With all of the drainage issues resolved we were on to the next phase of the project.
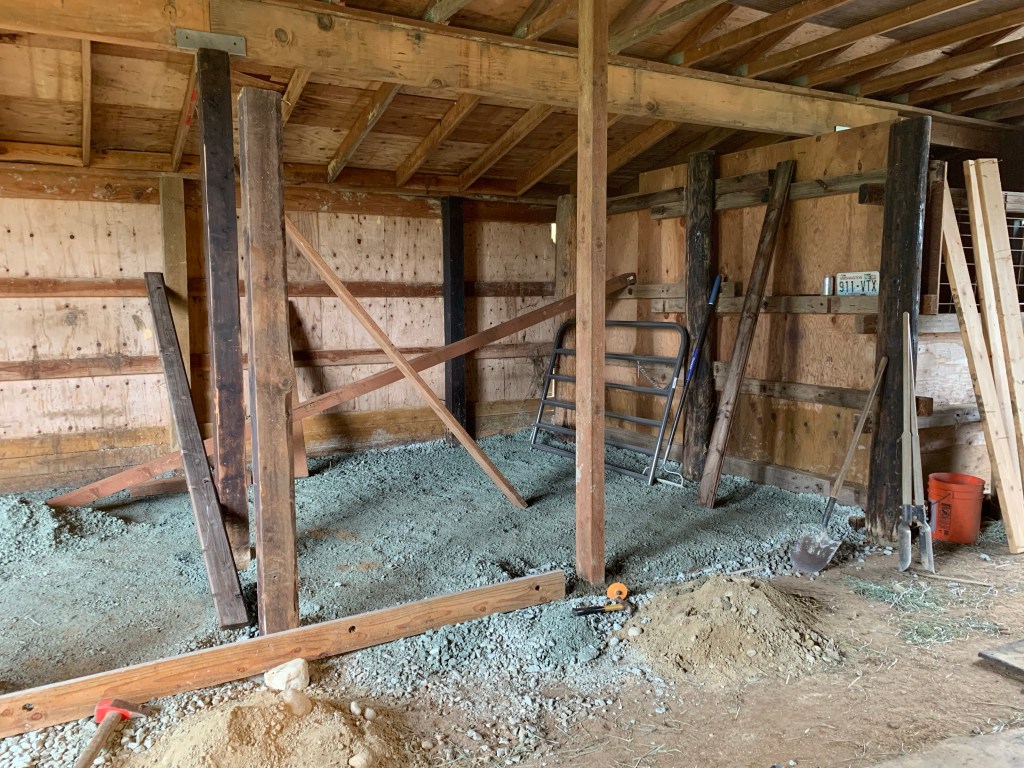
It was time to build the stalls. We started by determining the size of the stalls and planting posts where it made sense. The barn had some existing posts and we tried to utilize those as much as possible. Because of that we ended up with some varying sized stalls. There is one 12×16 and one 12×12. There is also a storage area that is currently being utilized so we left that alone.
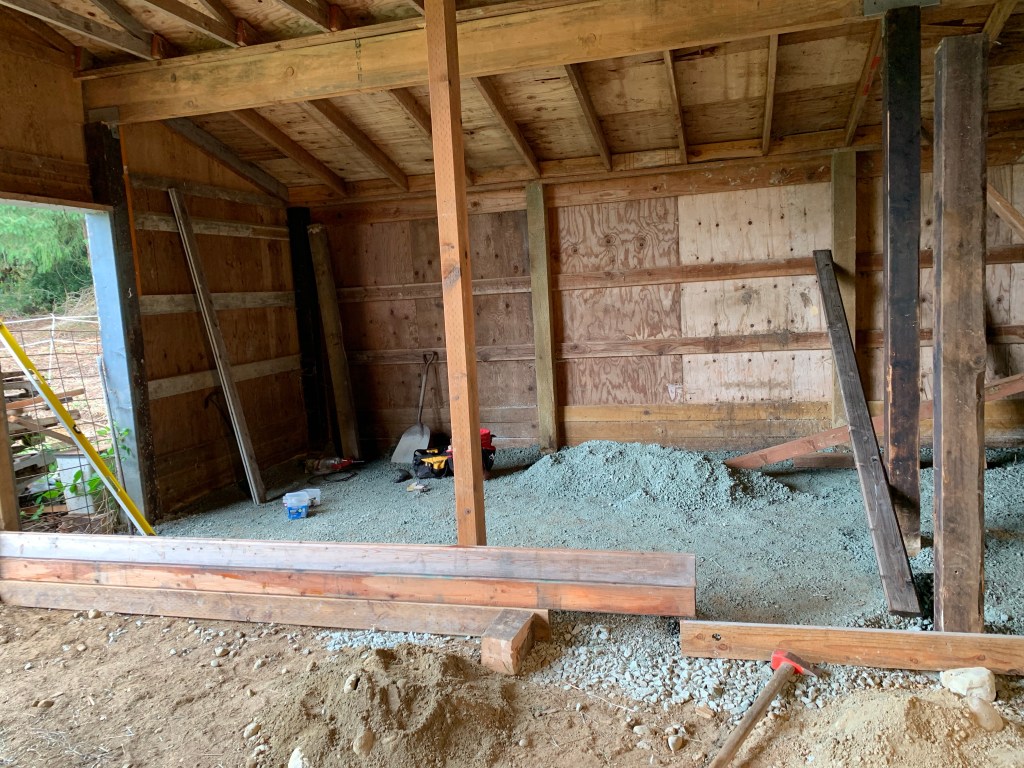
We then dug out the nasty dirt and old manure and replaced it with a rock base that would be good for laying stall mats. We used a 5/8 crush rock and made sure to tamp it down.
Next we laid down the stall mats. We put our base board in place to hold everything in. Then ensuring that the gravel was good and level and nice and tamped down we laid down the stall mats. Even tough we were building two stalls we laid them continuous so that there would be less cutting and less moving as the horses moved about their stalls.
Time to get going on the walls. Remember from a previous post I mentioned that we like to hoard lumber. Well it totally came in handy for this project. We had scored a bunch of tongue and groove boards in one of our purchases so we had plenty of lumber for the stall walls.
We leveled everything up and made sure that the walls were nice and straight. Straight walls make the tongue and groove go together a whole lot easier. Now for the top and the gates.
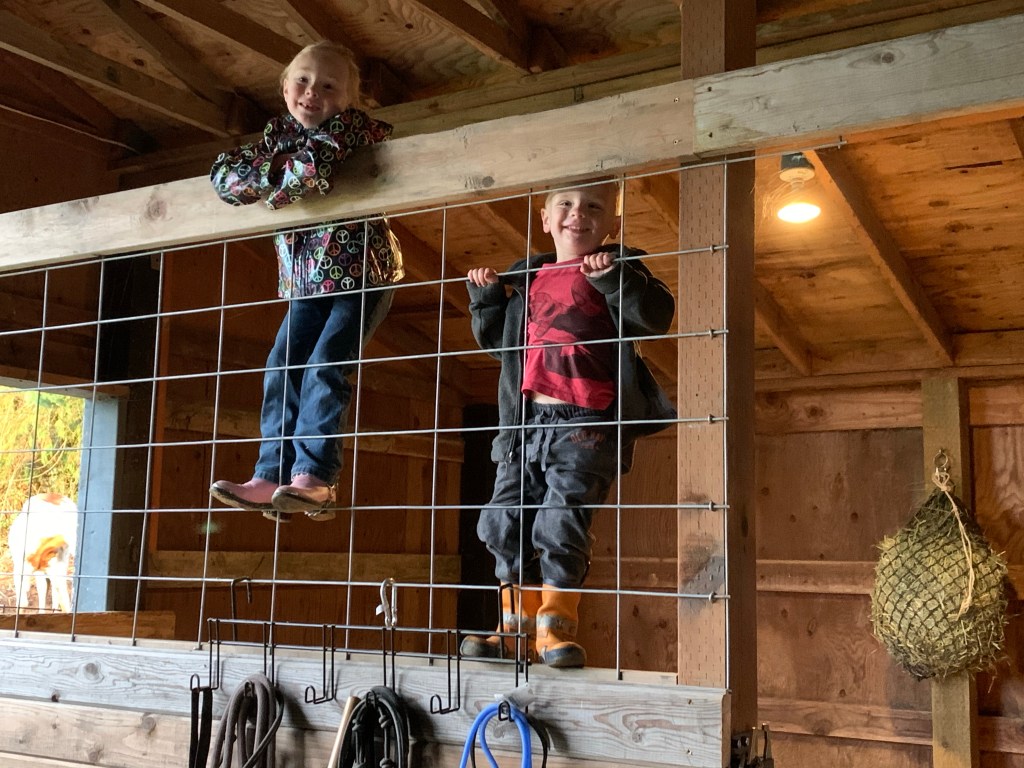
Keeping our budget in mind we decided that the traditional rolling doors and the large bars were outside of our price range. With a little creativity and research we decided to use cattle panel on the top so the horses could see out and we used tube gates with quick entry latches that allow the gates to swing in or out depending on your need.
The barn turned into a beautiful and functional space! It is easy to maintain. It does not leak and everyone stays dry and warm!
If there is one thing that we really enjoy, it is looking deep into a project and seeing the potential. But, there are times even we have to ask “Is it worth saving?”. That is what we had to ask ourselves when we looked at the barn that is on our property.
The barn has both positives and negatives. First, the location, it is pretty far from the house. When we first considered this it seemed like a negative. We were so used to having our horses close but after we considered the upside of getting more exercise every day it did not seem that bad.
Second, was it structurally sound? And if it was not what was it going to take to make it safe? After tons of analyzing we determined that the bones (posts and beams) of the barn were solid. The T111 siding left something to be desired. It is full of holes and rot from years of neglect. But really nothing that cannot be fixed relatively inexpensively. The roof was determined to be in pretty good shape especially once we removed all of the moss that had accumulated over the years.
A barn full of random stuff
Lastly, the barn was just a wide open space with a bunch of junk that had been left behind. We had to determine if we could build the stall space that we need without changing the structure of the barn. So after some careful planning we determined that we should be able to get 4 nice sized stalls and two large tack and hay storage areas.
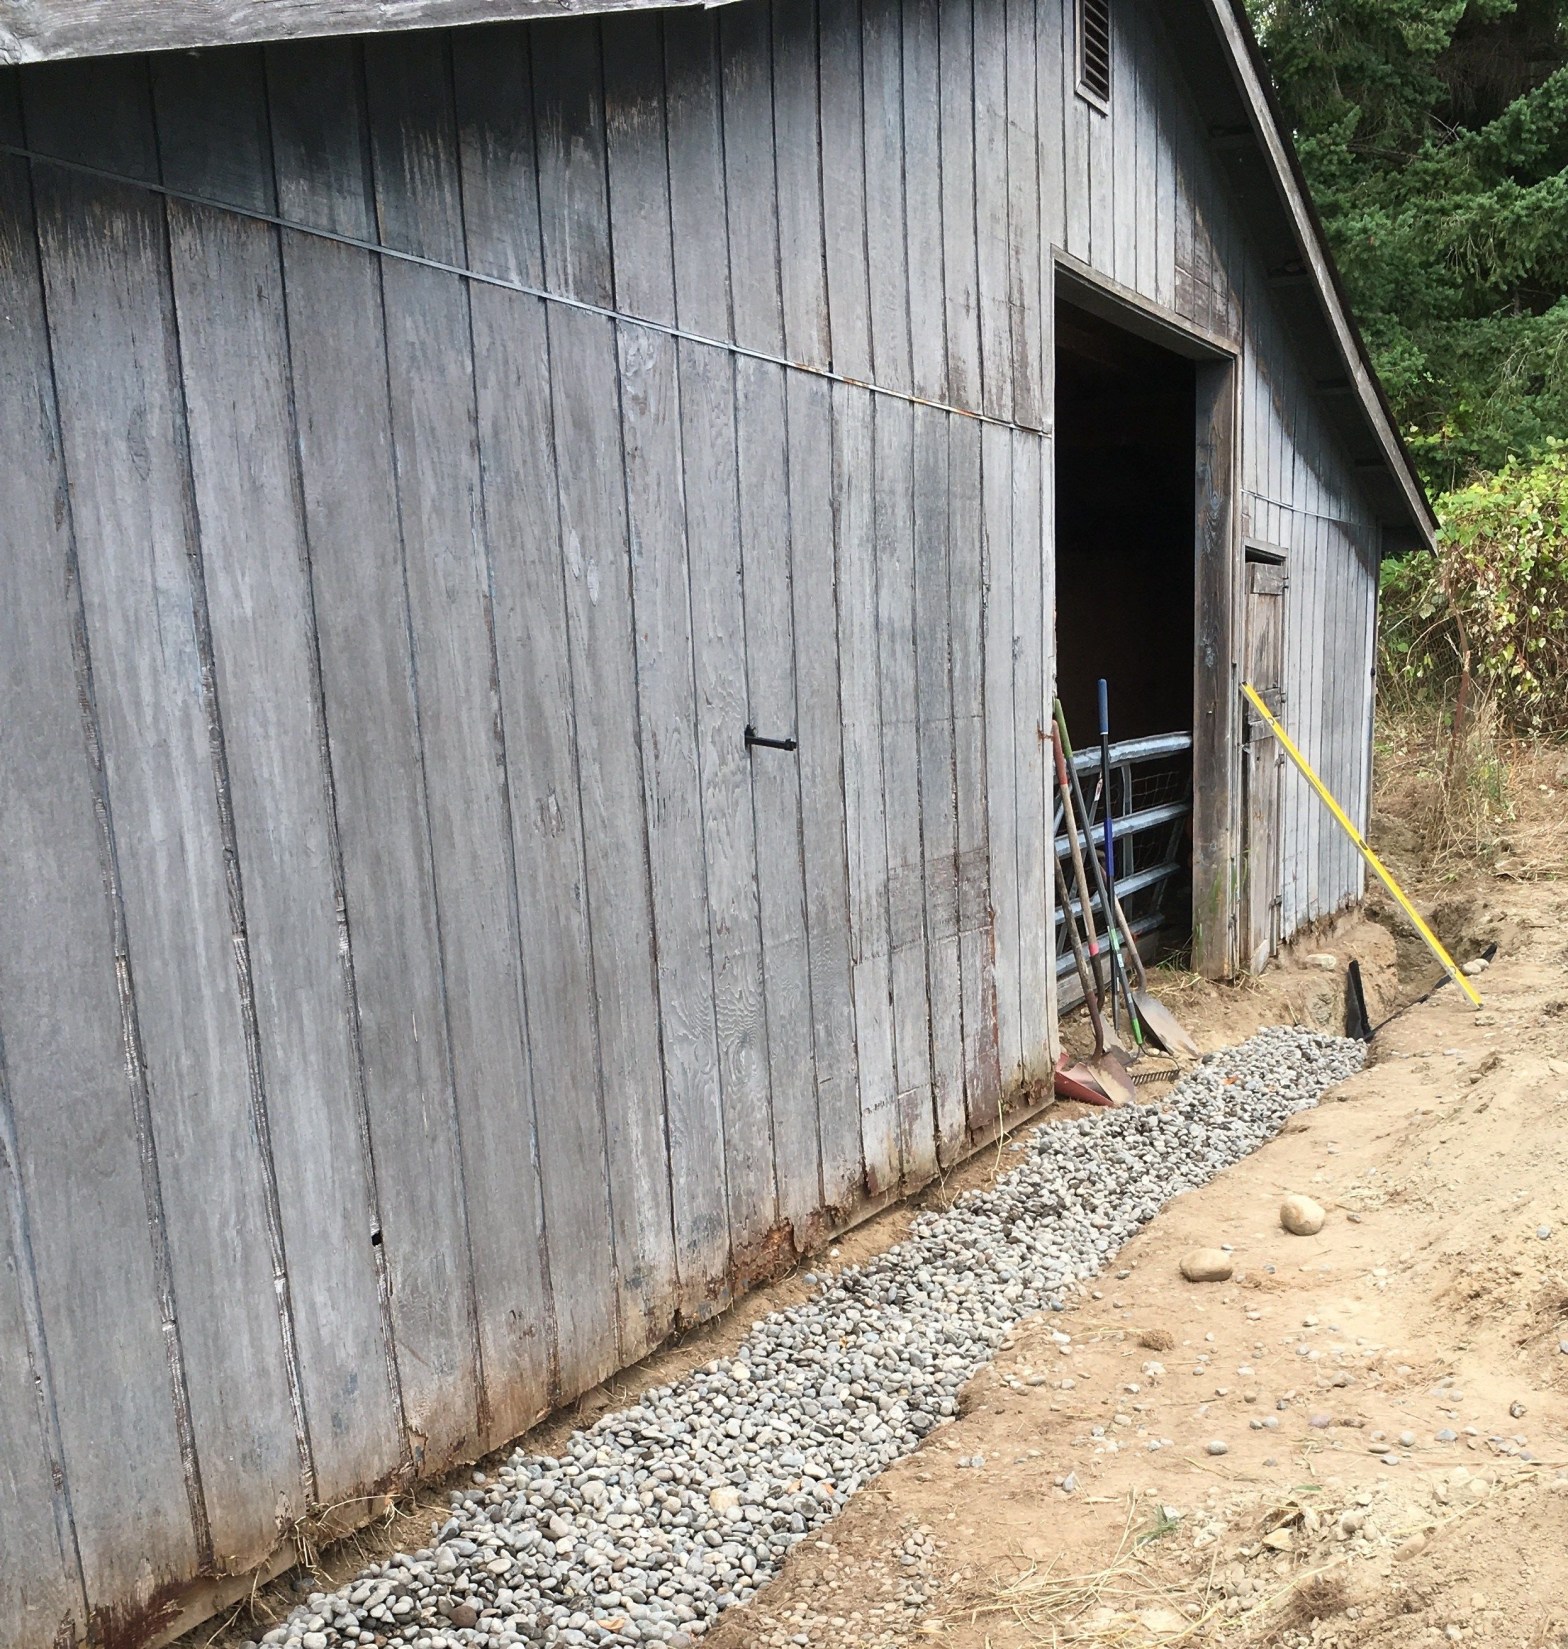
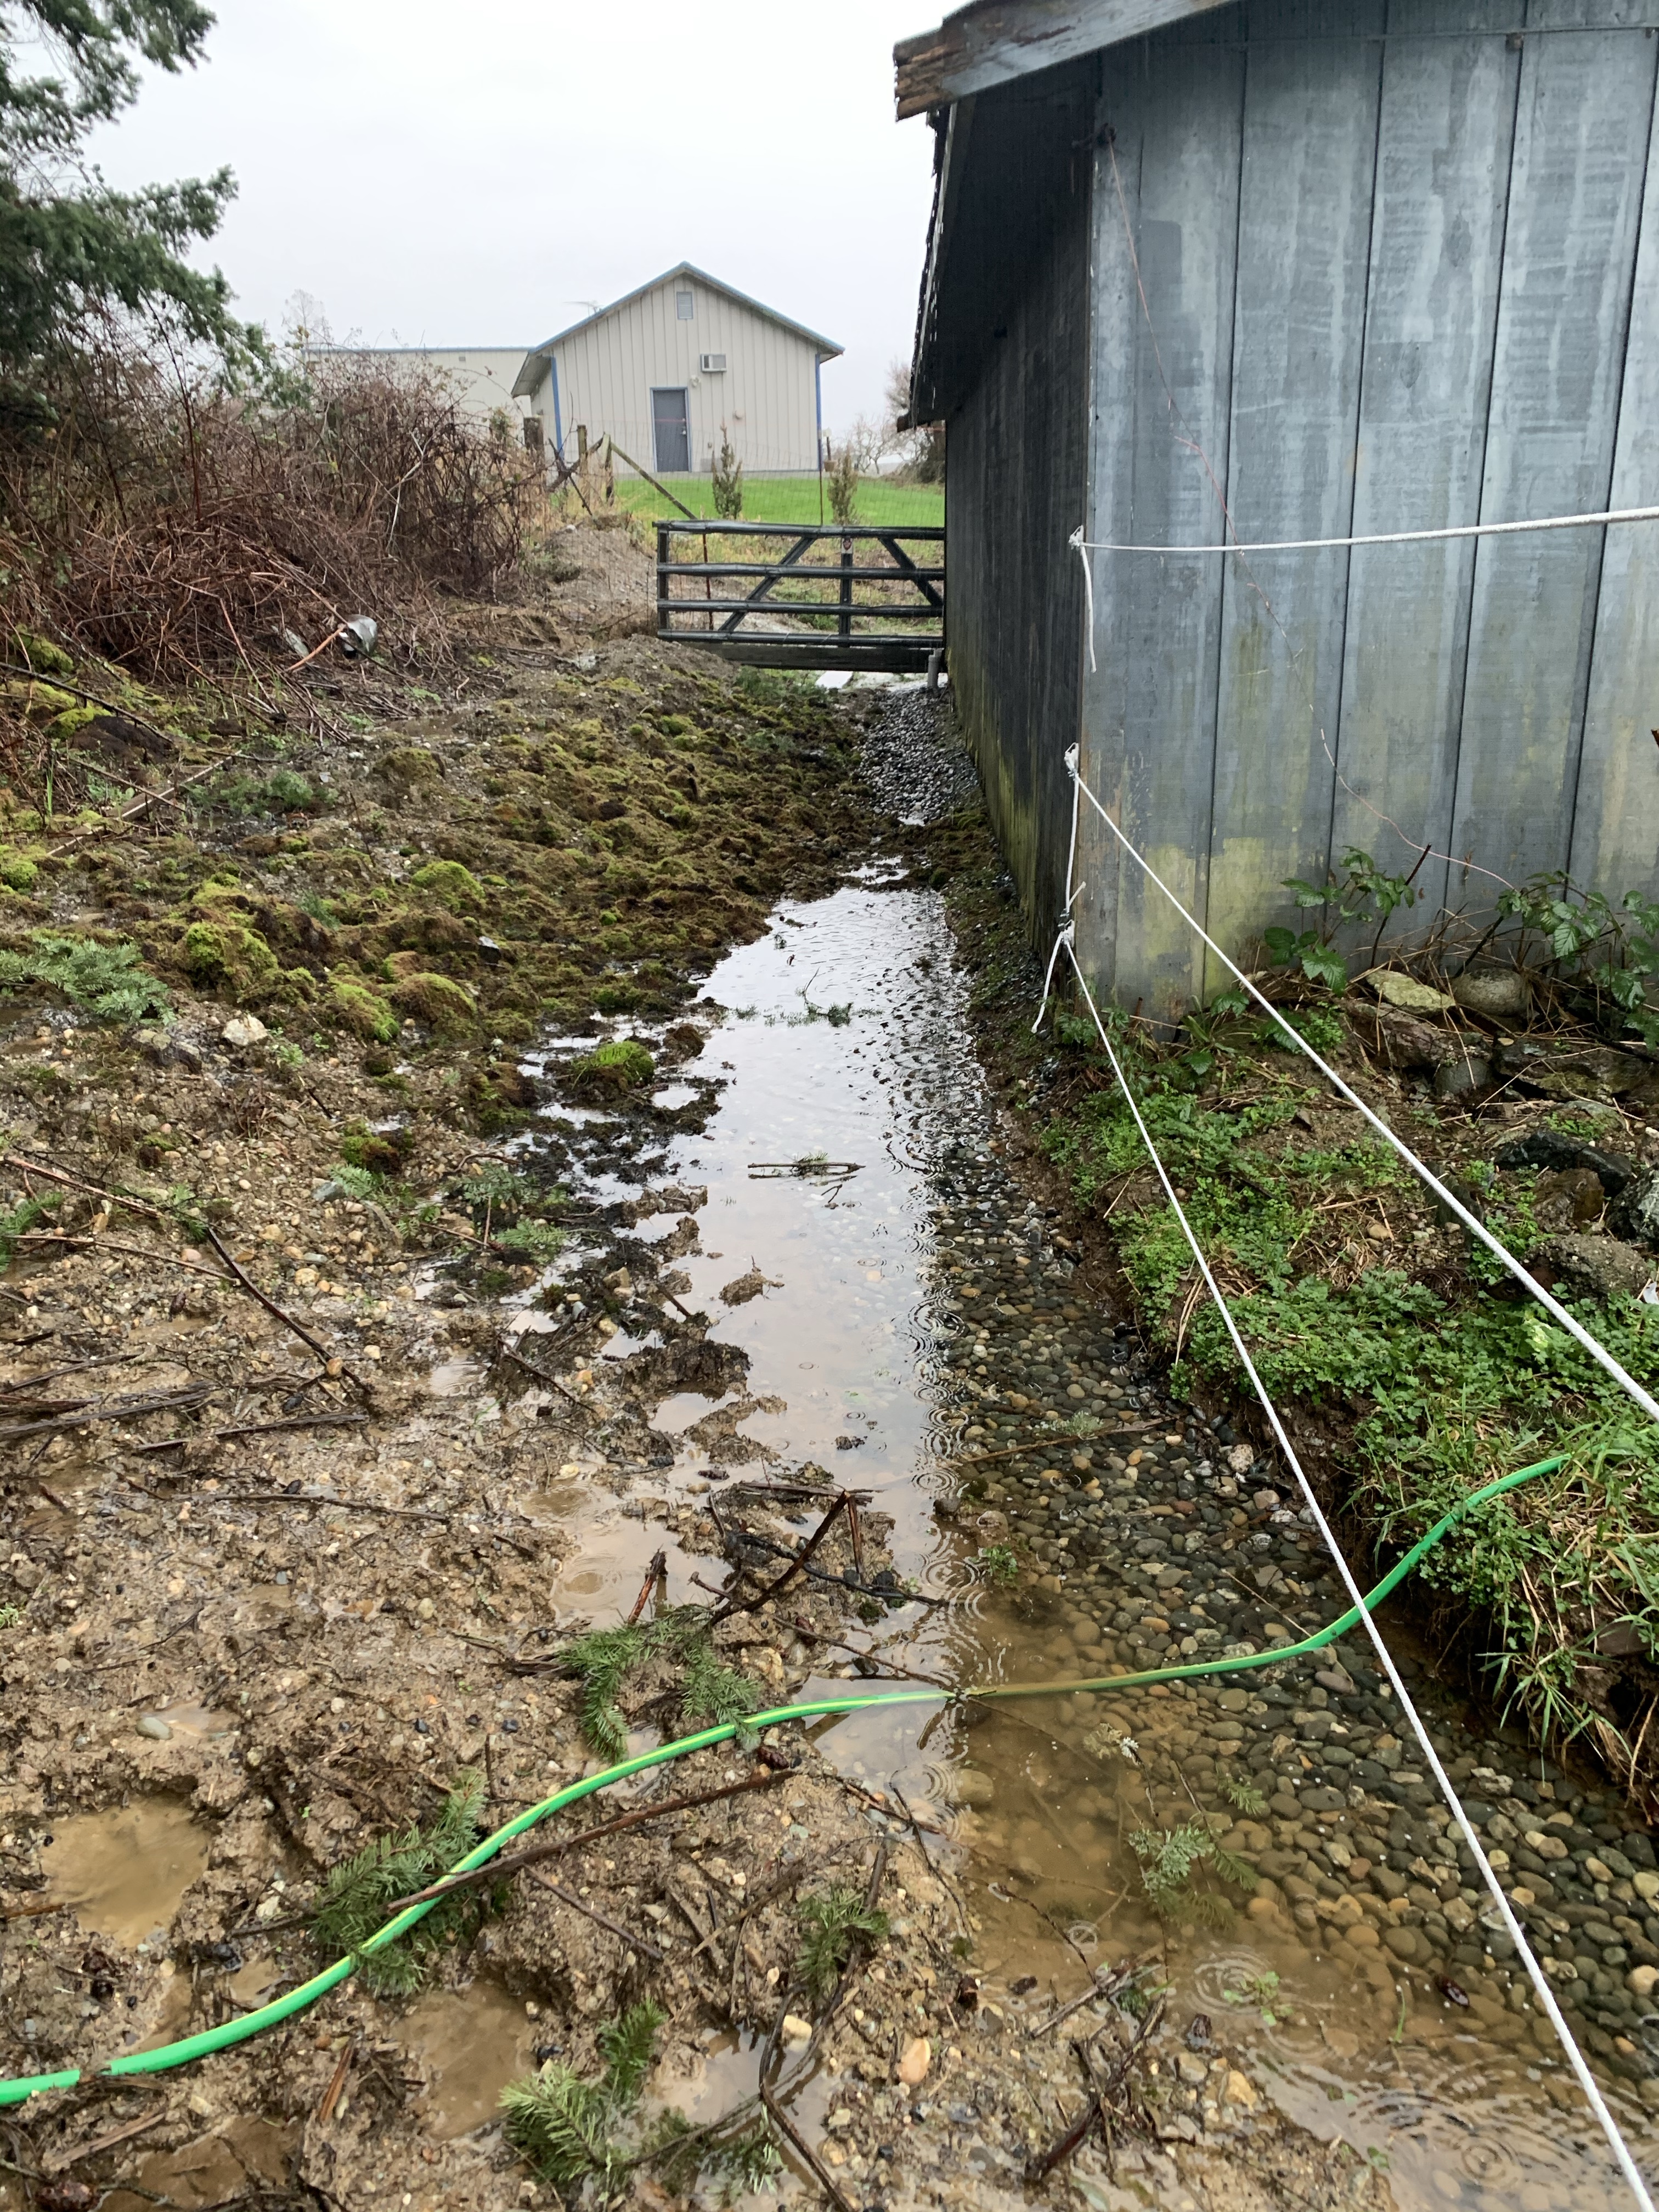
But before we started all of that we were going to have to address the major drainage issue around the barn. Strangely enough the barn is built right next to a small hillside. This does not allow for paddock areas but the horses are turned out all day so we feel they are happy with that. What the hill does provide though is a bunch of rain run off that goes directly into the barn and comes up through the floor. Living in western Washington we are no strangers to the rain so first thing first…address the water and mud!
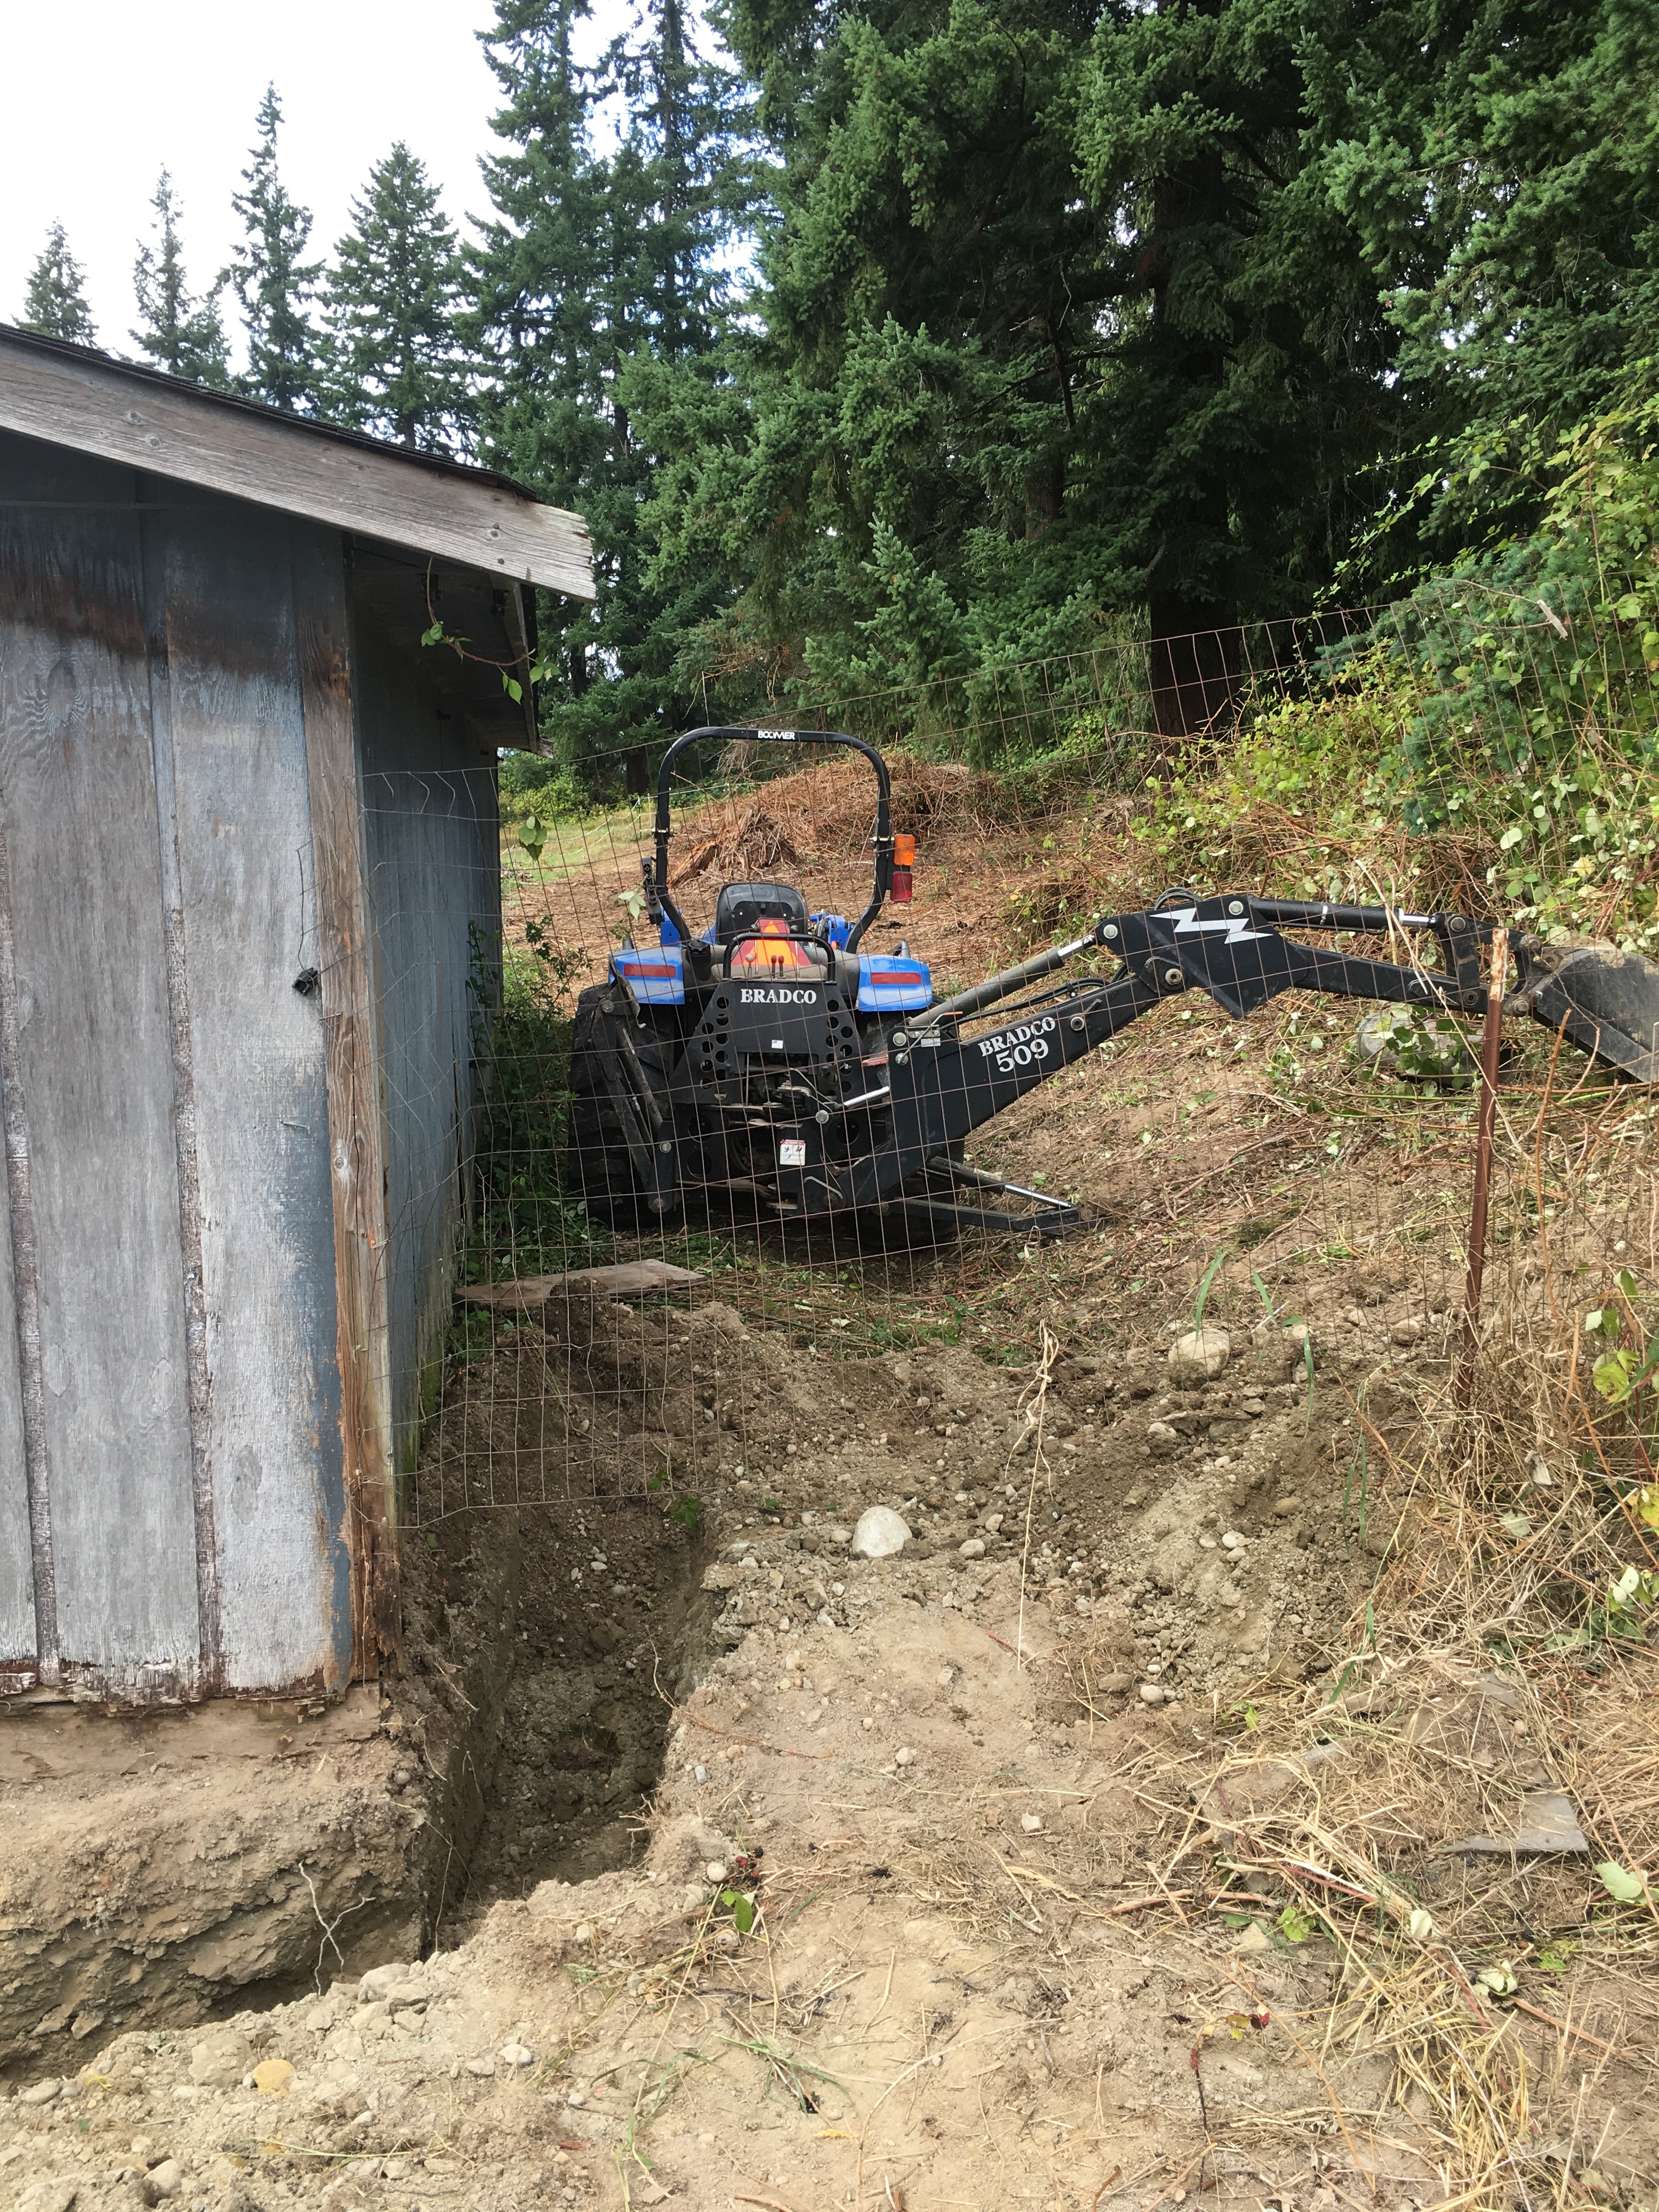
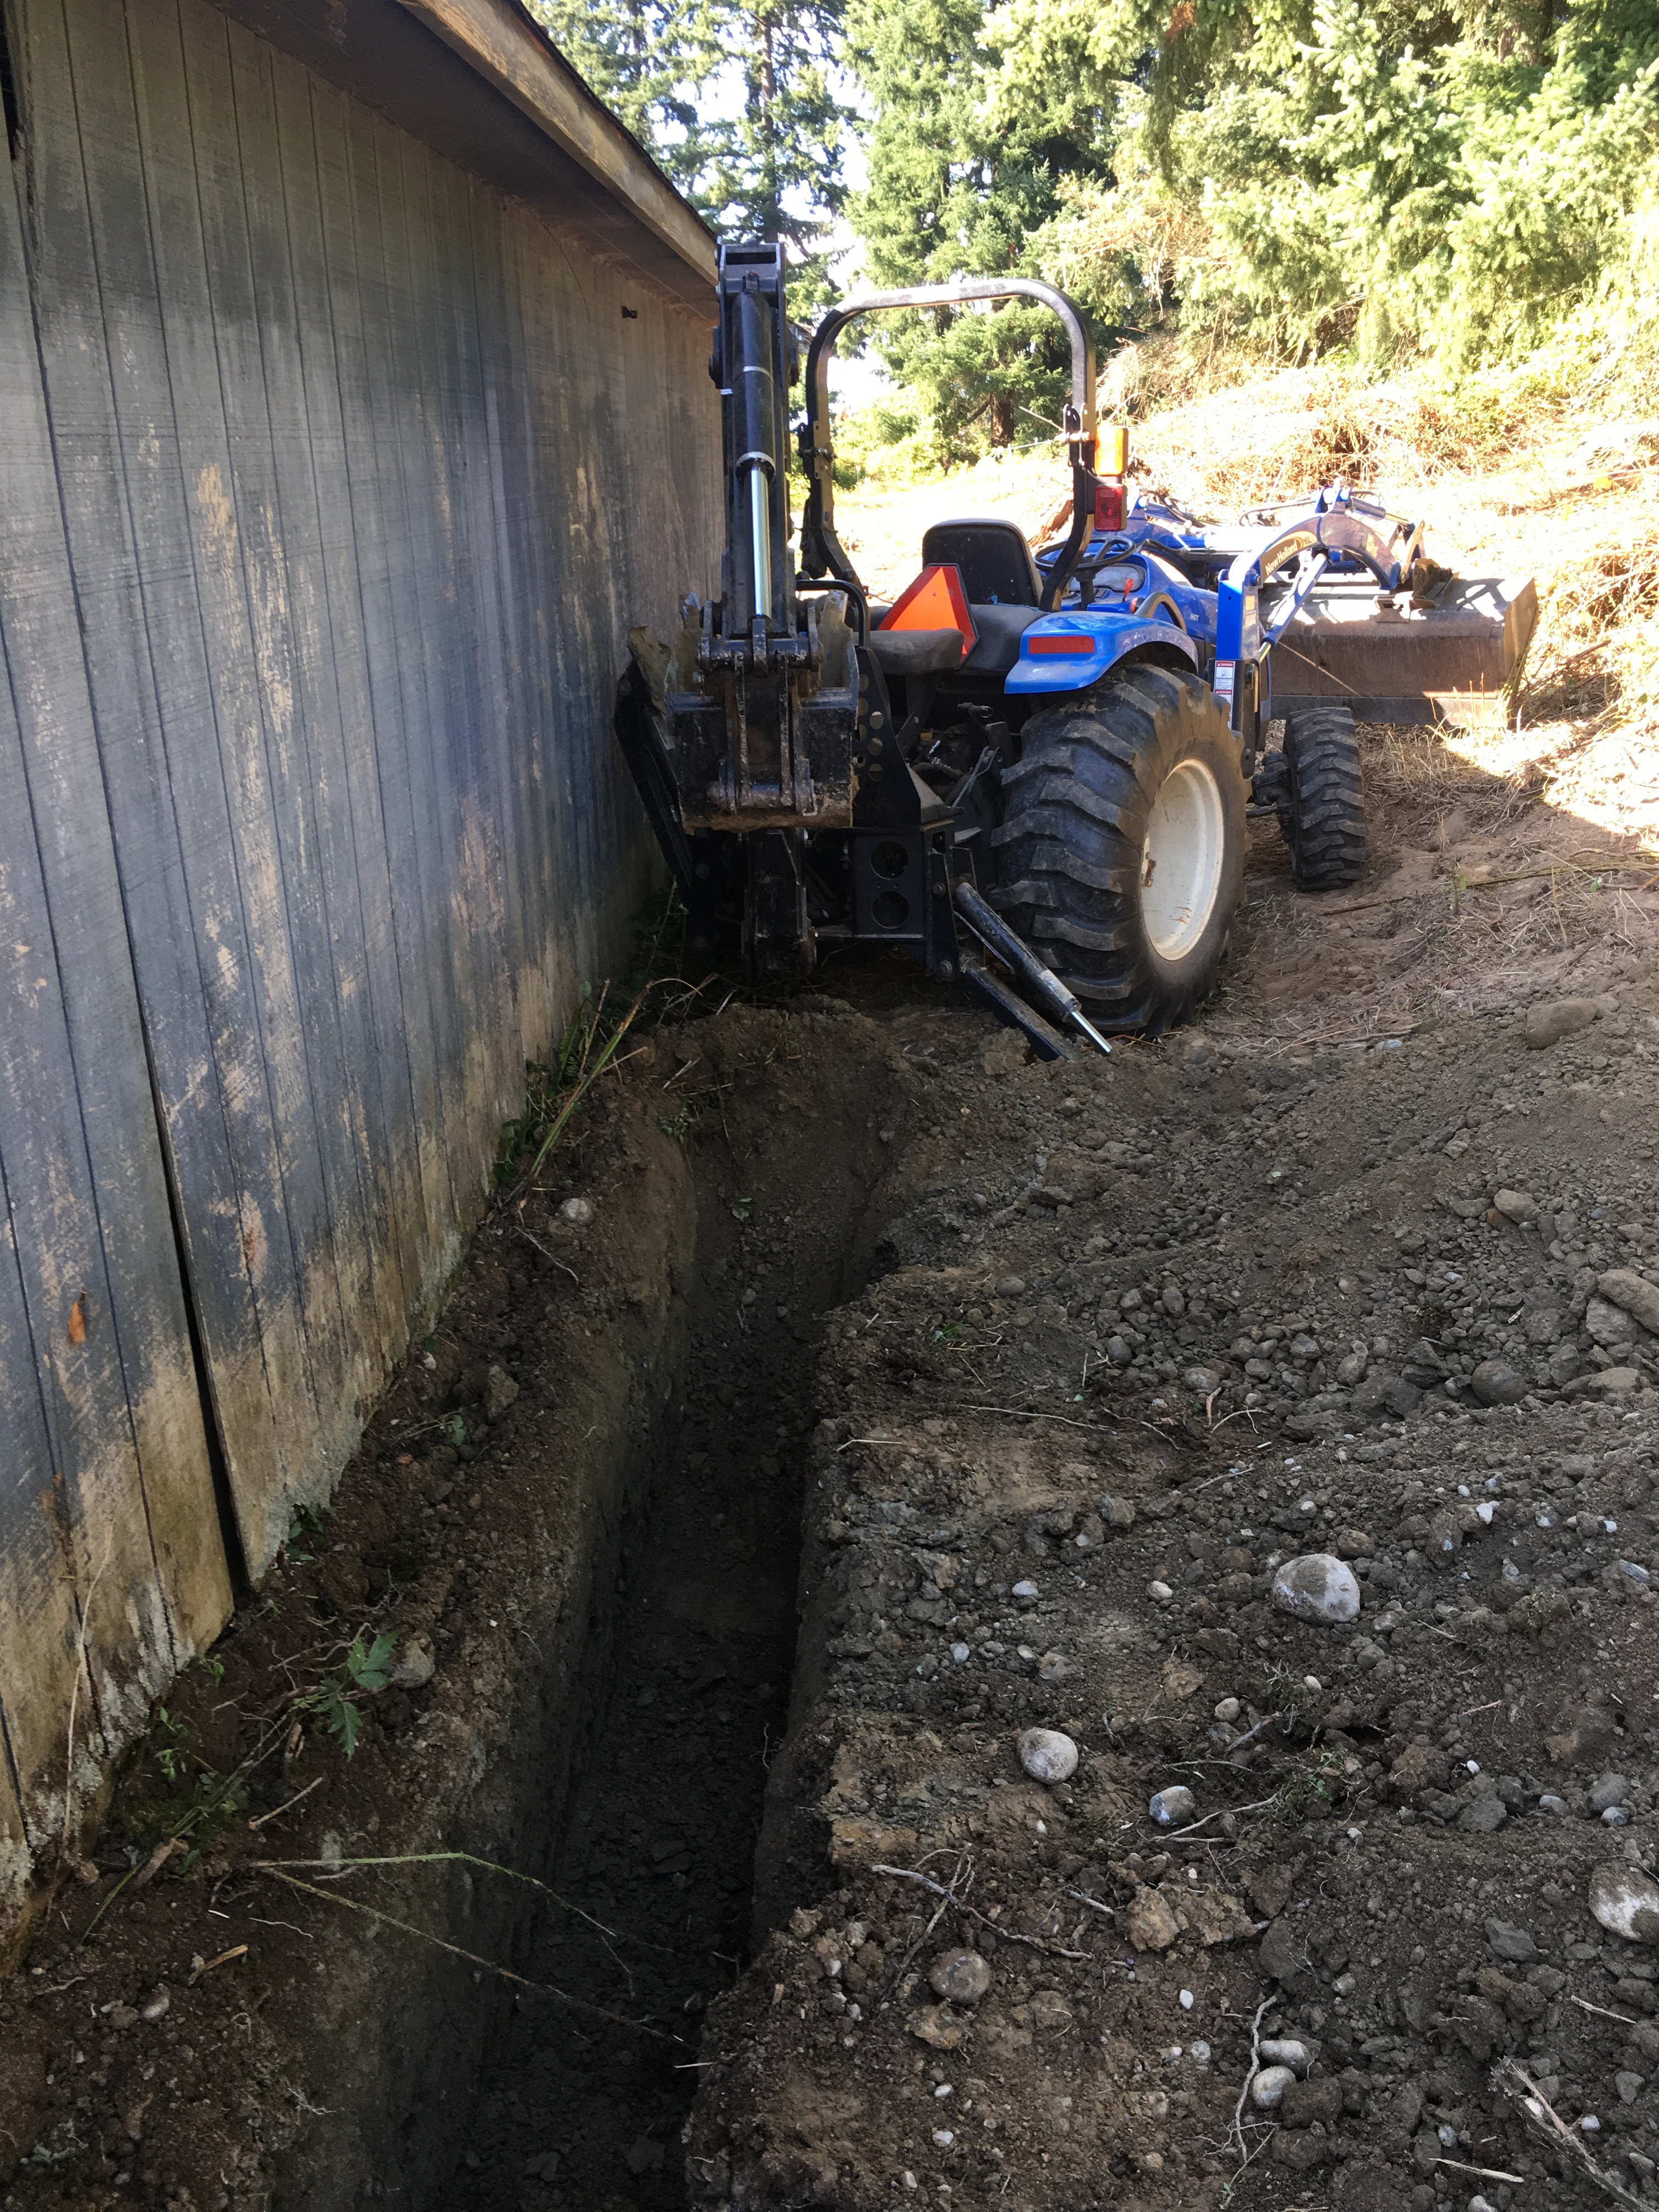
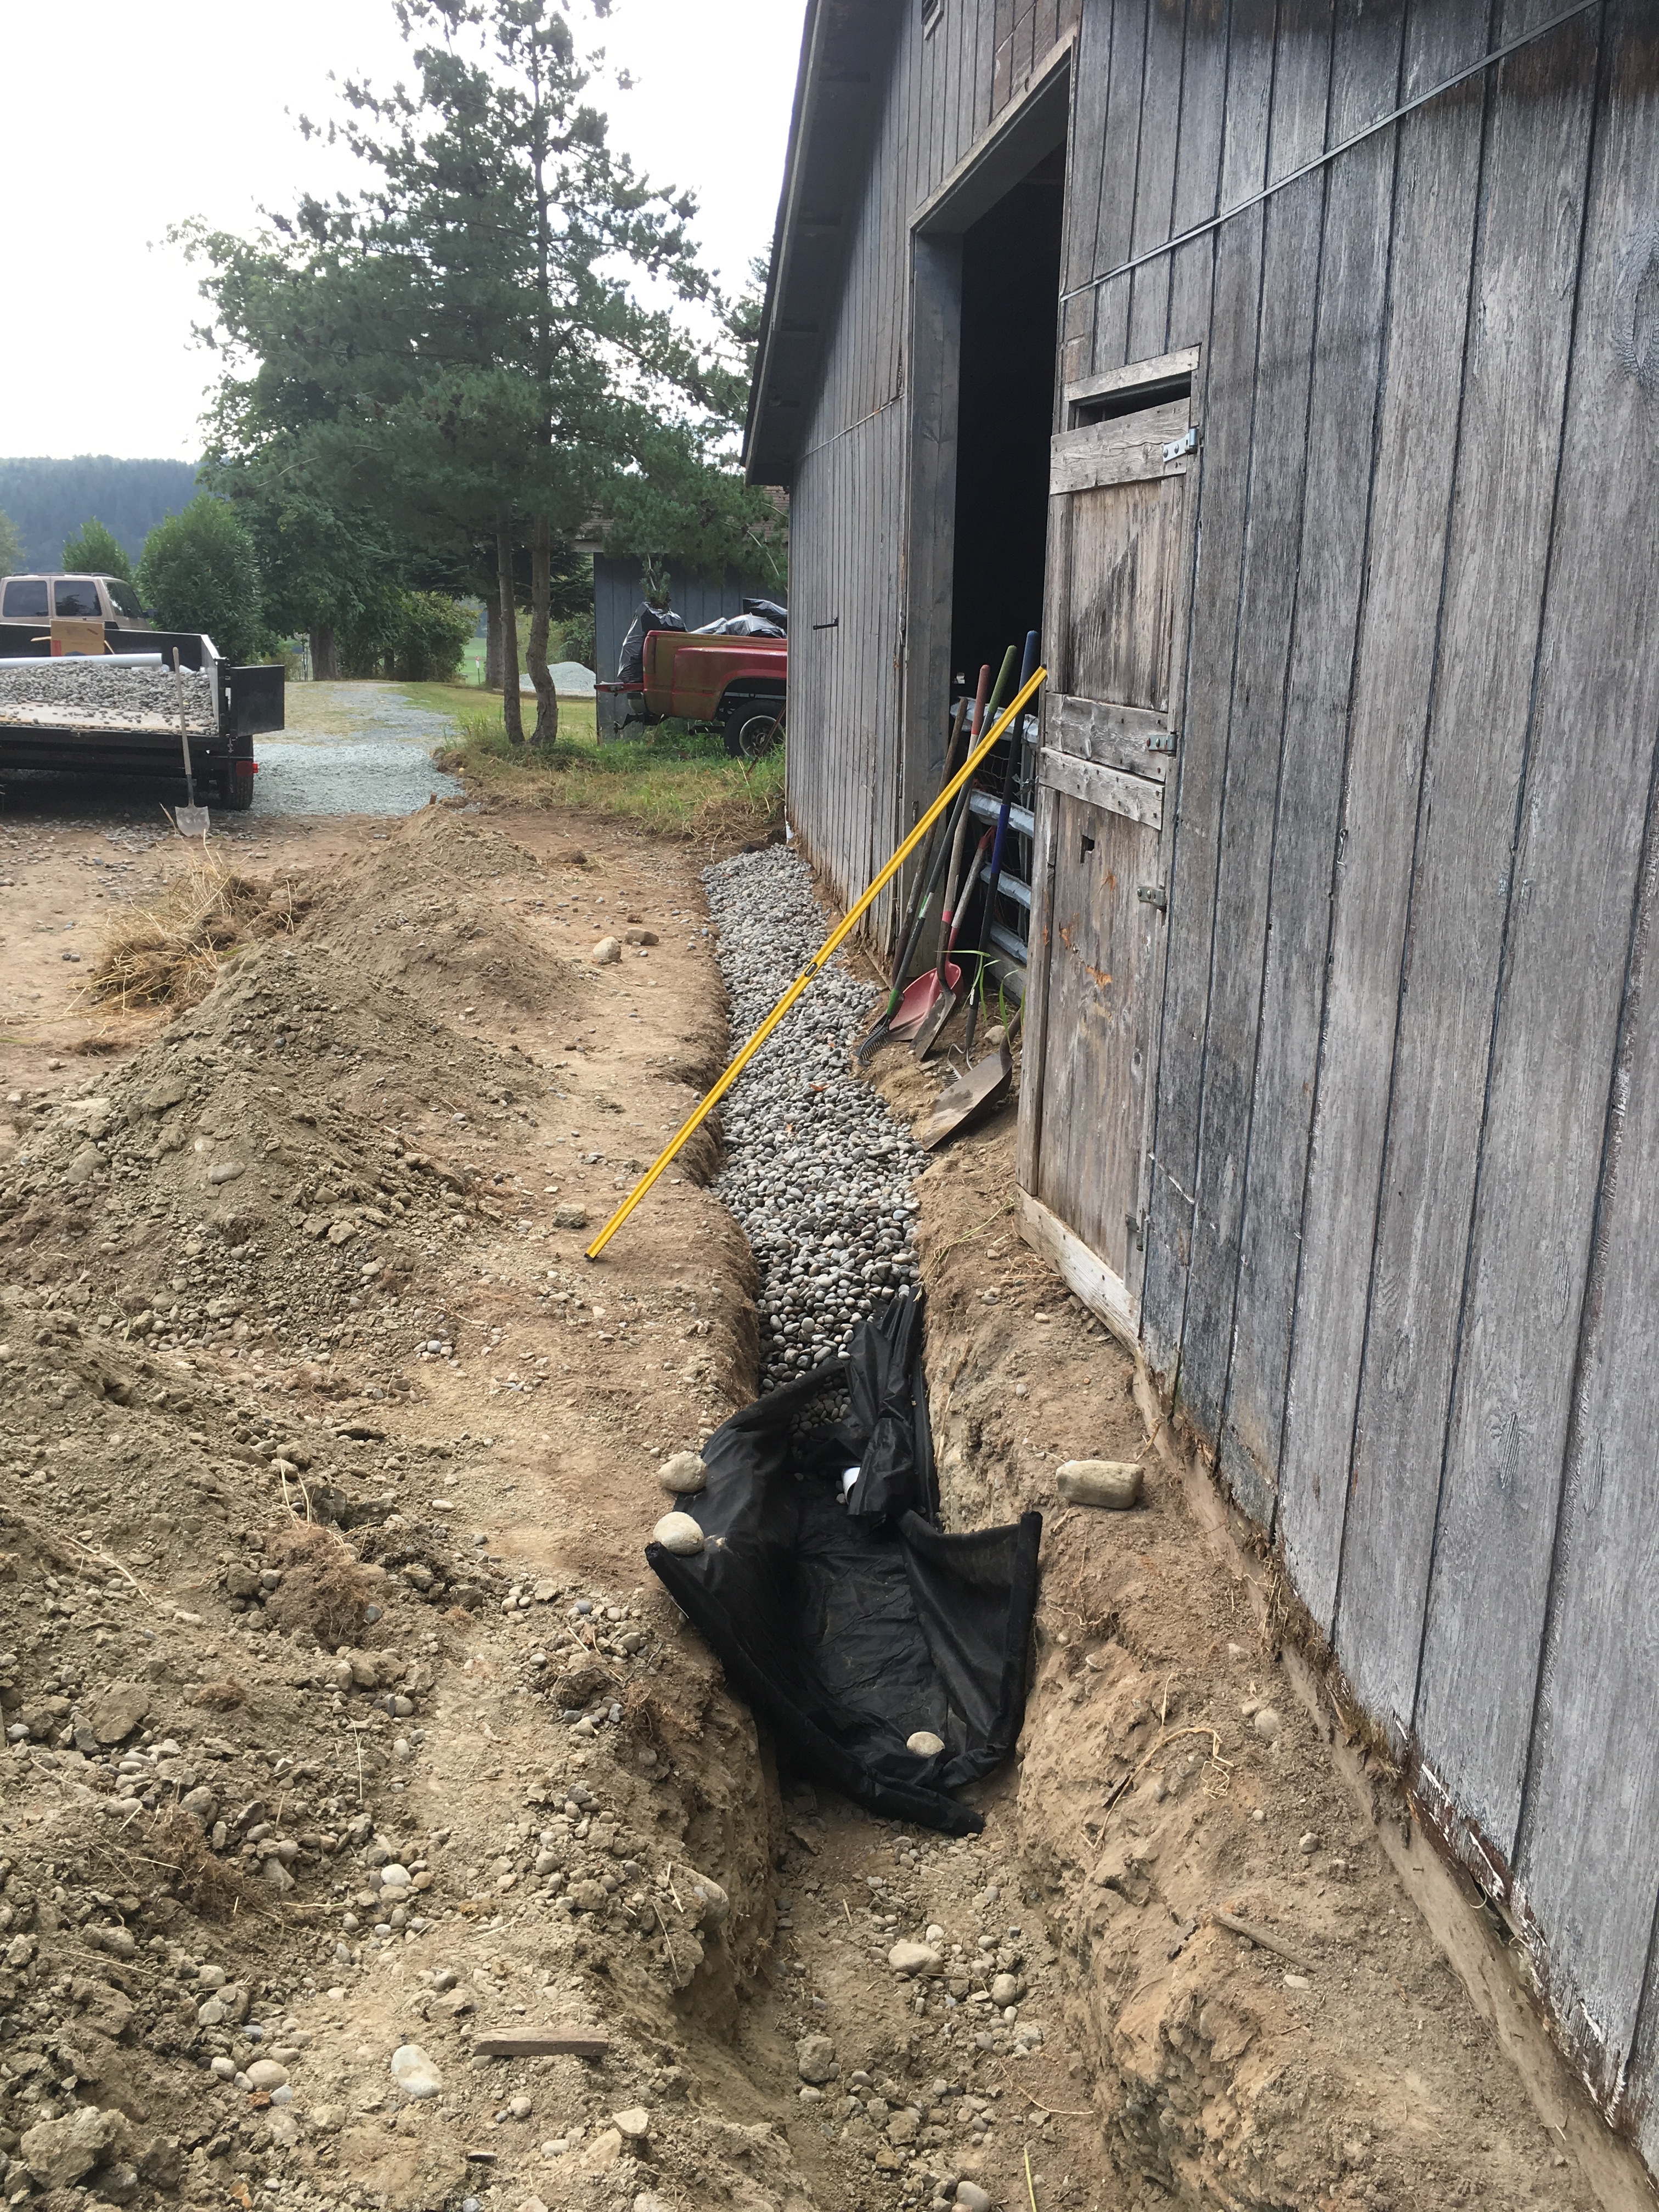
One of the best investments that we made was purchasing a tractor with a backhoe. It has been an invaluable tool. So, we used it to dig a trench around the barn. The trench was dug from about 1 foot deep and ended about 3 feet deep. We lined the trench with landscape cloth and back filled it with drain rock. By doing this we hope to eliminate the massive amount of water that puddles around and seeps through the ground in the barn floor.
Water around the barn but not in it
We were able to get a drain that functions pretty well. Even during the flooding that we experienced this winter the water stayed in the trench and eventually drained out to the area we have it pointed. The barn floor stayed dry and now we are on to building the stalls.
Have you ever started a project thinking, “this should not be to bad?” Only to find out that things don’t really go like you thought they should. Well, that is pretty much what happened to me as a small maintenance project turned into a total disaster!
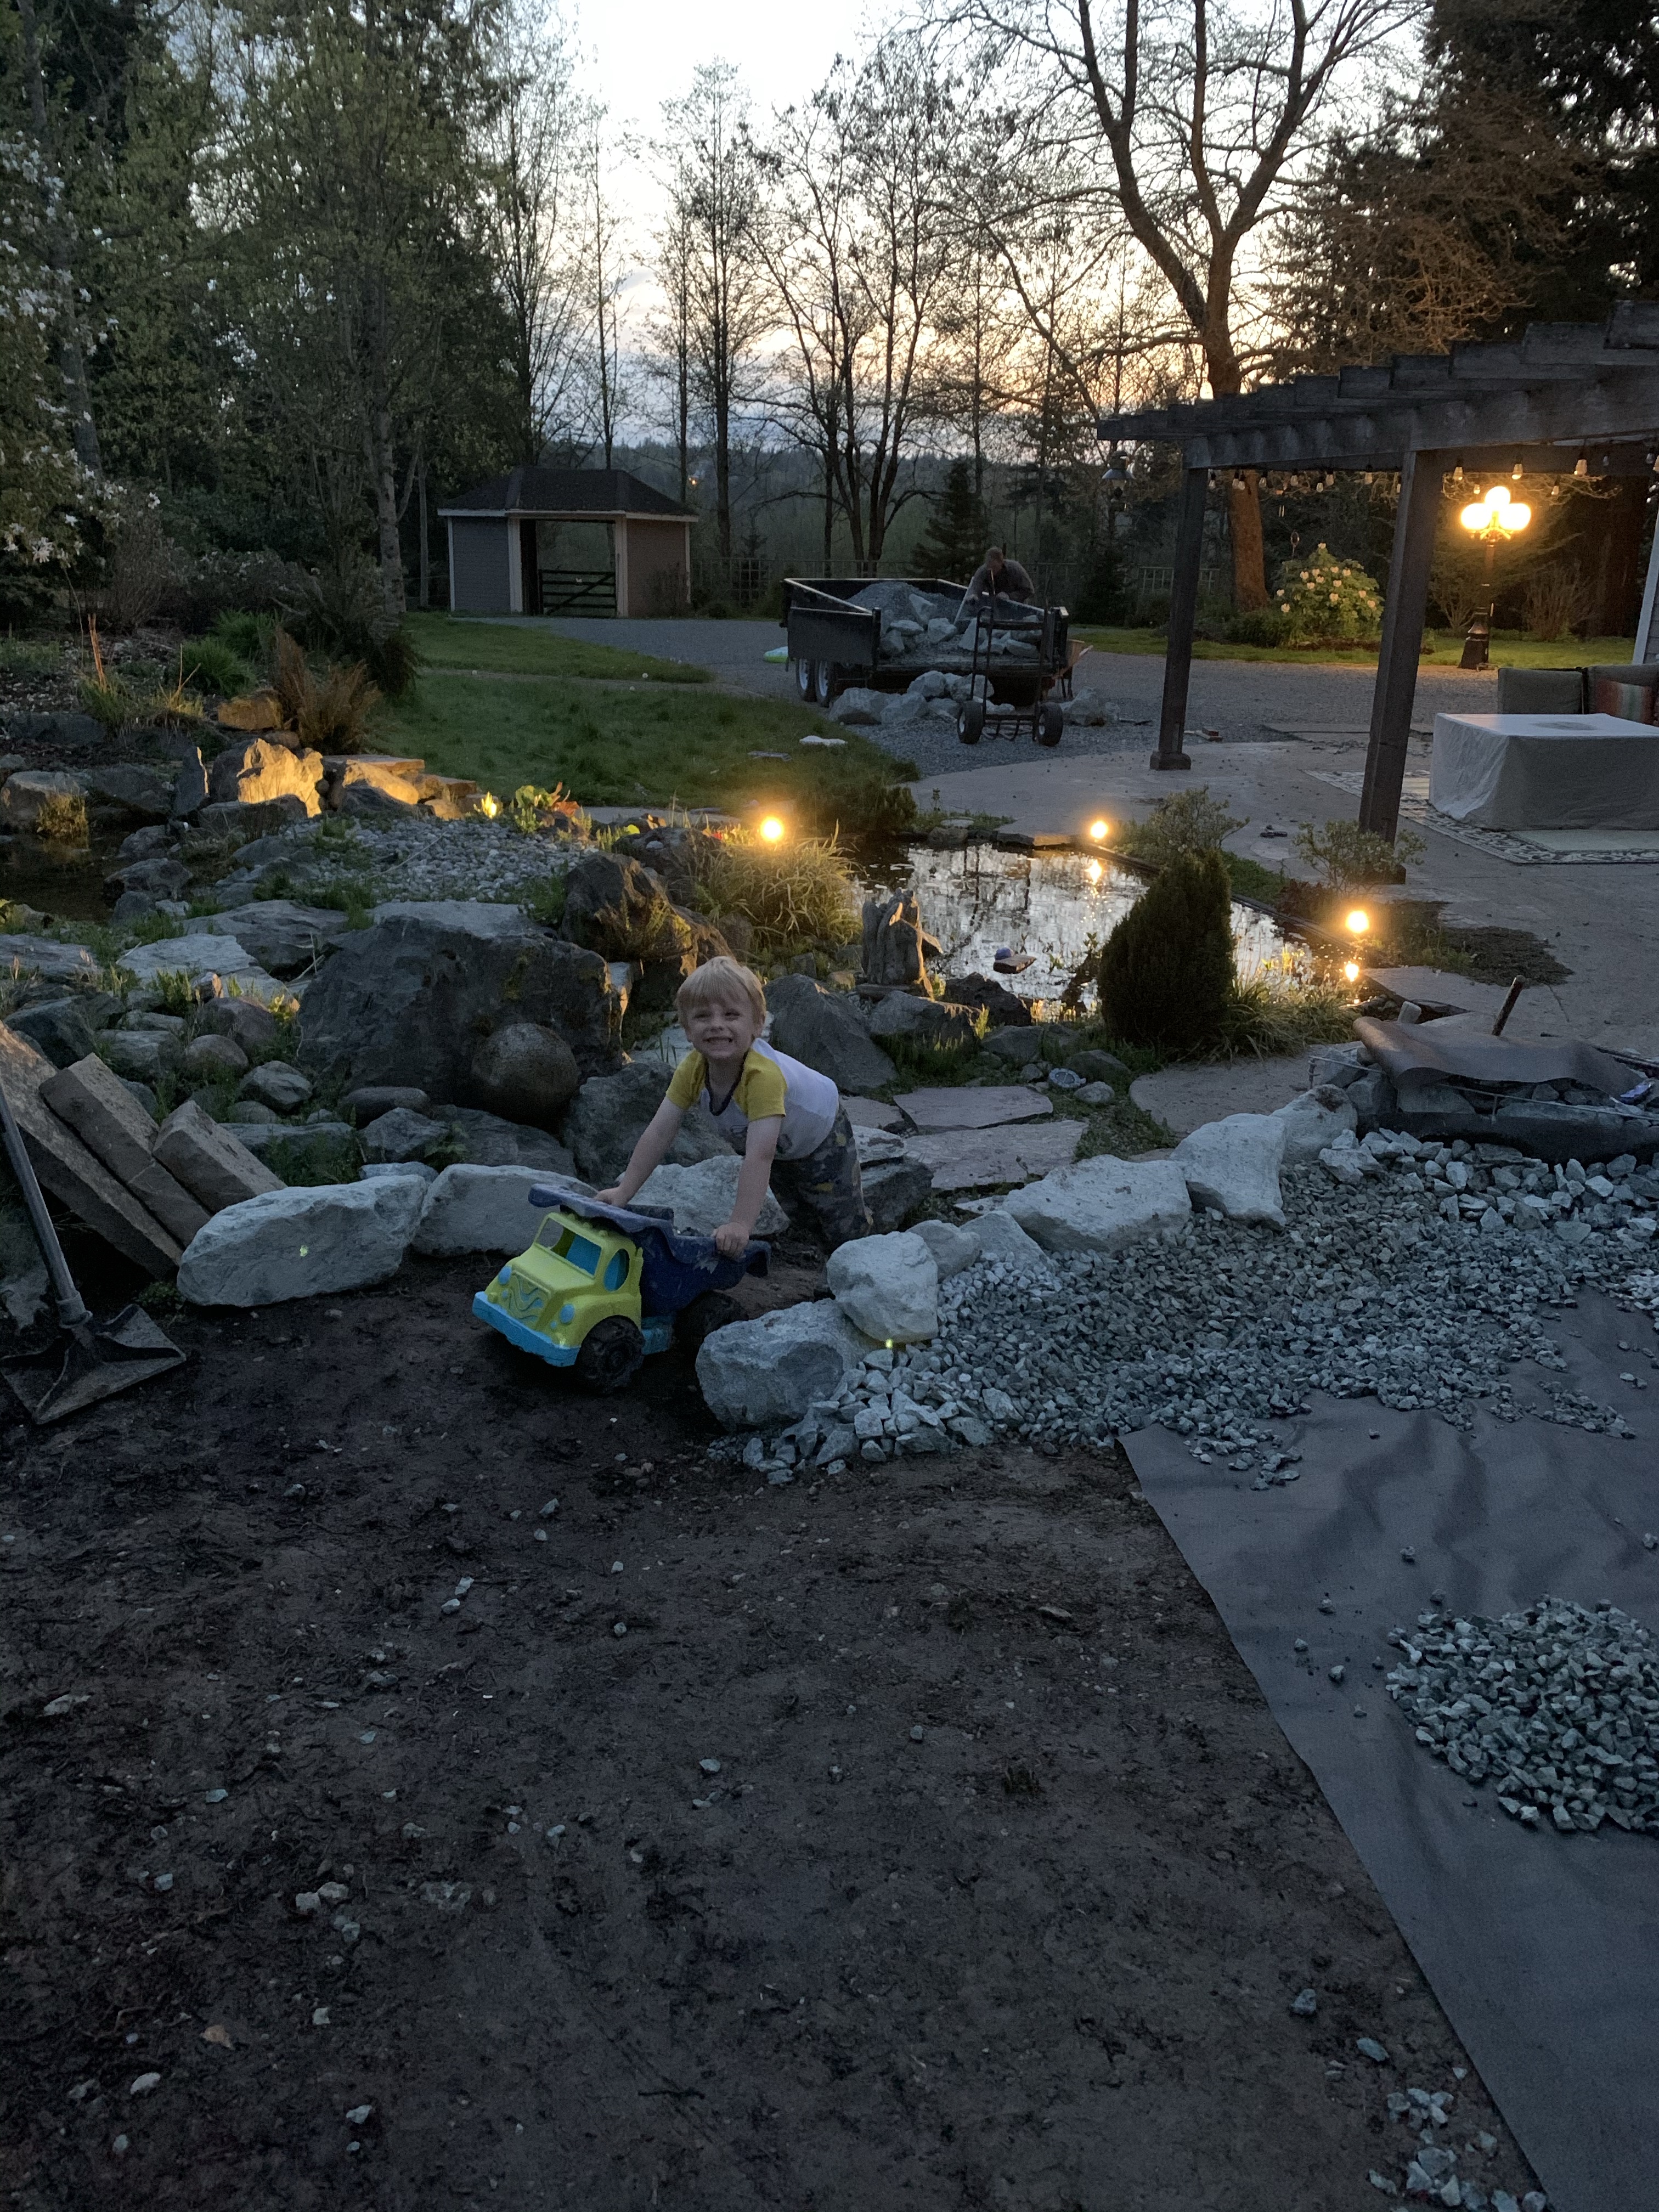
When we bought our home the one feature we were unsure of was the outdoor pond. It looks nice, has nice ambiance and is a great place to entertain, however we don’t know a thing about ponds, least of all how to care for it and all of the critters that live in it! So, in the fall, we hired a company to come educate us on the pond. It was worth the money and an hour of our time to learn what regular maintenance and upkeep was going to be needed. Fast forward to the spring time and a global pandemic keeping us home more and we decided it was a good time to get started on that maintenance.
Upper and lower ponds before and during clean out
I picked up a “pond vacuum” at the pond store (Yes there is such a thing) and got started removing all of the sludge and muck from the pond. Man was it way more nasty than I thought it was! So much mud and junk. However, the lower pond went so well and I was so excited about the transformation that I could not wait to clean the upper pond.
In case you were wondering, just the lower pond took me one whole afternoon. I knew the larger pond would take a whole day. I threw my ear buds in with some great music, had the kids playing in the yard where I could see them and I went to town vacuuming out the most nasty sludge I had seen. Now, let me tell you, the stuff coming out of the pond has to go somewhere. I had the exhaust hose out positioned where I wanted it so I could clean up any mess that may spill over. It never occurred to me to check that earlier in my endeavor. Epic fail! At some point, I am not sure when exactly, the new puppy, decided to play tug-a-war with the exhaust hose. When I finally turned around, mud, sludge and nasty pond water were everywhere but where they were supposed to be.
Naughty puppy
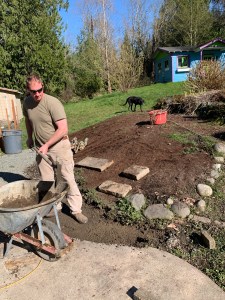
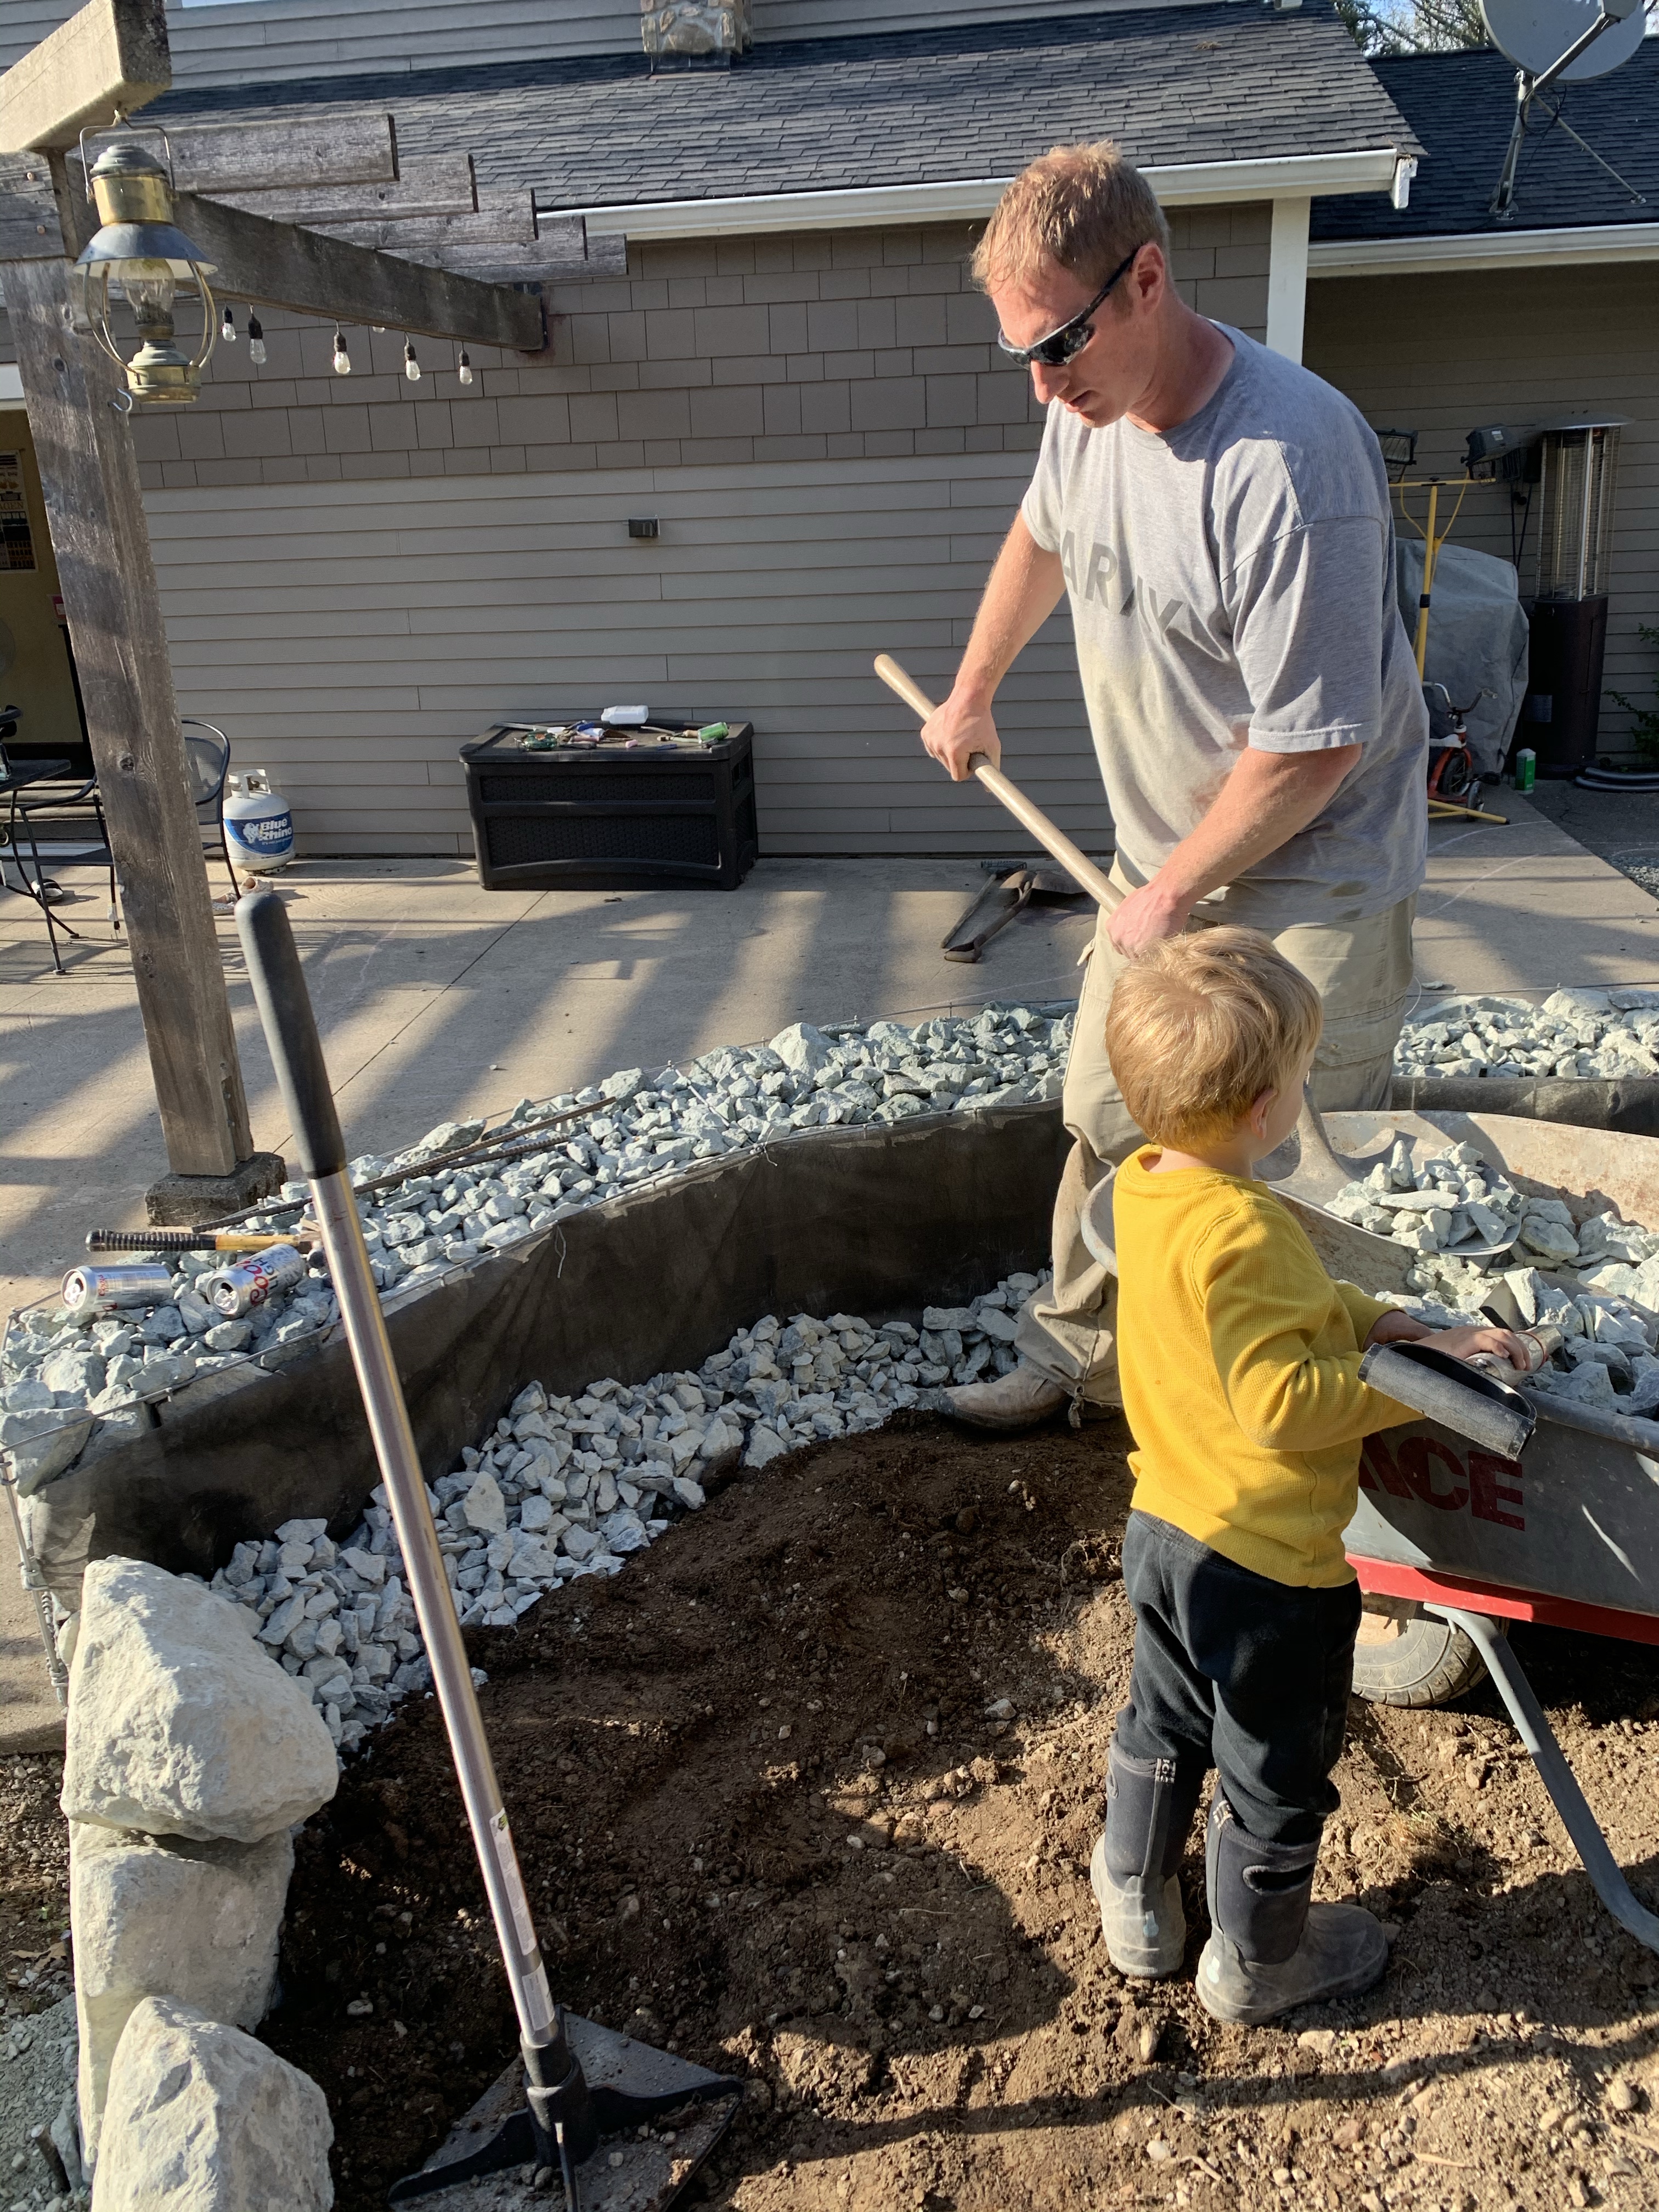
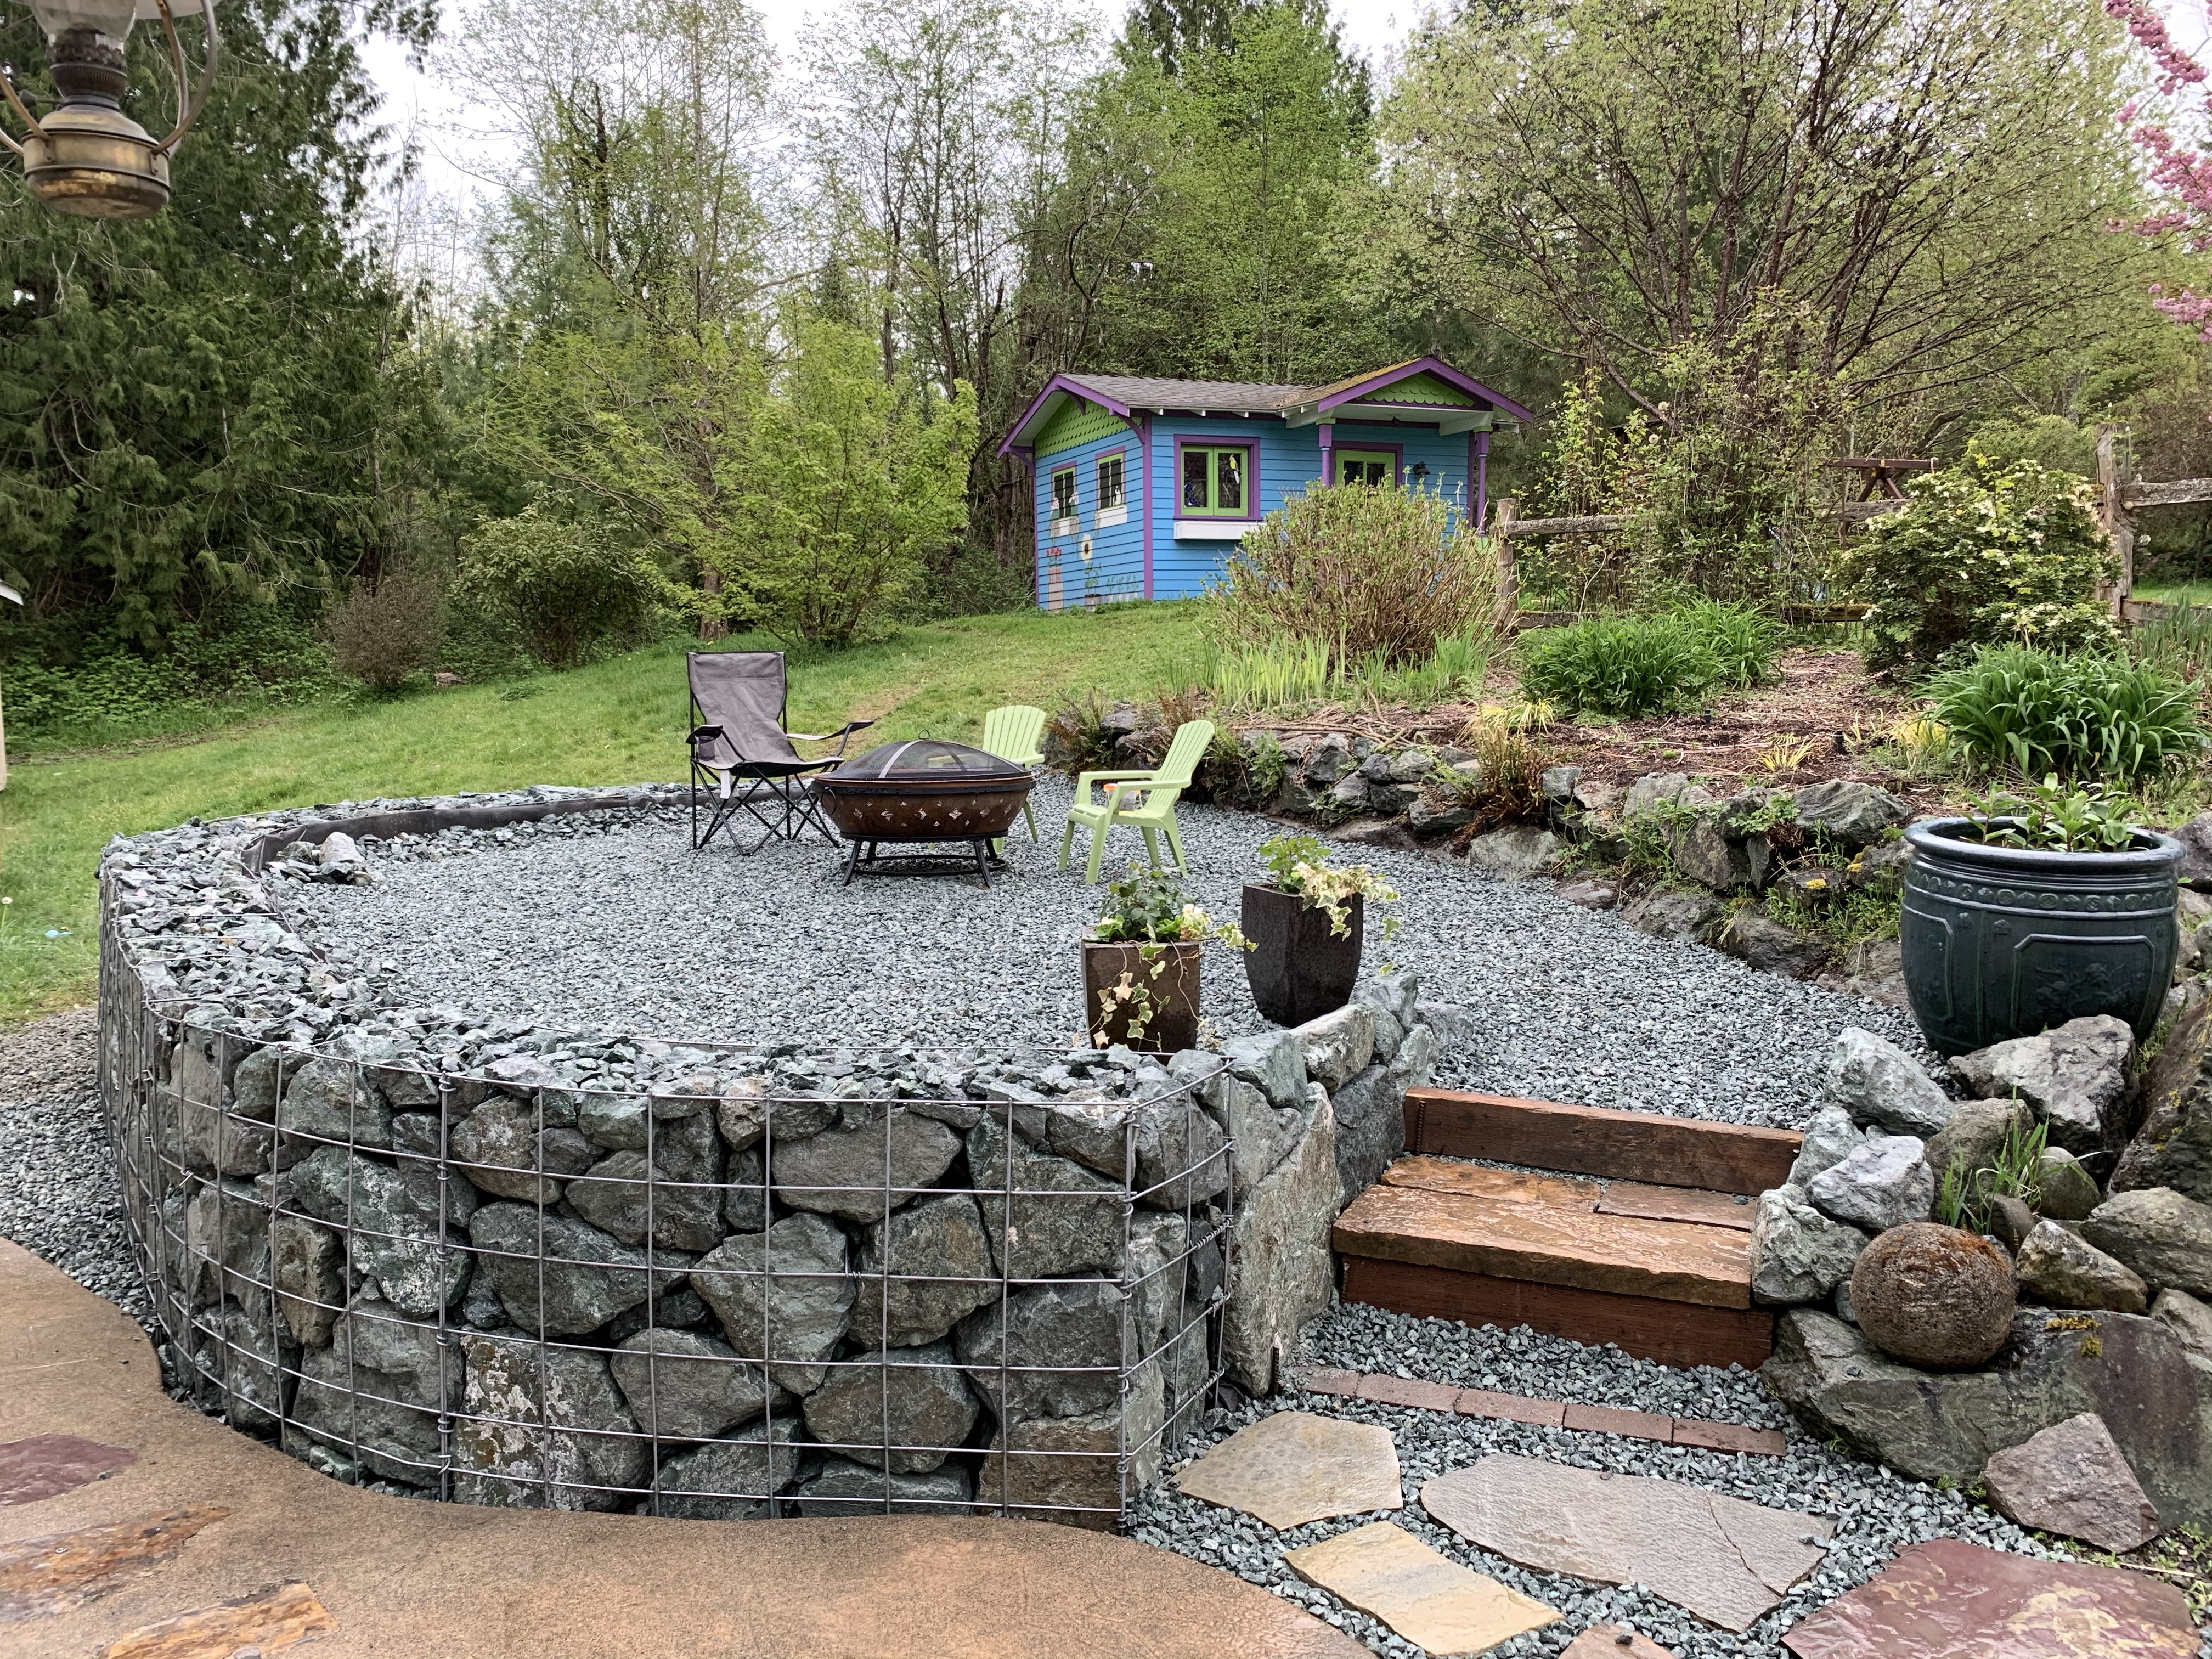
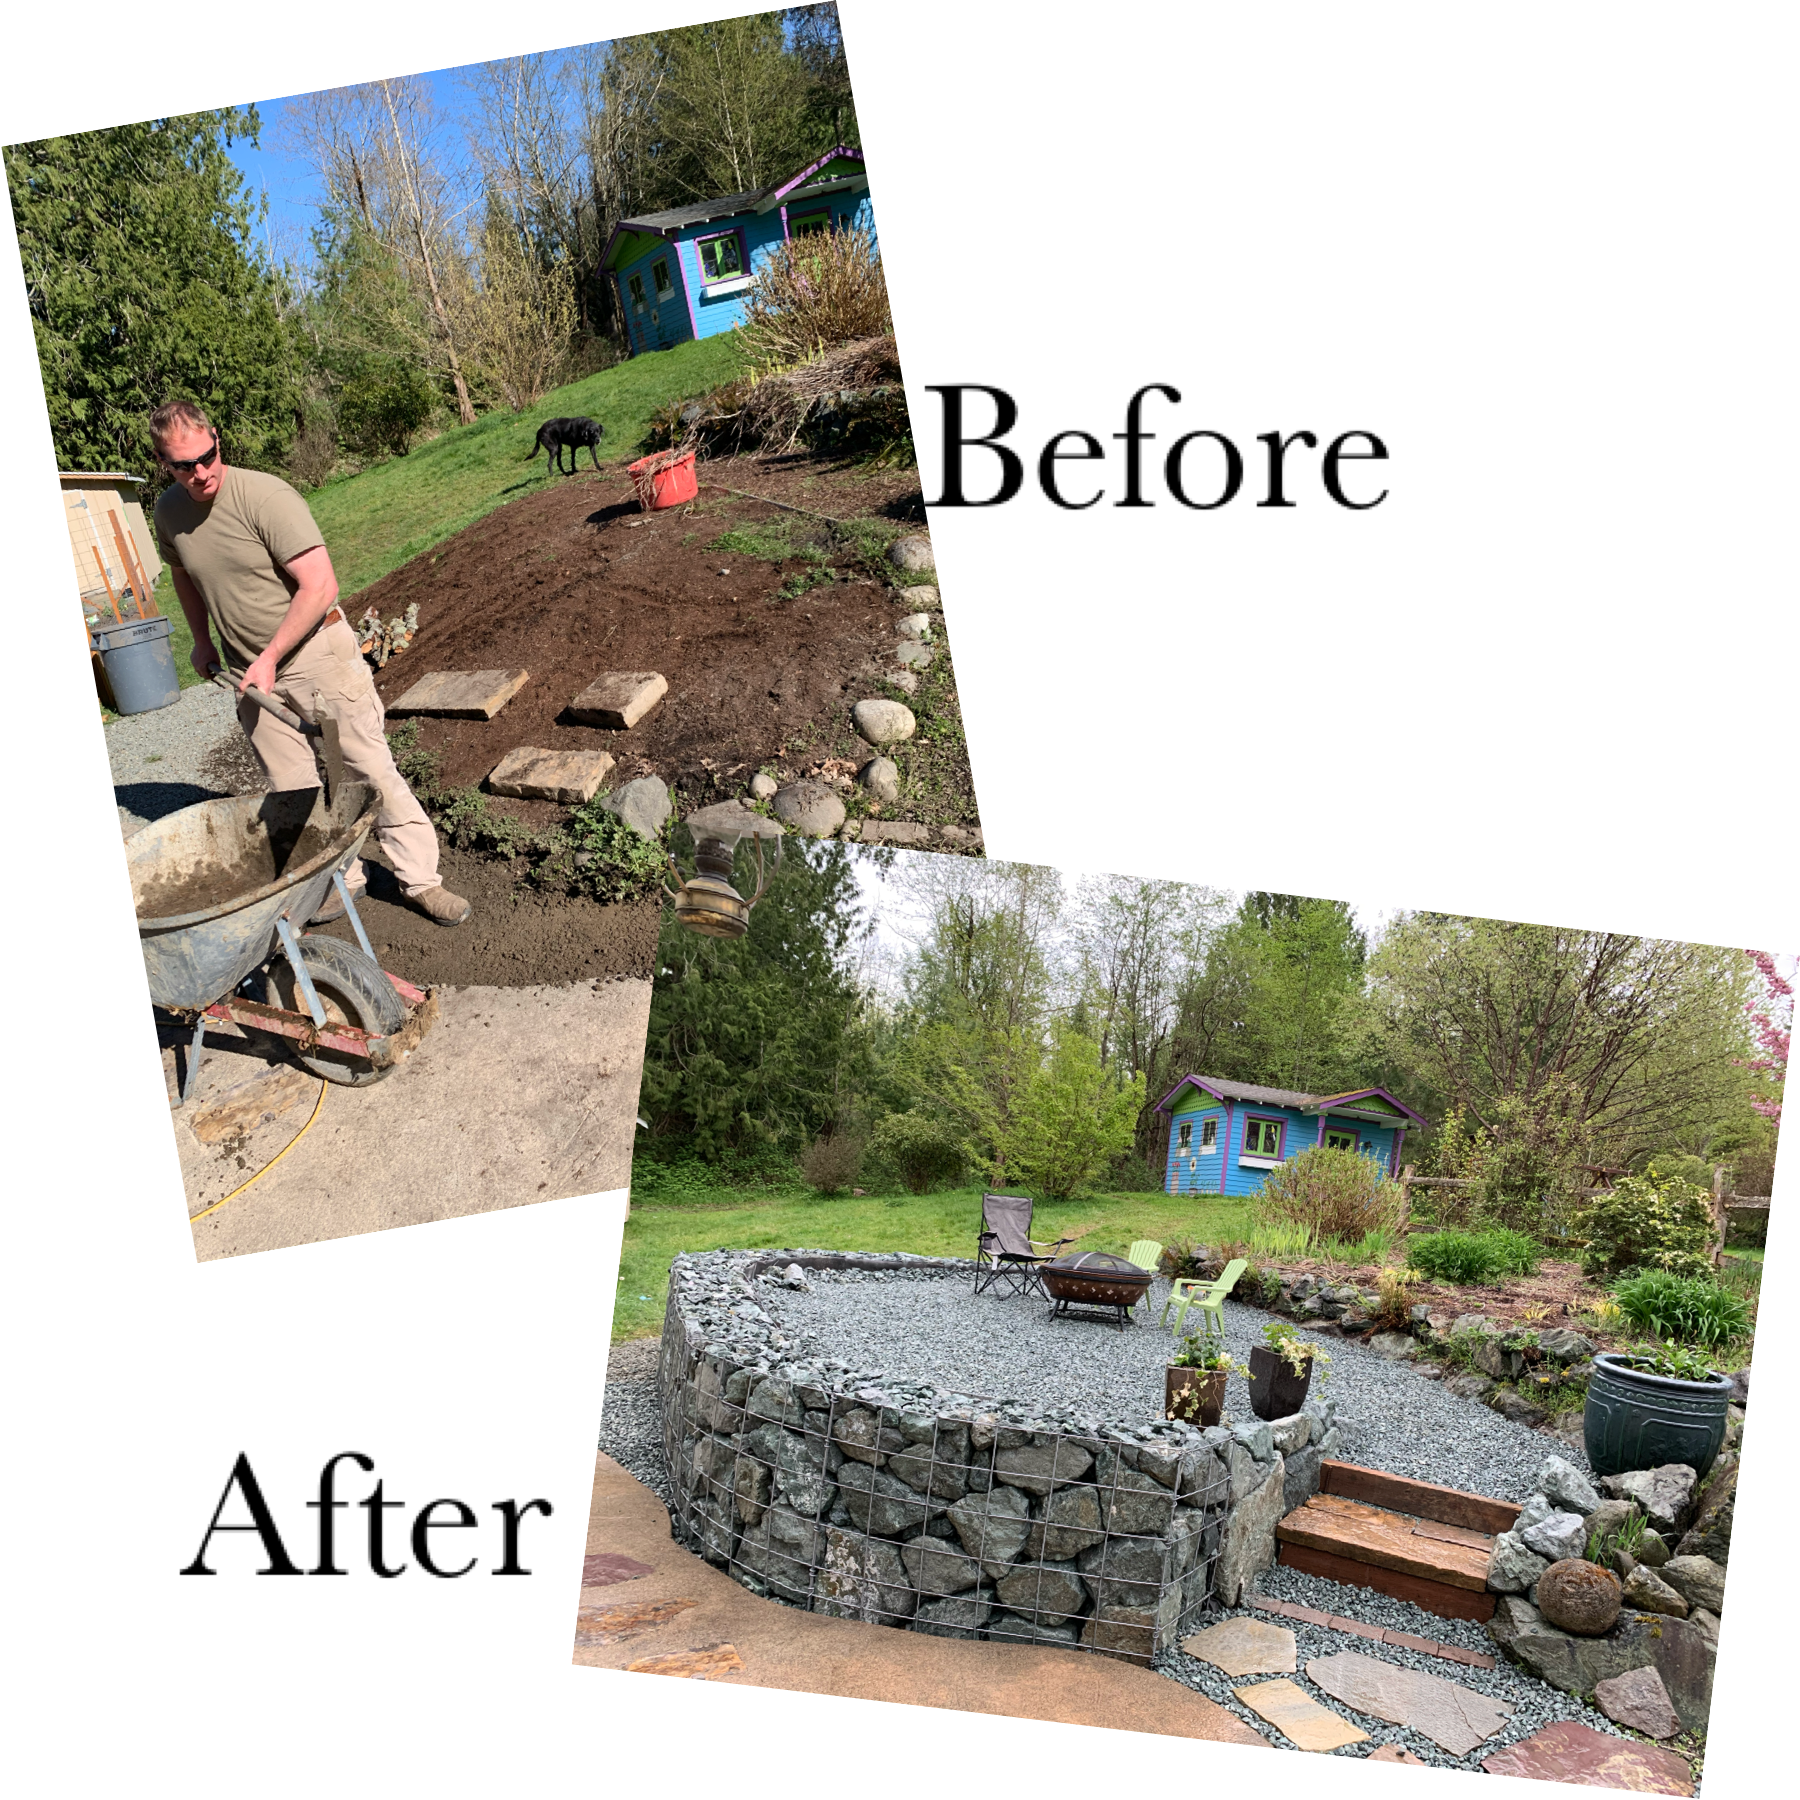
Needless to say, the nasty stuff went everywhere. Up on the patio, down the yard where the rain run off goes and all over the rockery. The problem is, the stuff is nearly impossible to clean up. So after spinning our wheels trying to clean it enough to make it look nice and drain correctly we decided that we would just activate our vision for that area early! Commence fire pit retaining wall project!
Before: hill covered with bark
Rock Retaining Wall
The area that I had the mess running to was not an ideal area. It was just a blank hill side that the dogs played in and got super messy. It was difficult to maintain and we were unable to enjoy it. It needed some help!
We began by digging out all of the organic material, the bark, weeds and pond junk. Then we determined where we would like the space to end and started to build our wall.
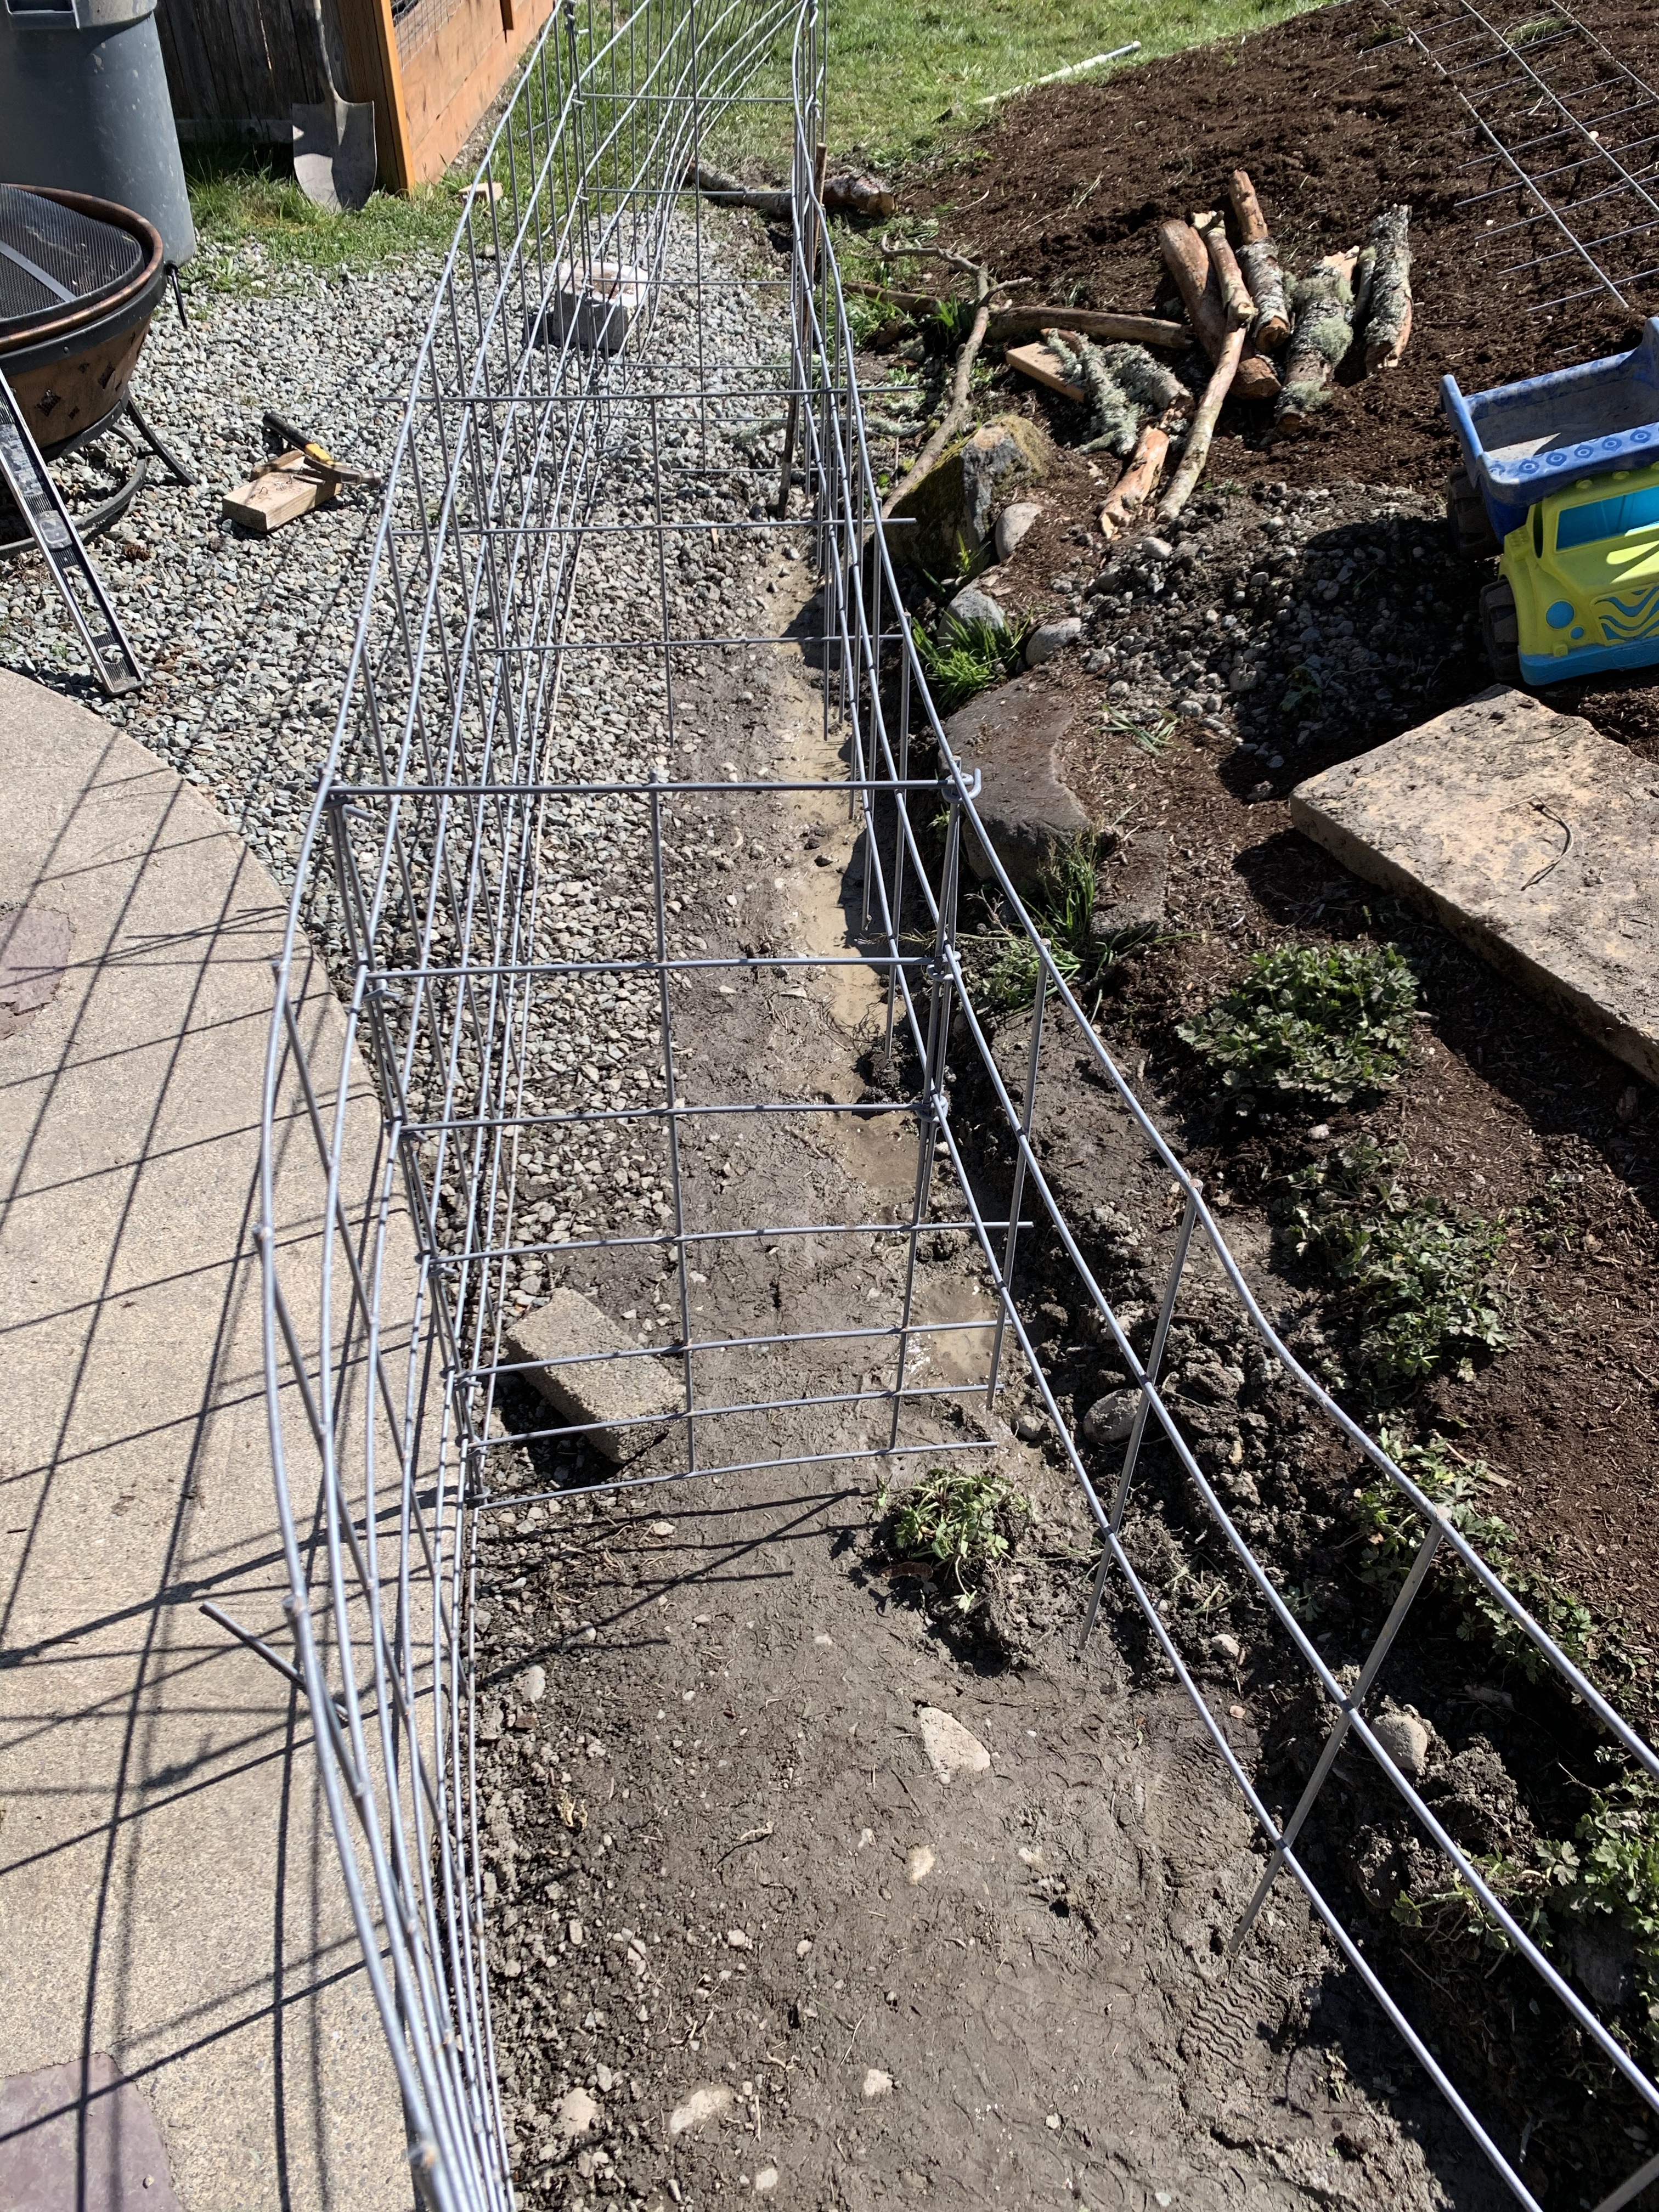
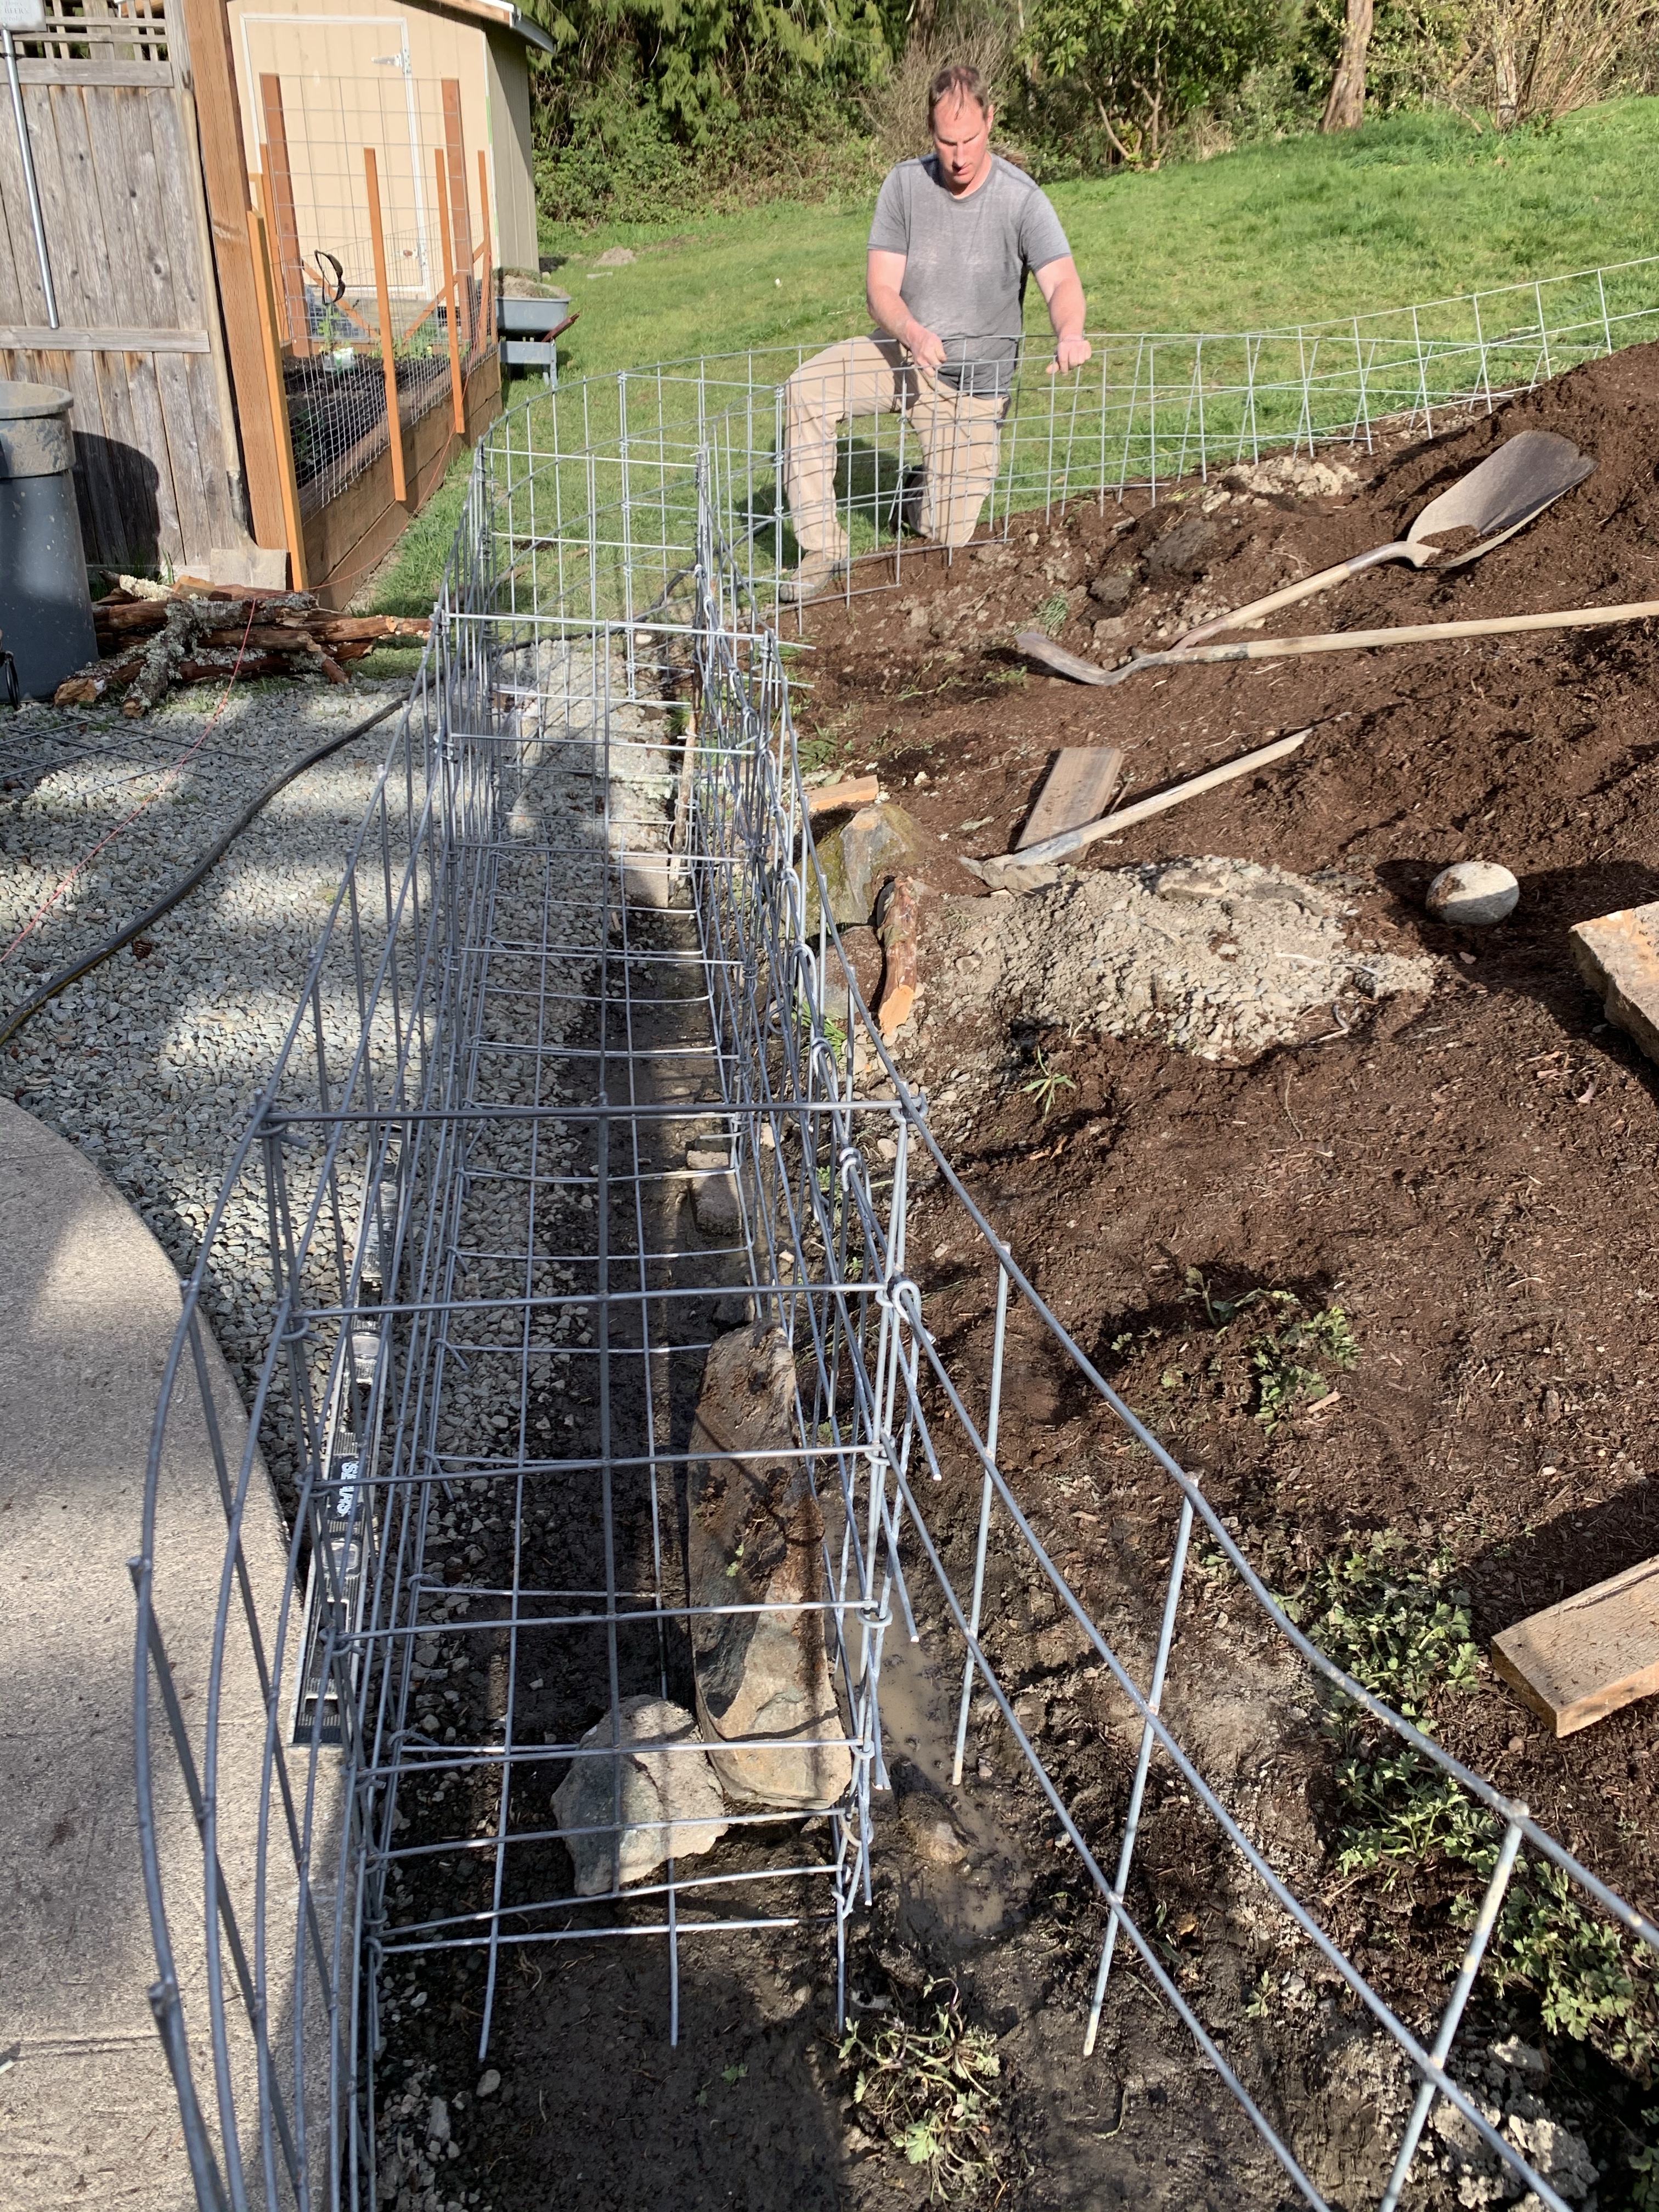
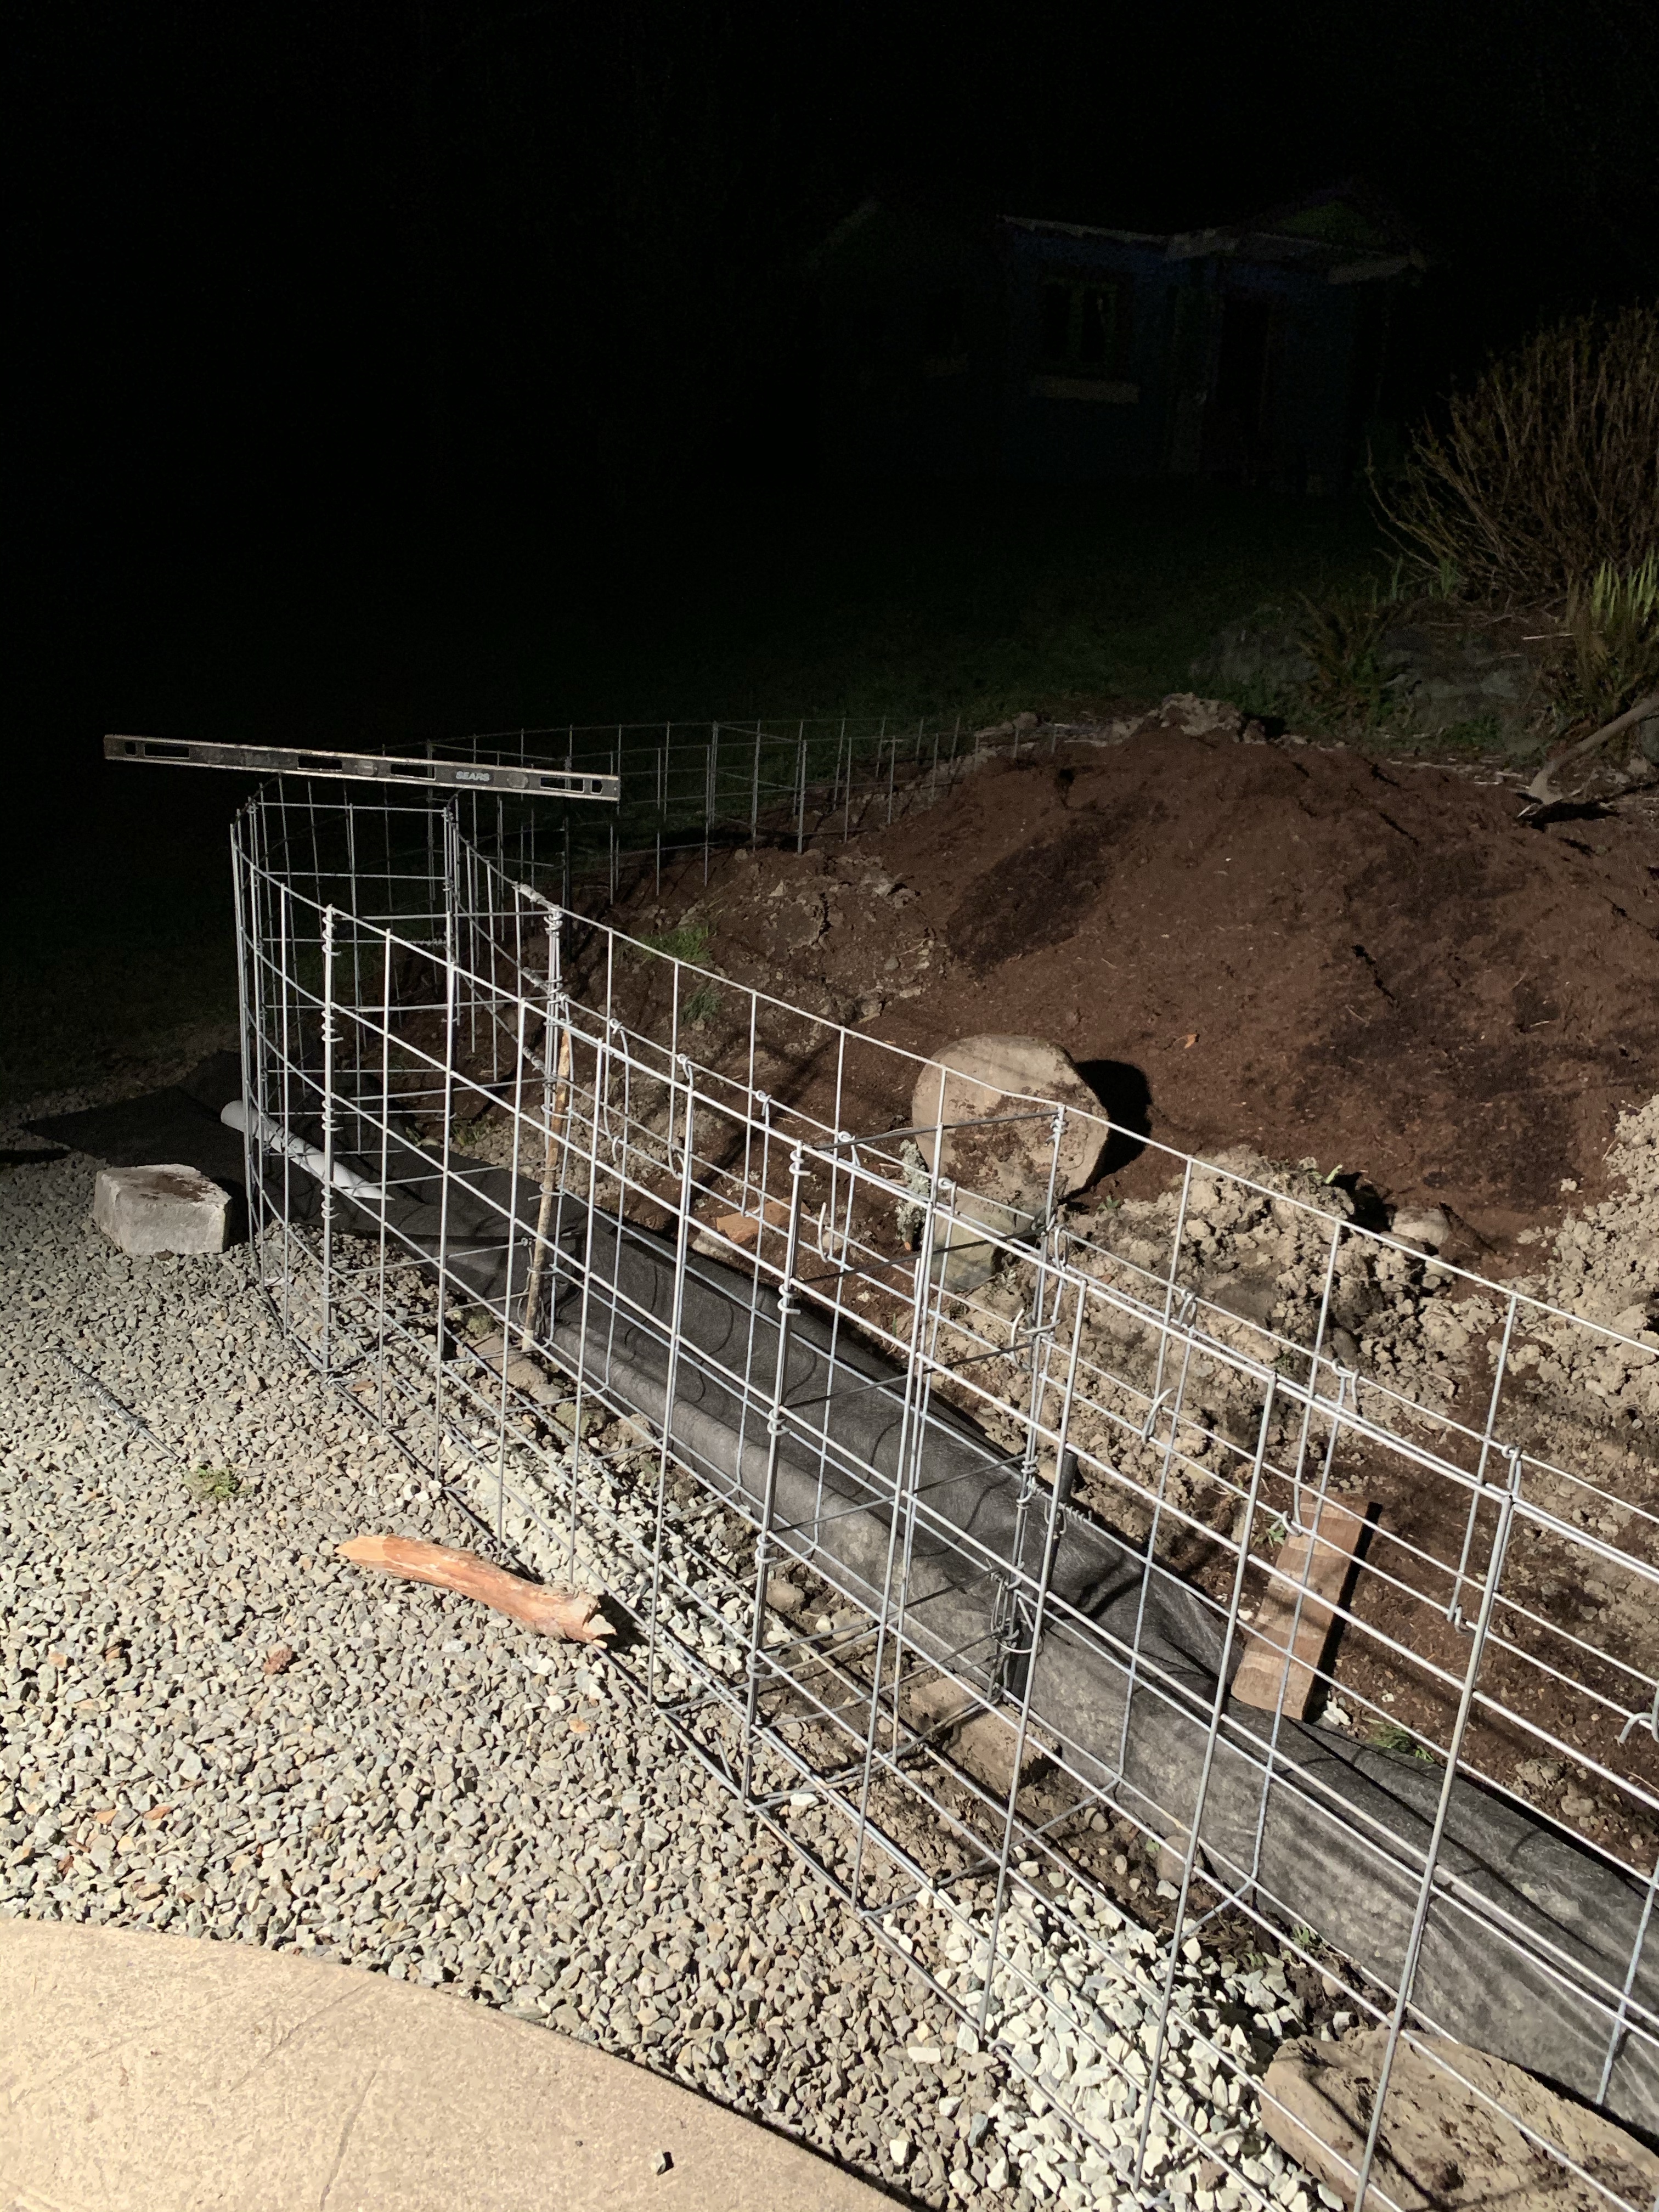
For the wall, we used what we had here at the house. We had cattle panel on hand so we were able to cut it and bend it with a wire bender (3 hole fence tool) to create a “box” for our rock wall. We also put in a French drain behind the wall. Being that we get so much rain and this area has pretty good run off we decided to be safe rather than sorry by adding the French drain.
3 hole fence tool
*Tip: Cattle panel is super stiff. You can use other wire panel that is a little easier to work with. The smaller the holes in your panel the smaller rock you can use.
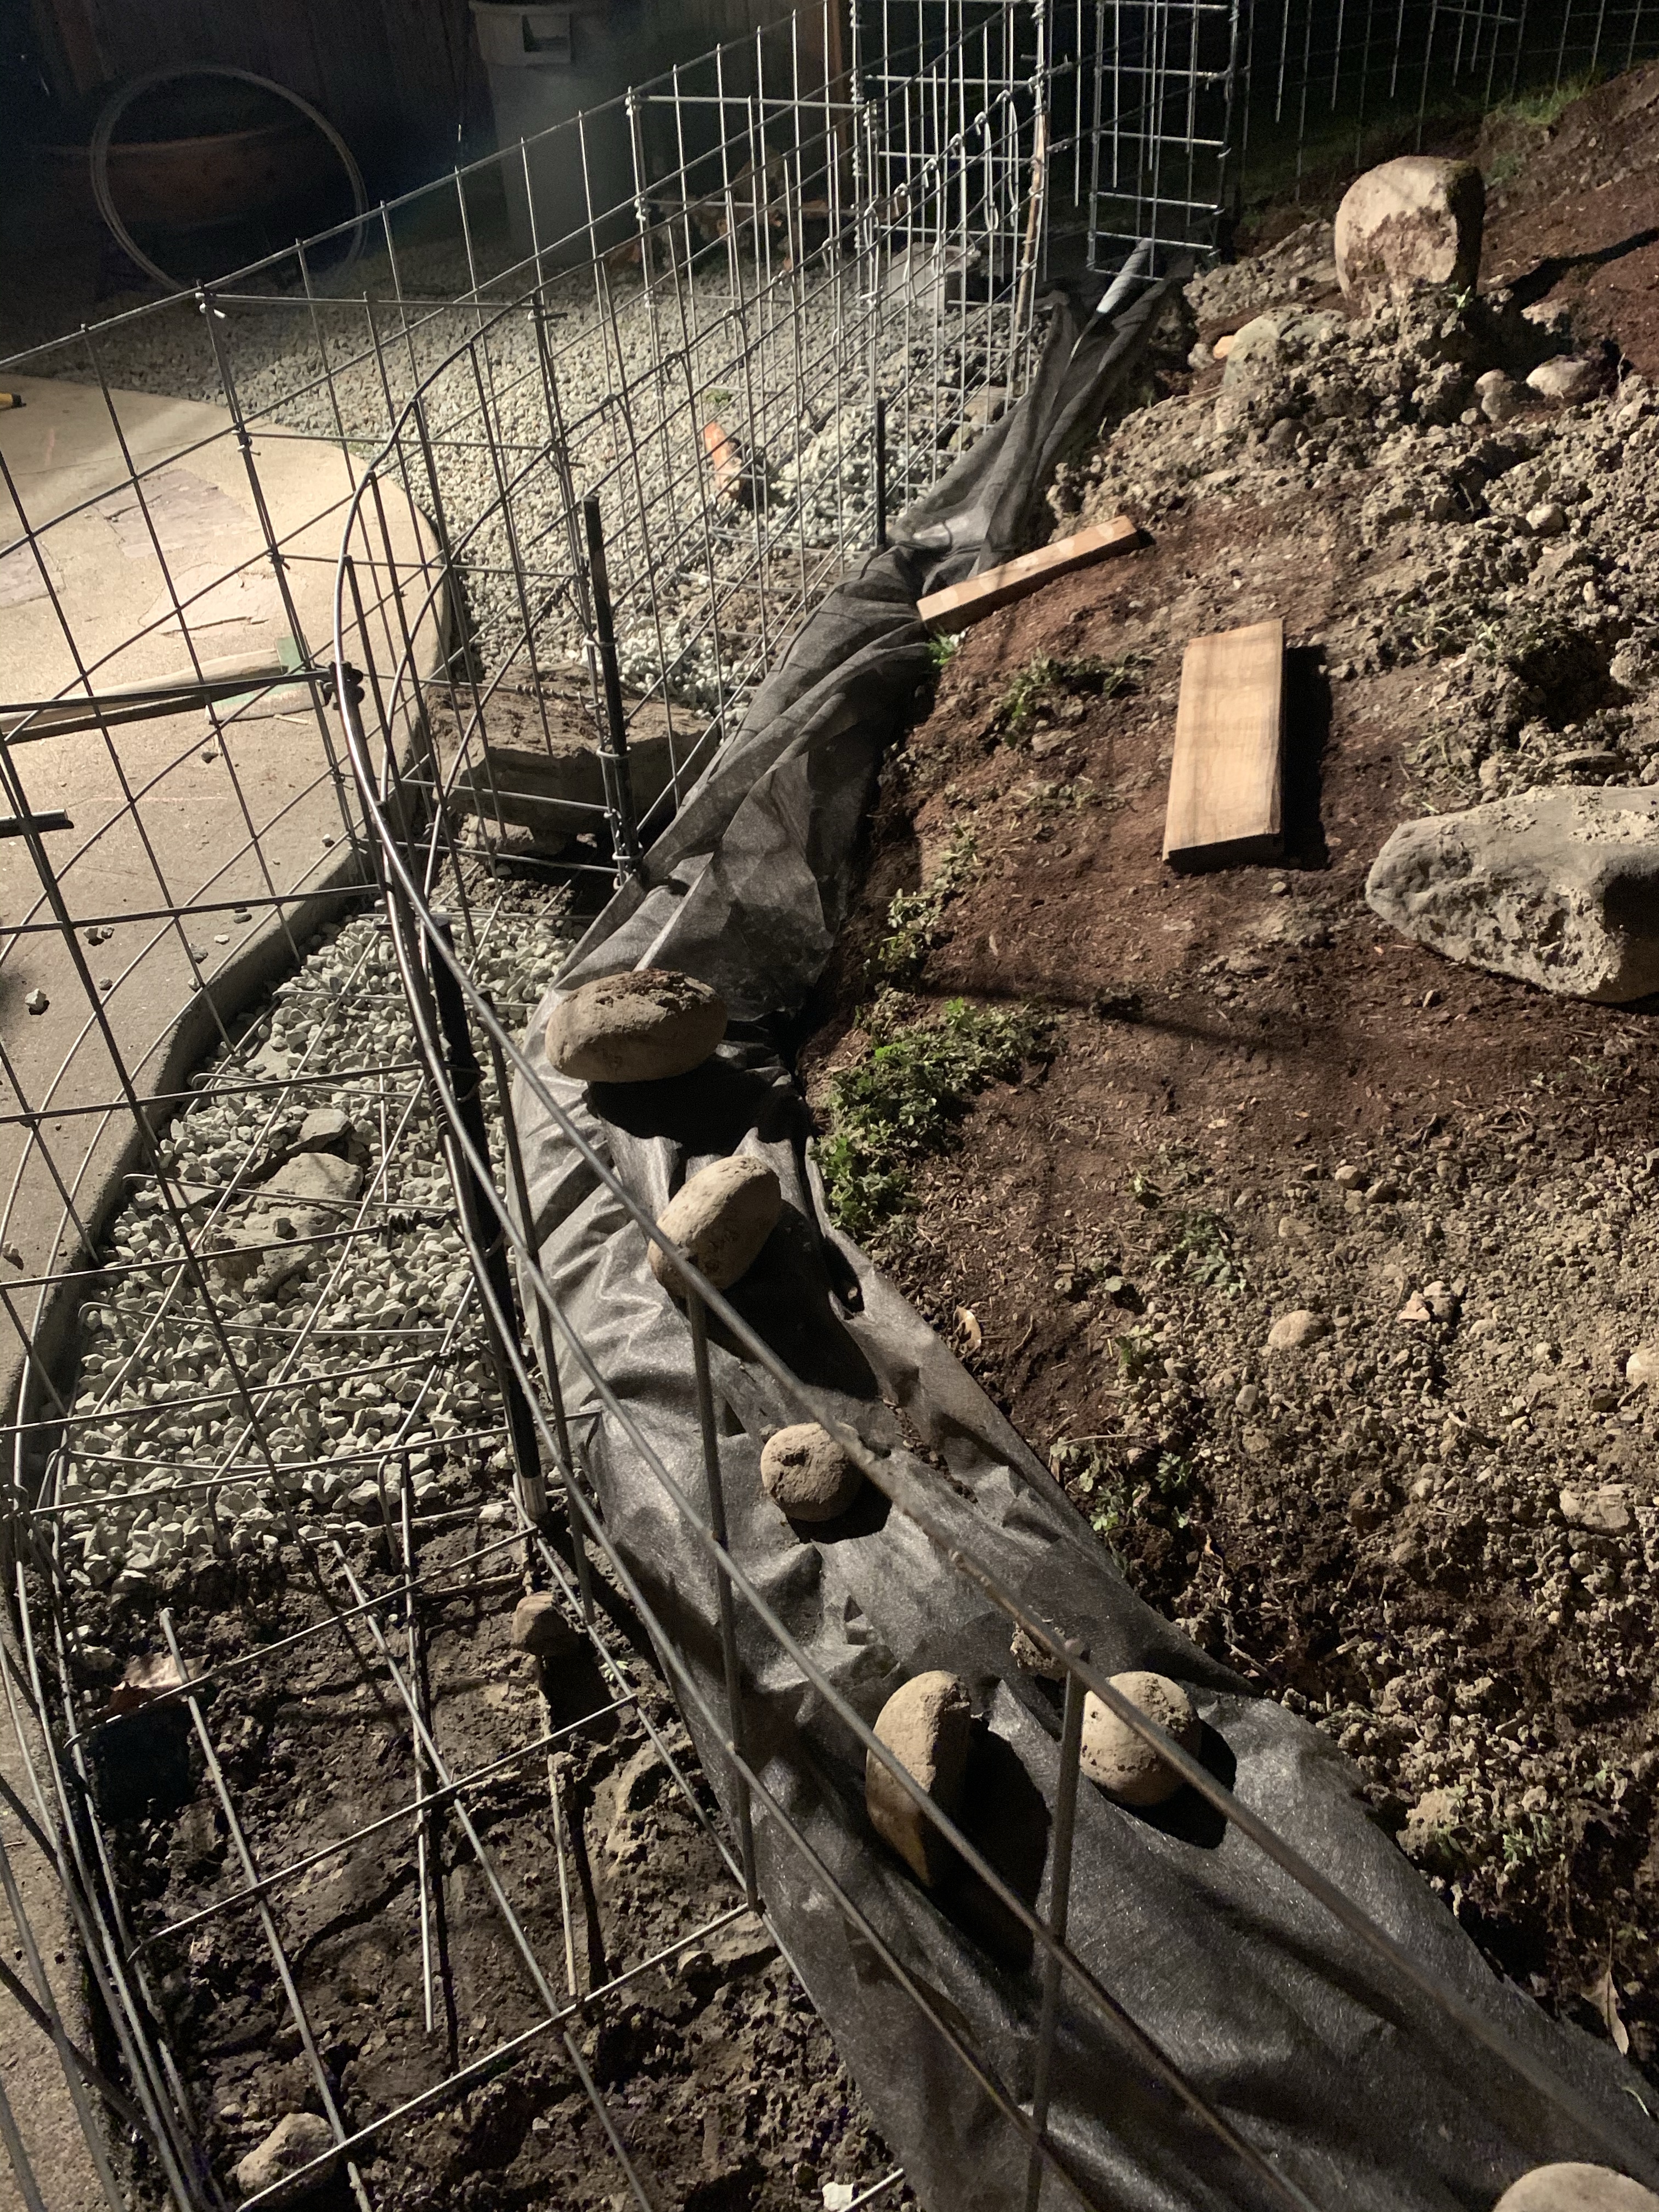
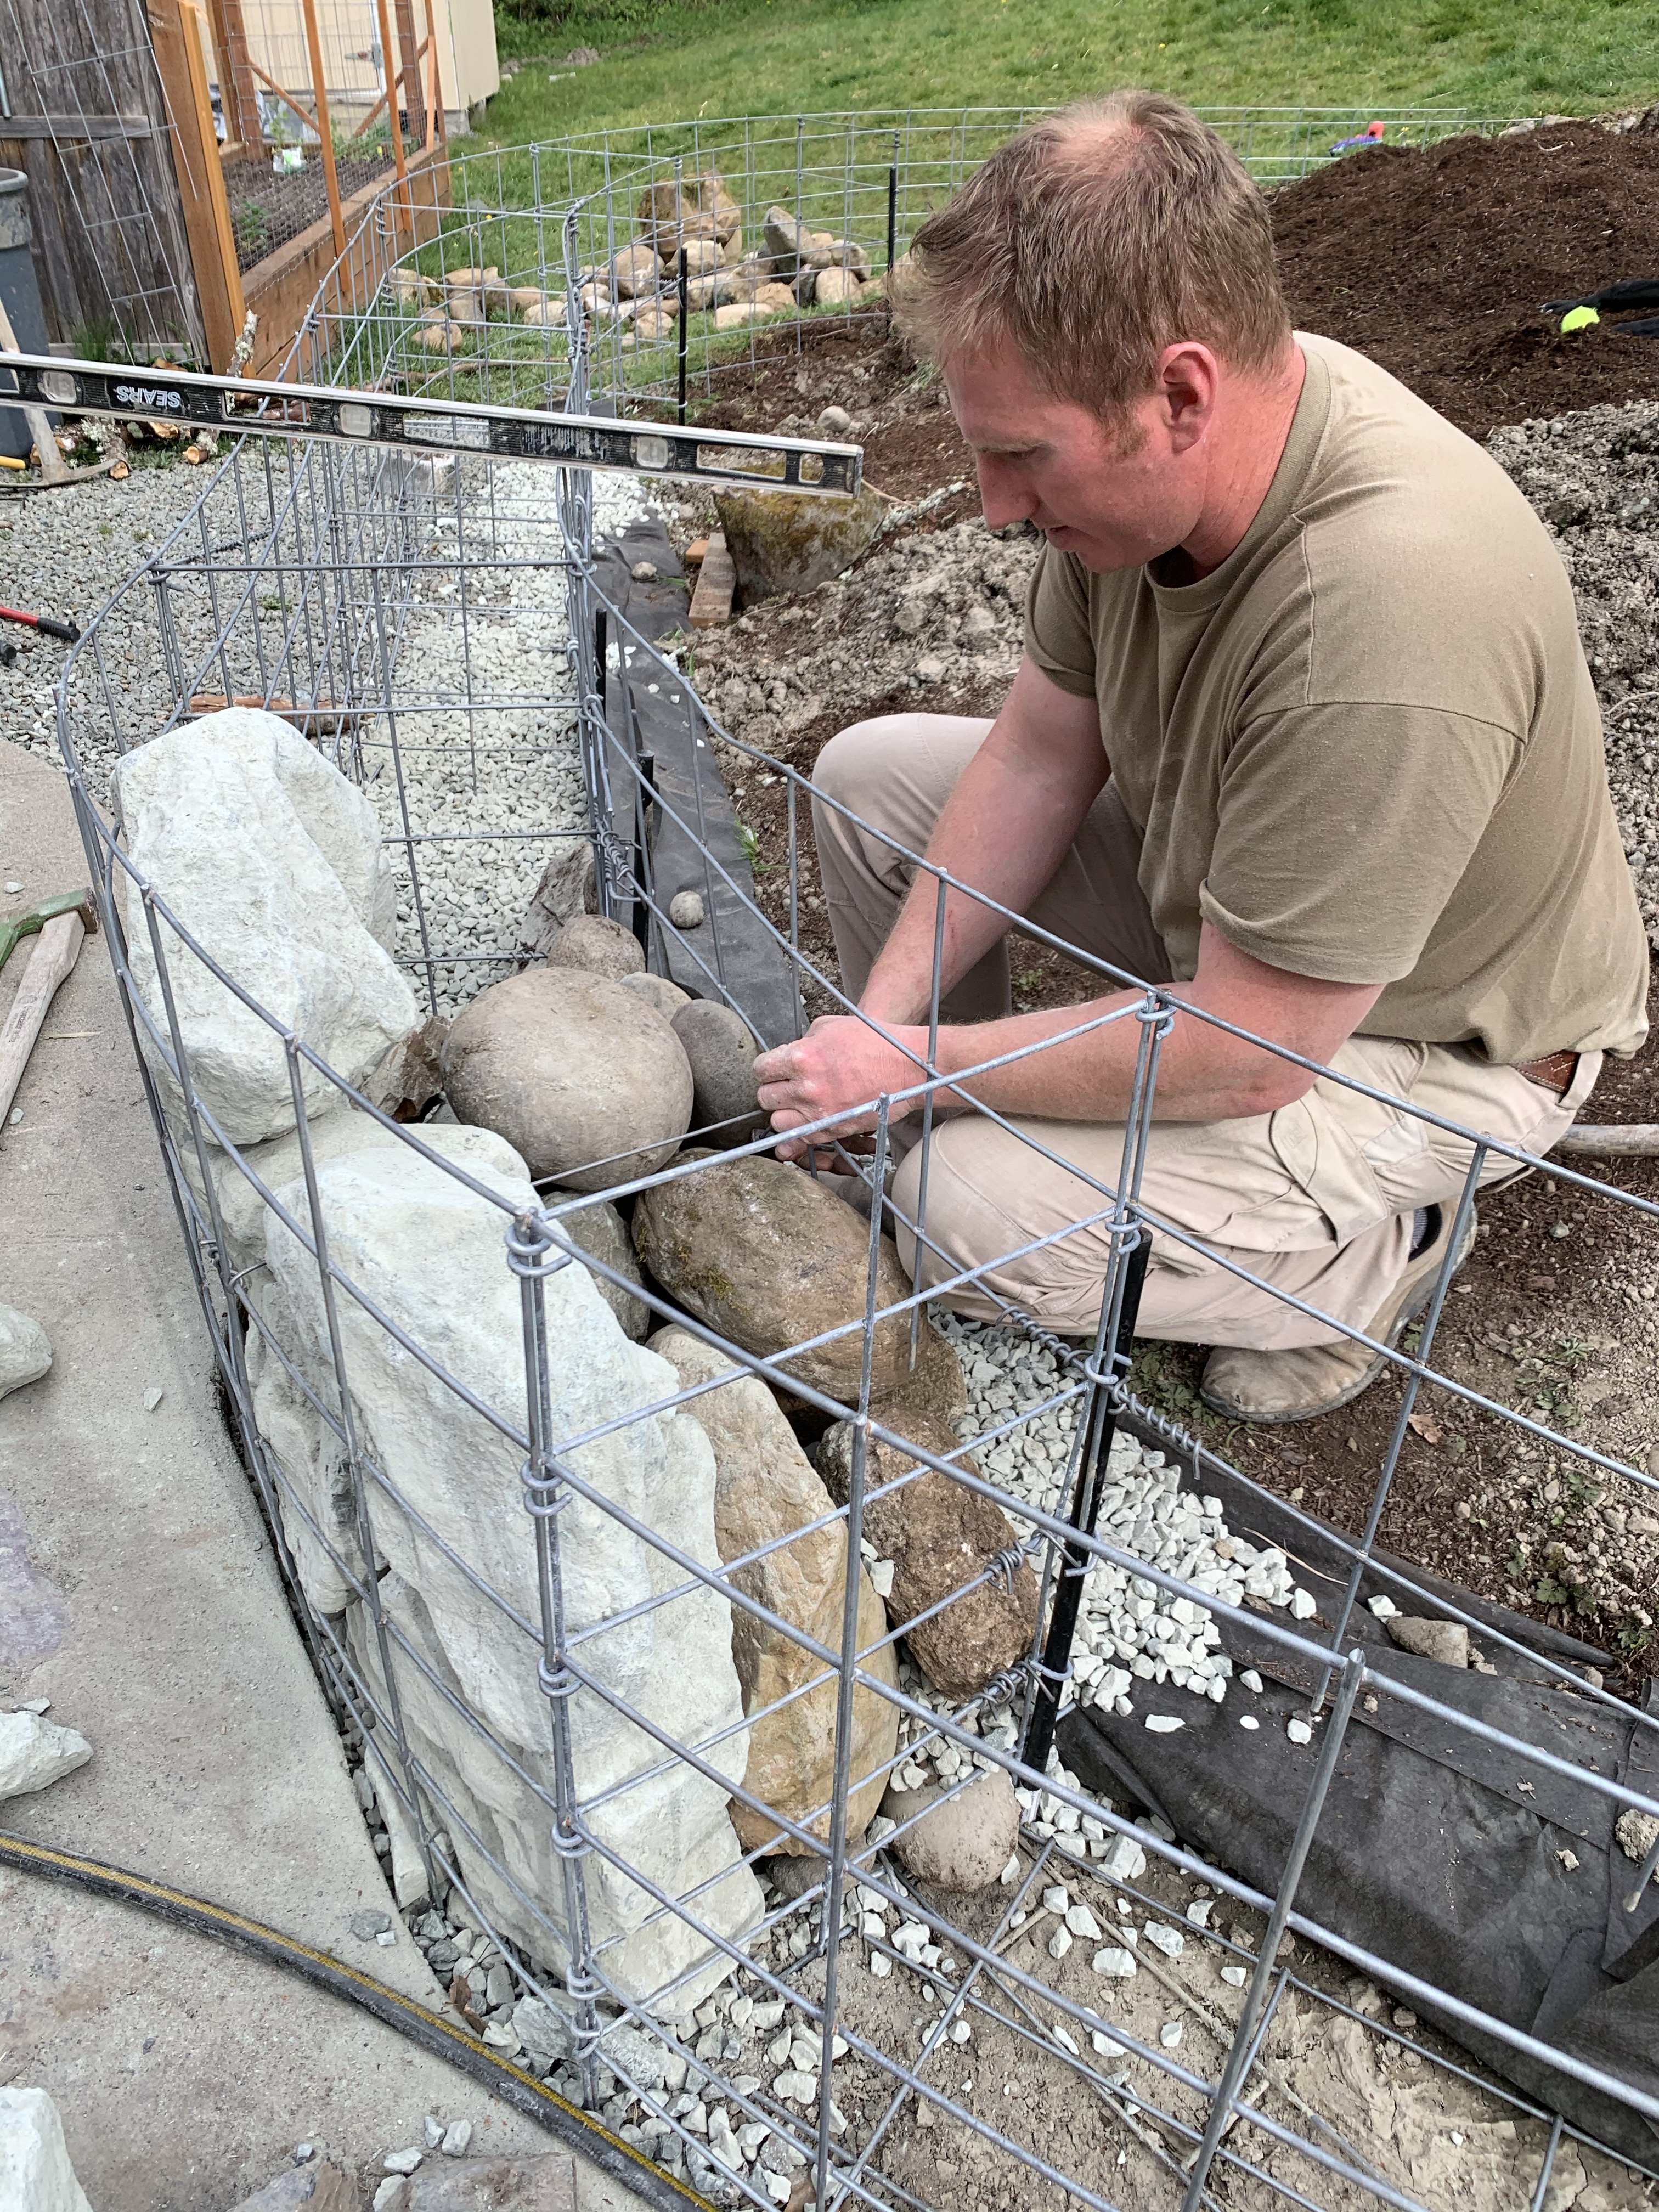
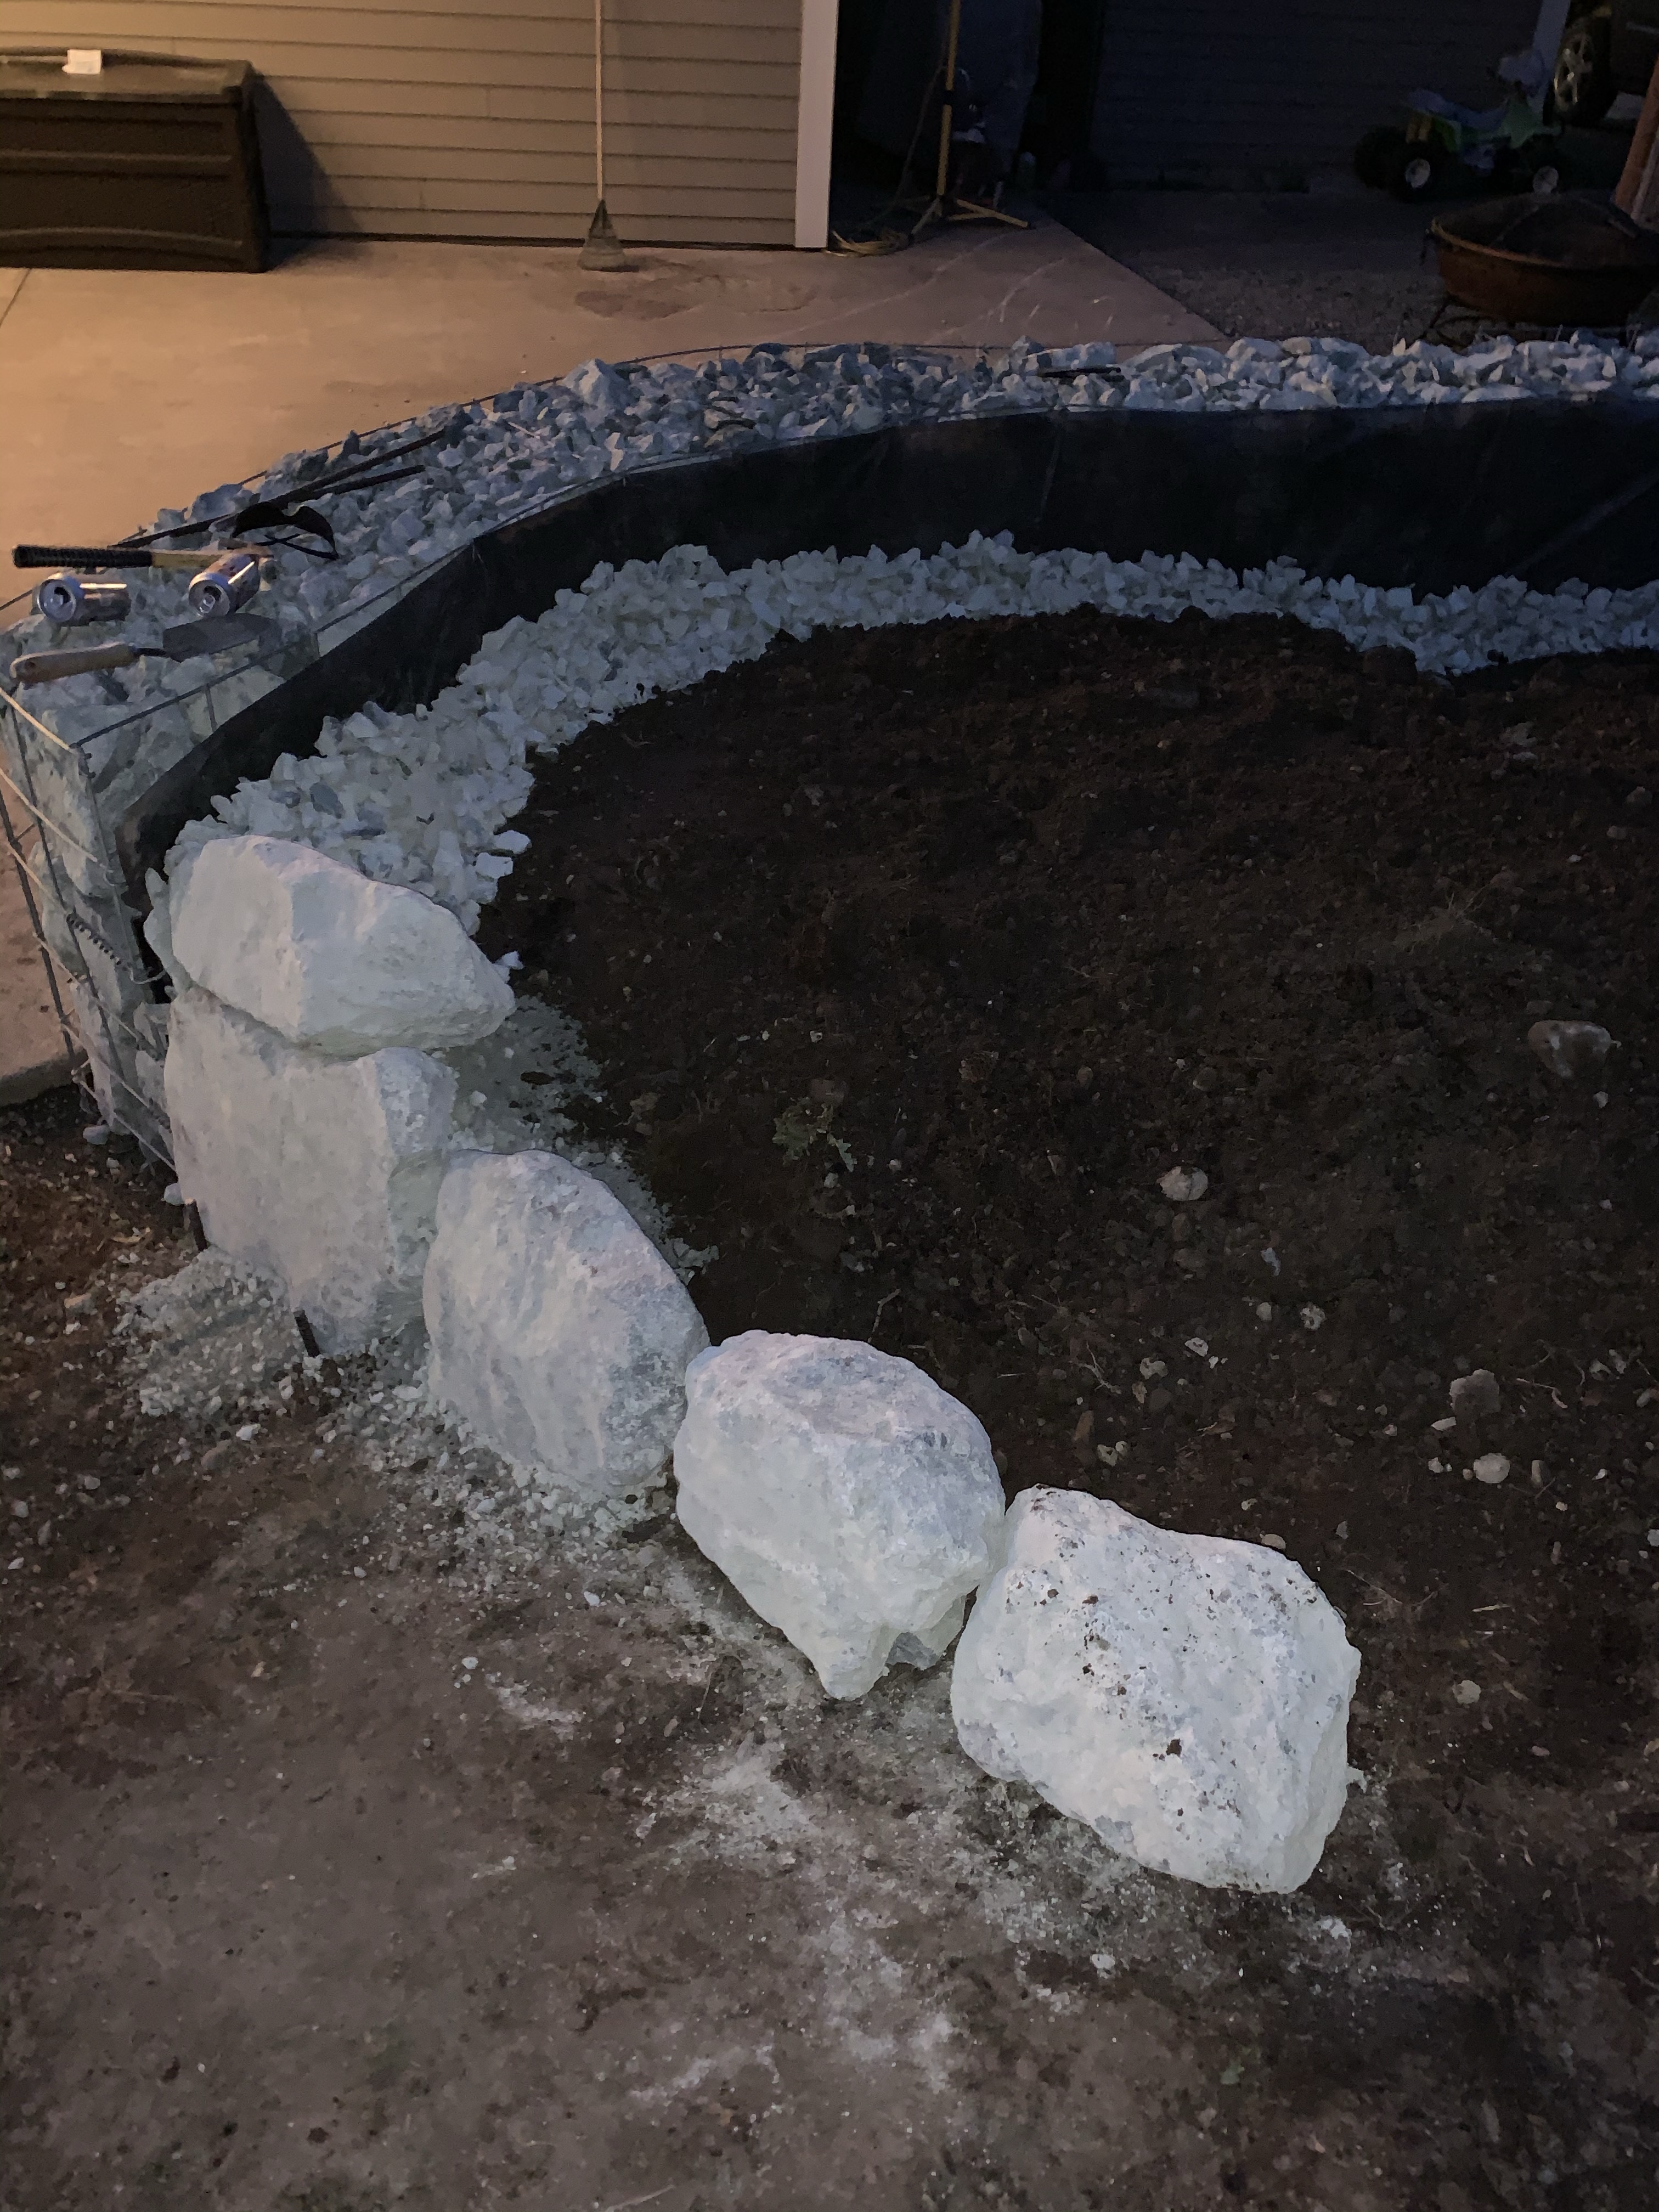
Once the wire panel boxes were in place we could start to load them with rocks. We have some existing rockery so we wanted to match what was already here so we used a local rock quarry. Rocks come in all different sizes so it is important to know what size you are going to use for your project. We used “one man” rocks. They are quite large and not super easy to work with. If you use a smaller wire you could possibly use “half man” rocks or smaller. Most local quarries will let you get a couple samples so you can decide what size is best for your project.
*Tip: If your wall is only going to be visible from one side, consider filling the back with just random rocks from around your property. Save the nice rocks for your project. Also, you want to be sure to use different sizes of rocks so you can fit them together like a puzzle and fill in any gaps you may have.
Filling the baskets
*Tip: Rocks are heavy and even with large gauge wire you will need to put a piece of wire in the middle and along the top as a brace or your rock boxes will bulge out after while and look messy.
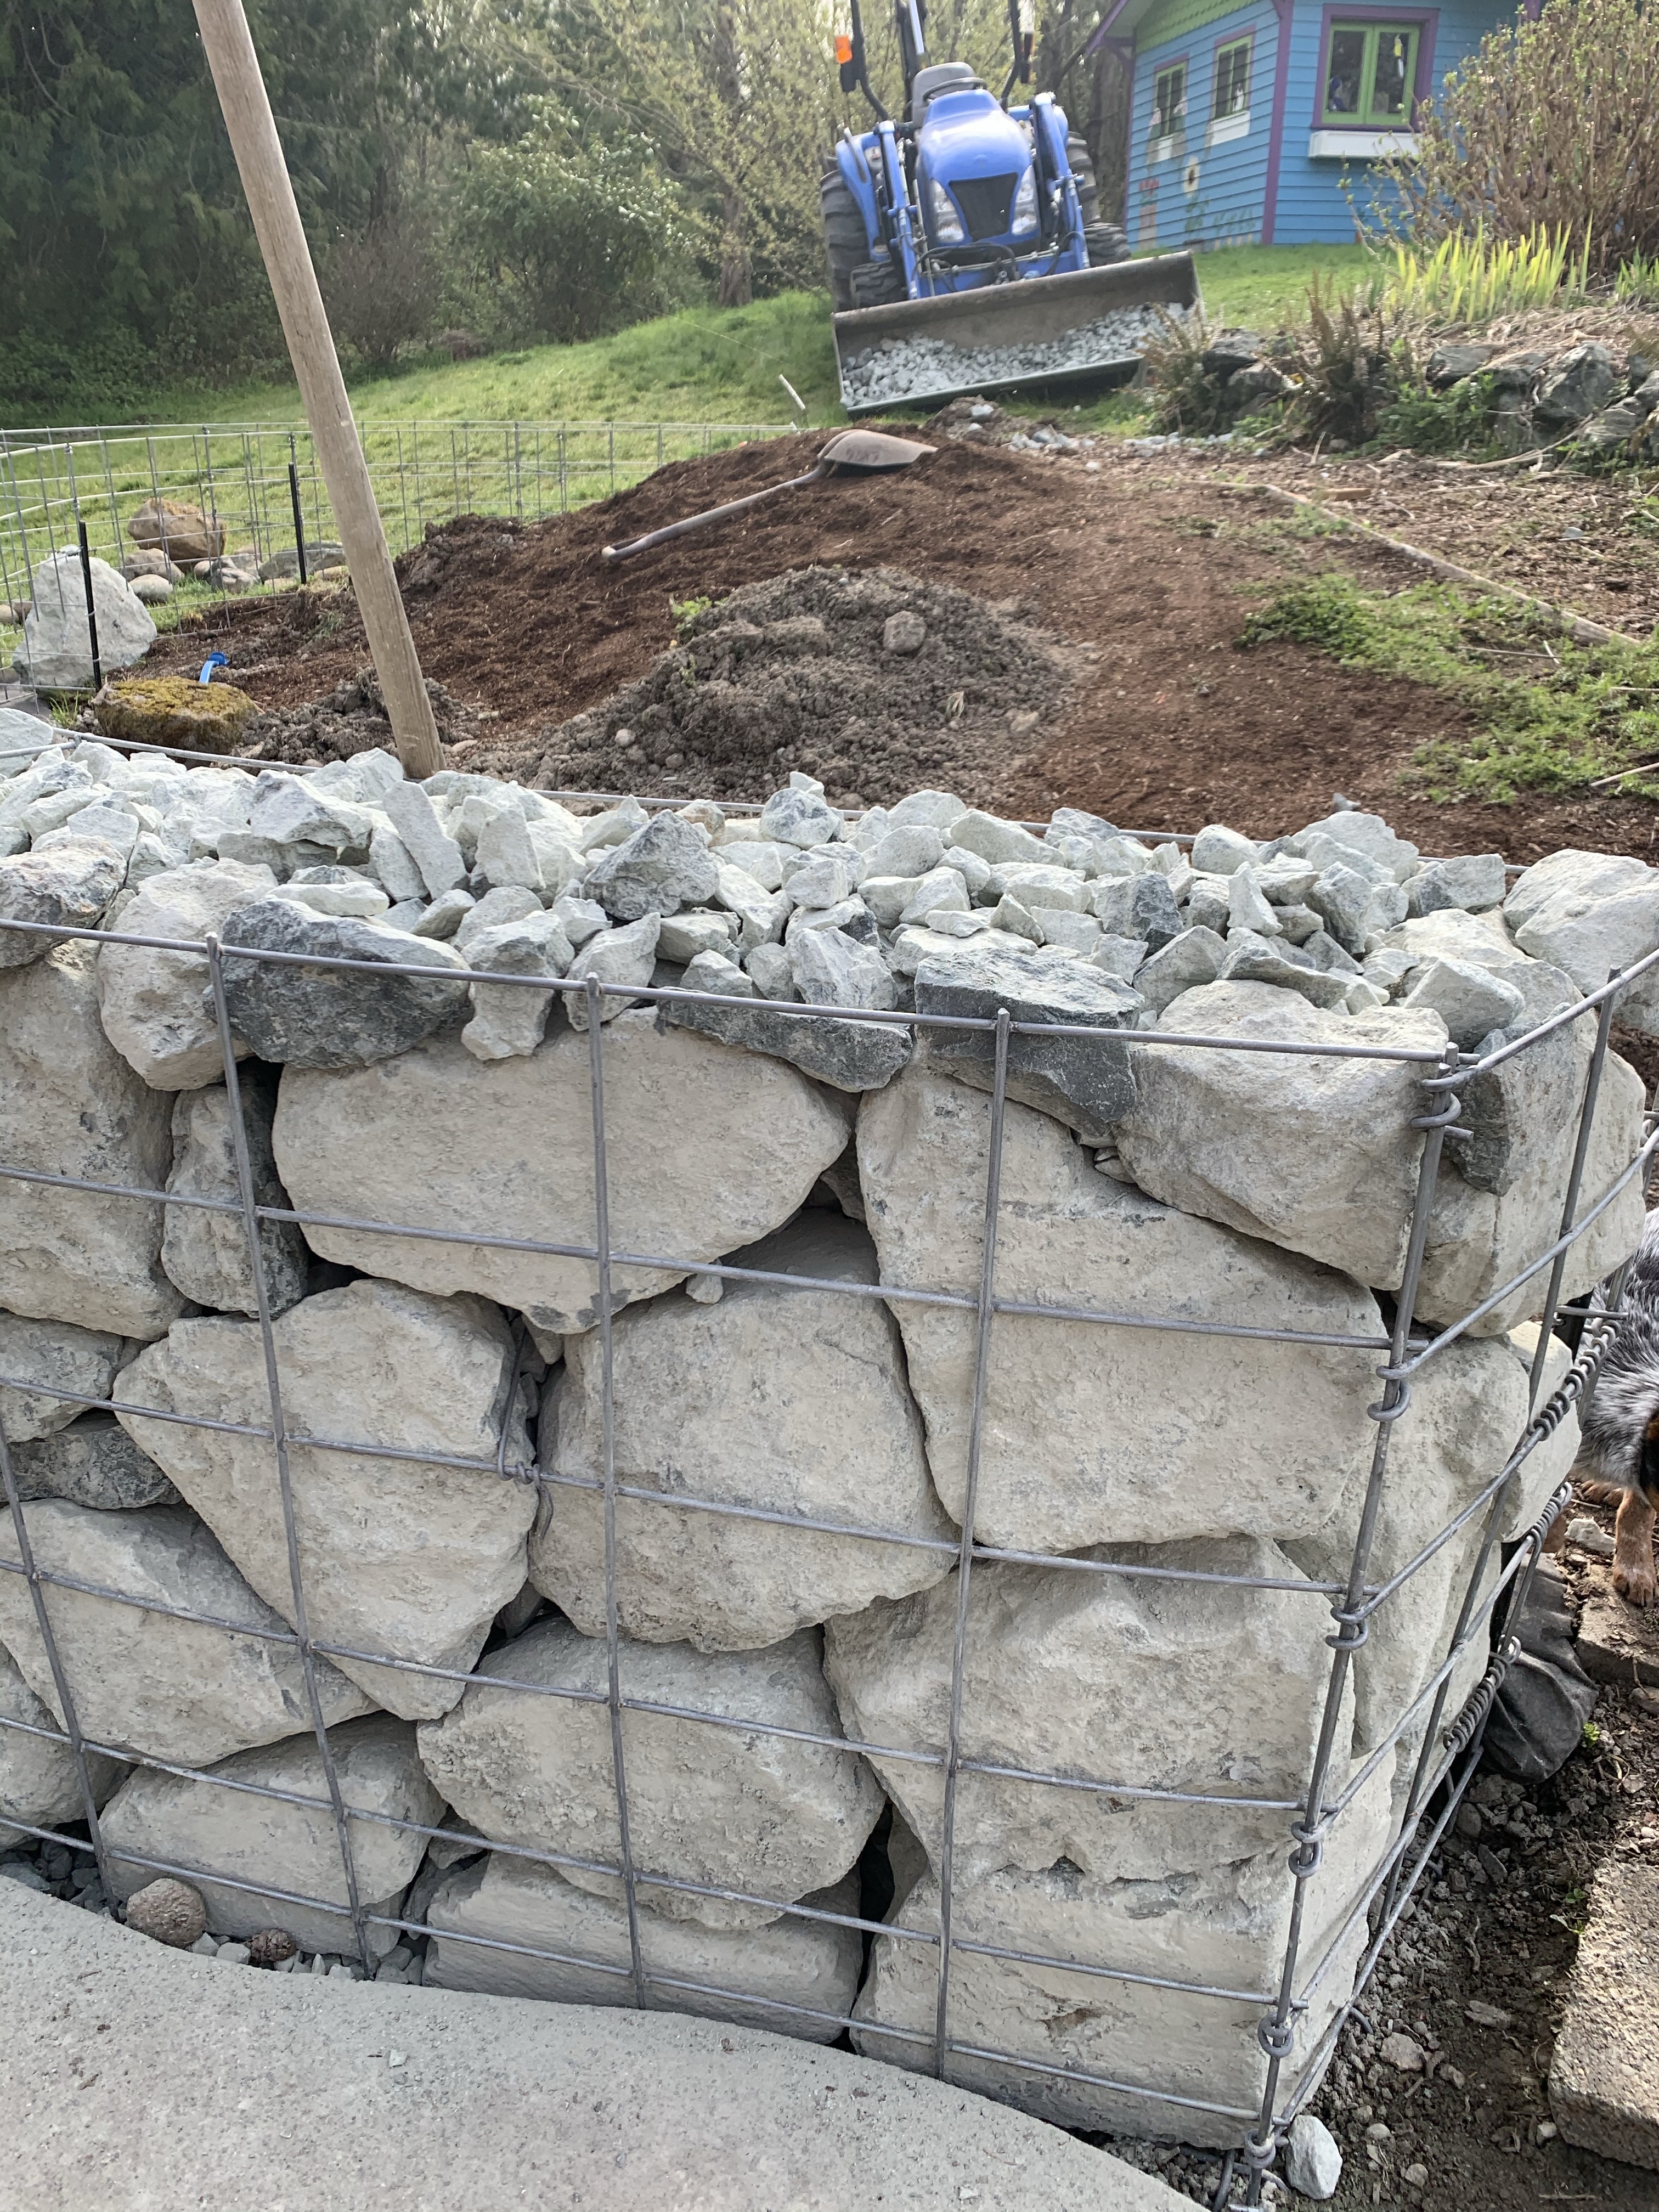
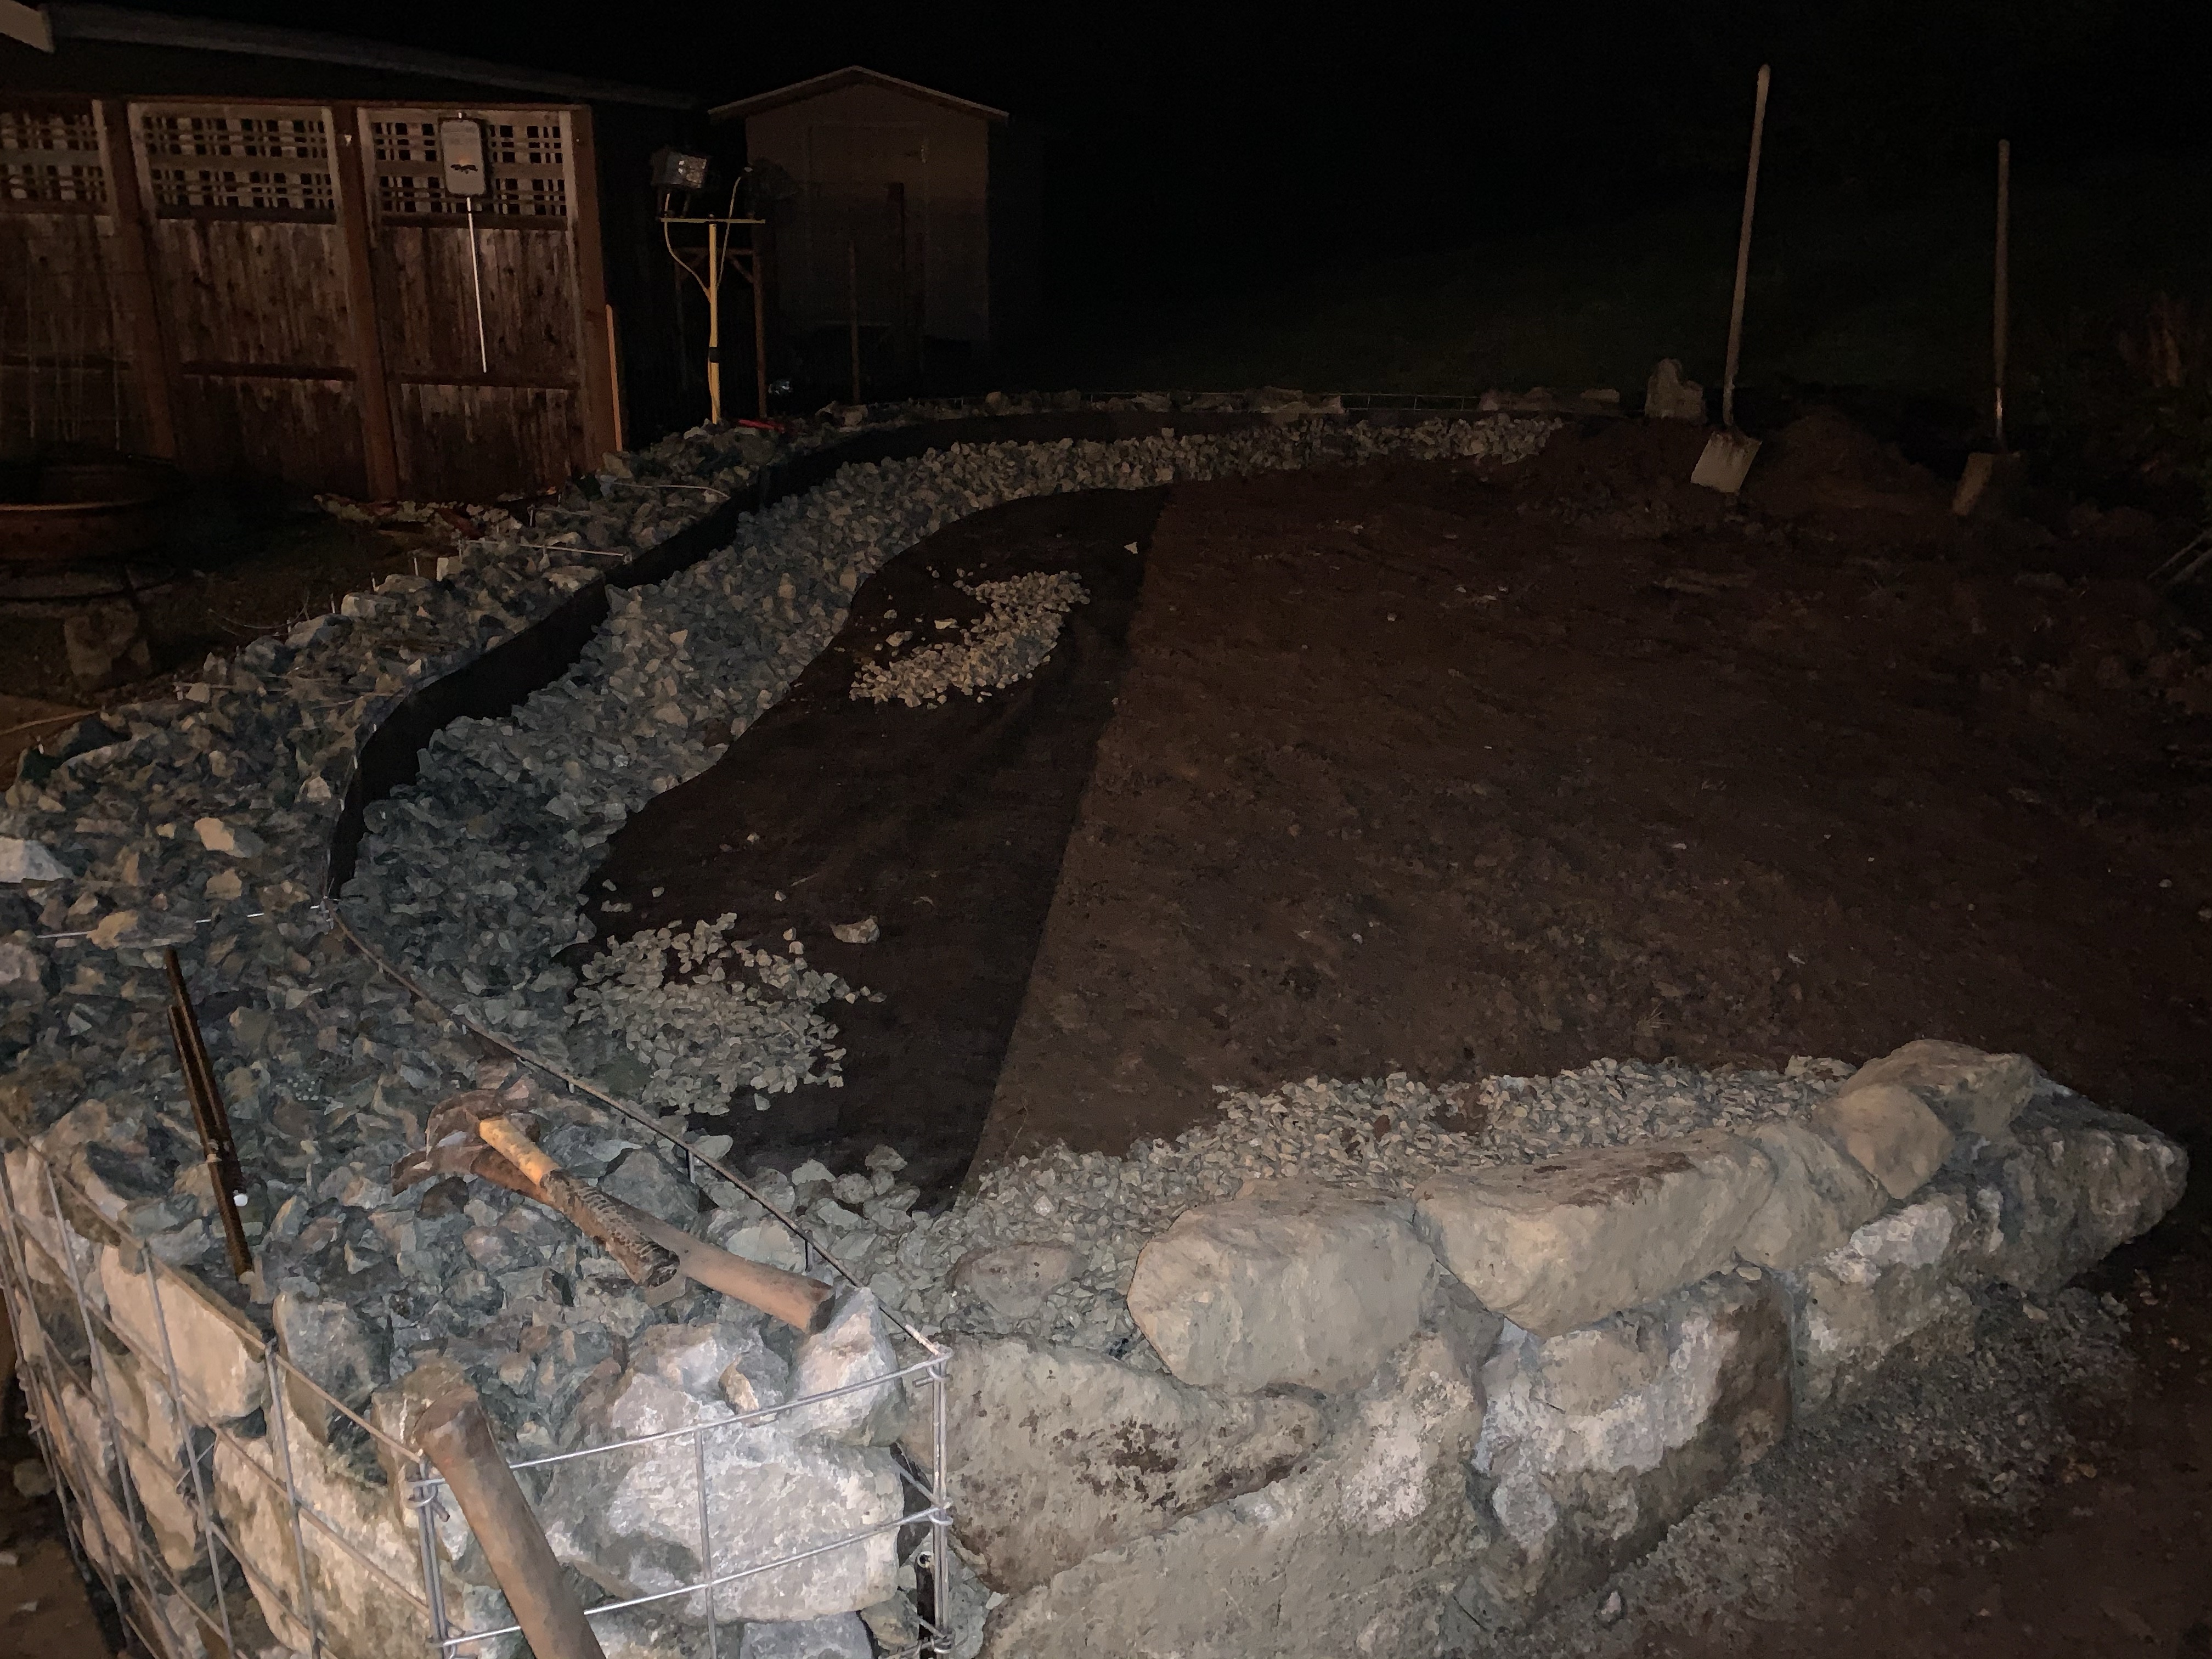
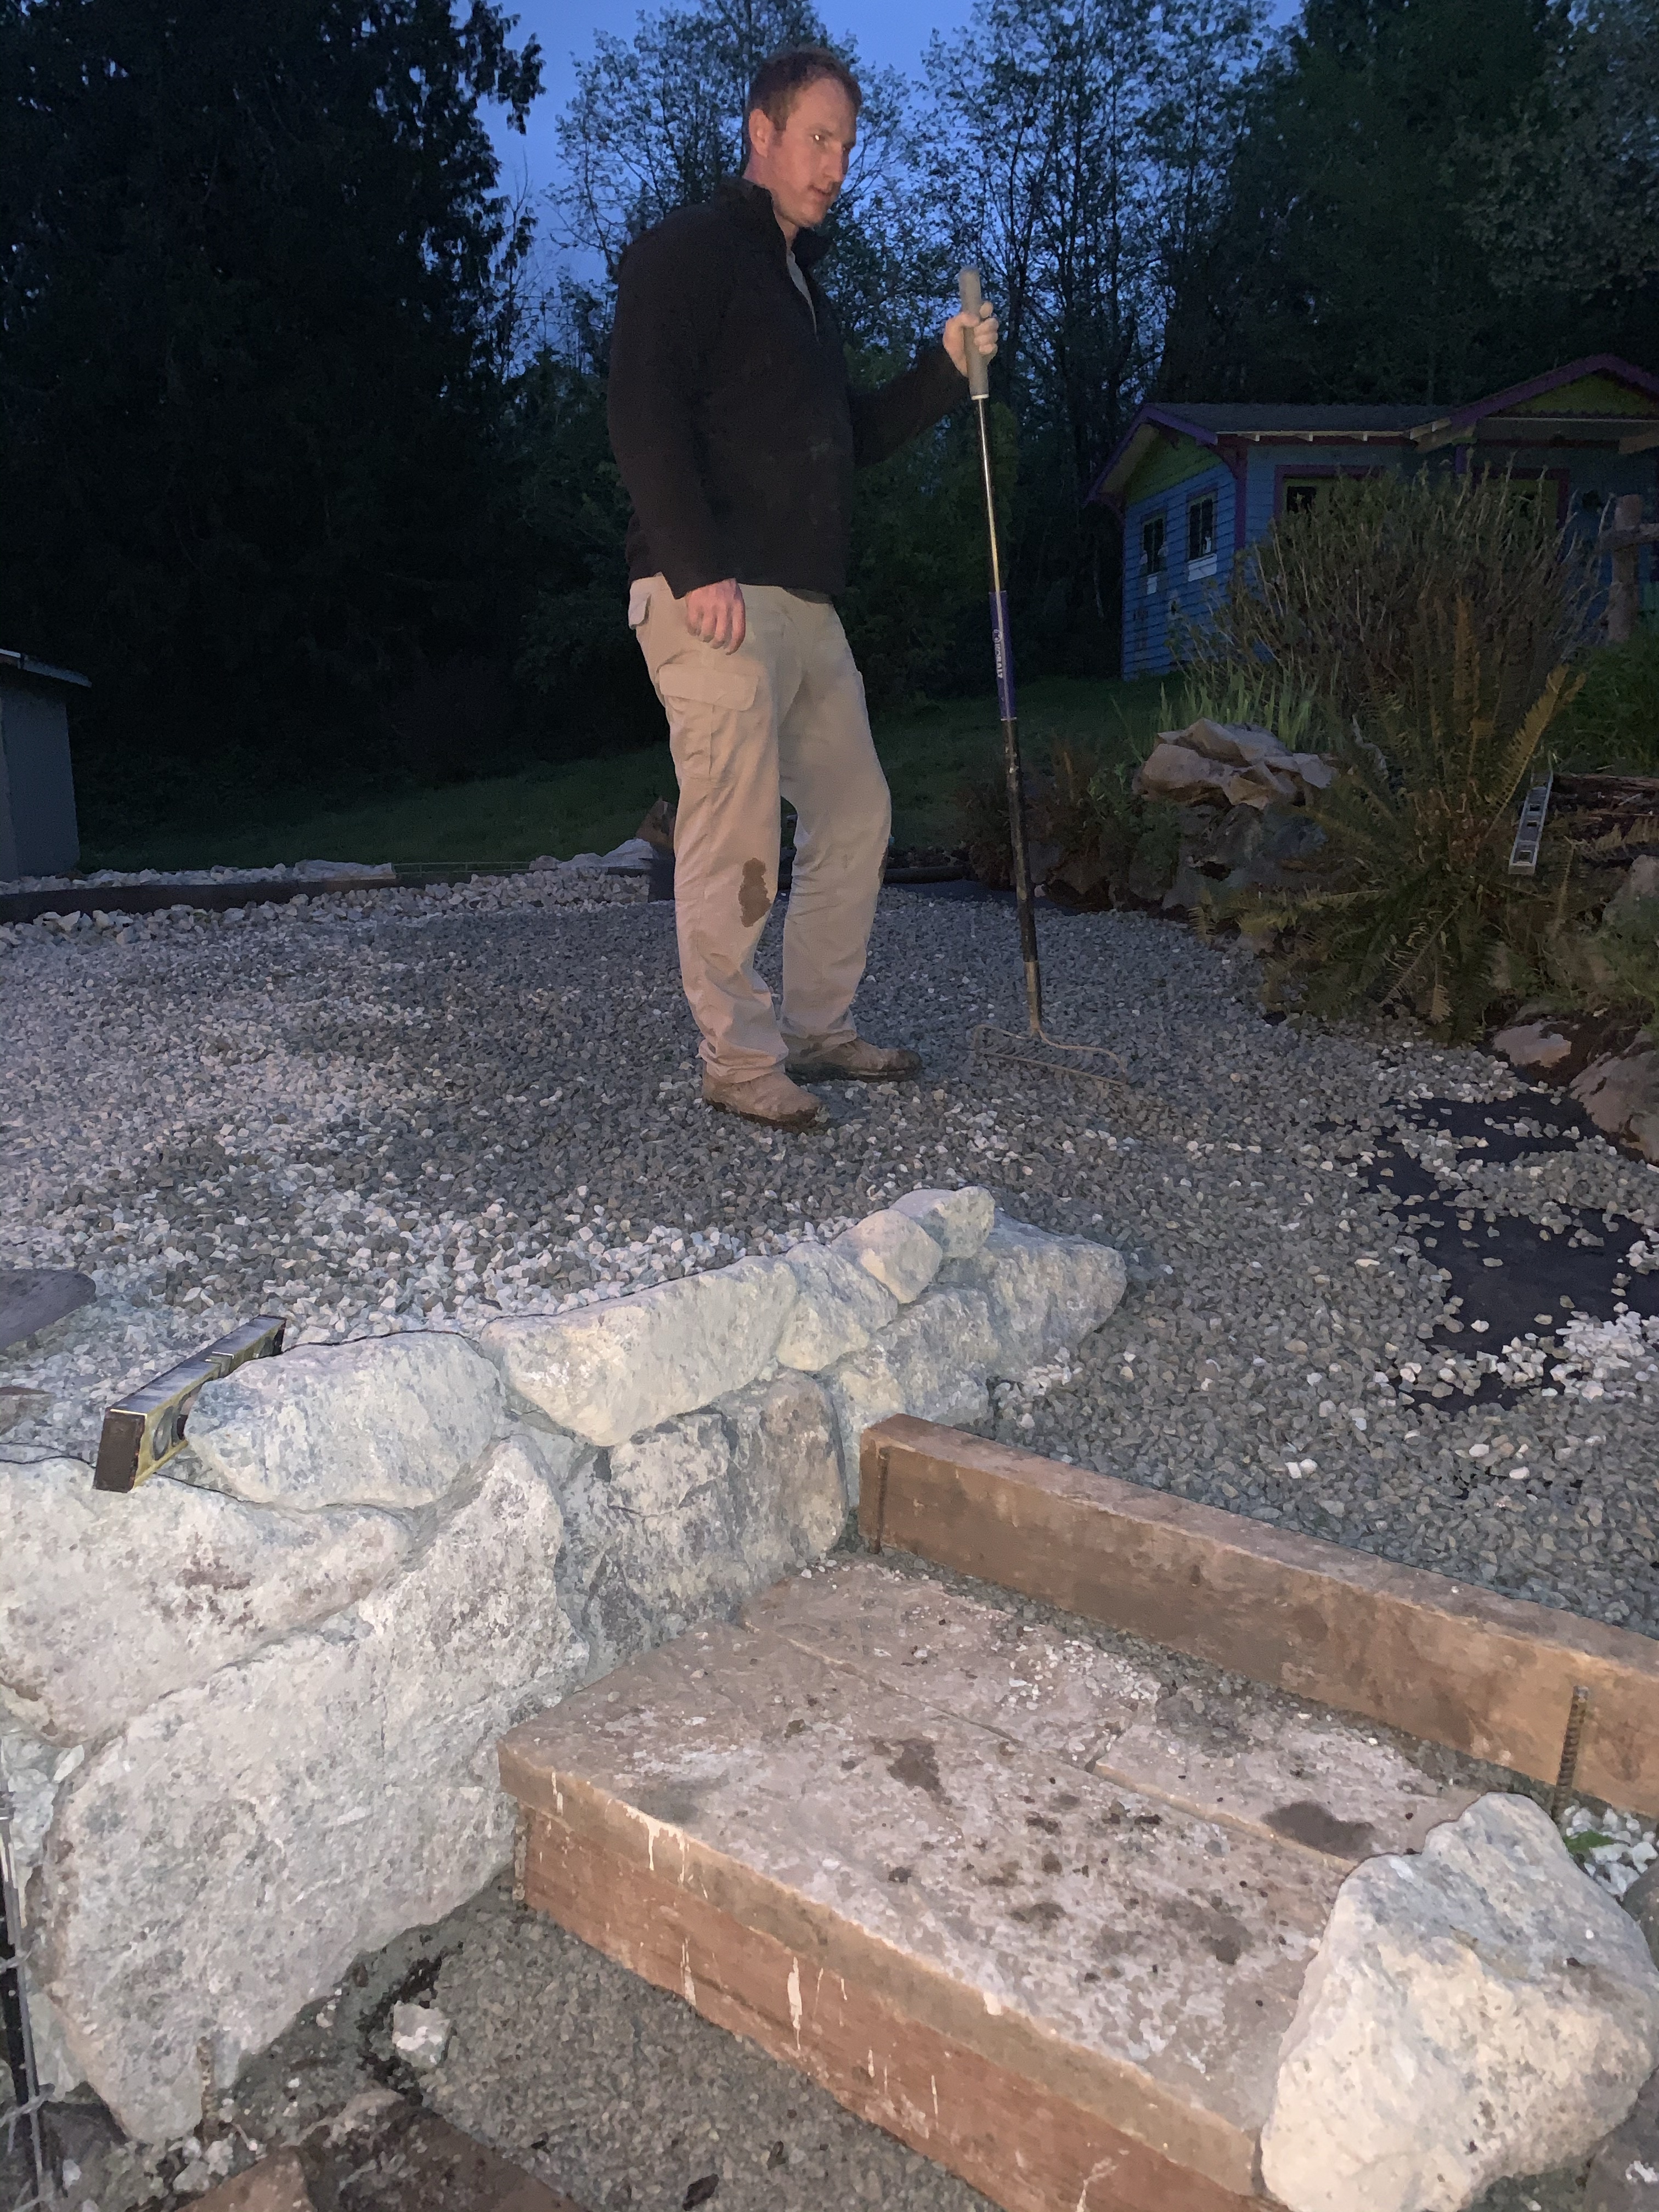
After the baskets were full we began filling in the hillside. We used dirt from around the property from other projects we had left over. Along the backside of the wall we continued with rock as to not cover the drain with dirt. We used “railroad ballast” or “2 inch chip” and then filled in with dirt up to the rock. We laid down landscape cloth and covered it with “5/8 washed rock” because it looks nice and is easier to walk on.
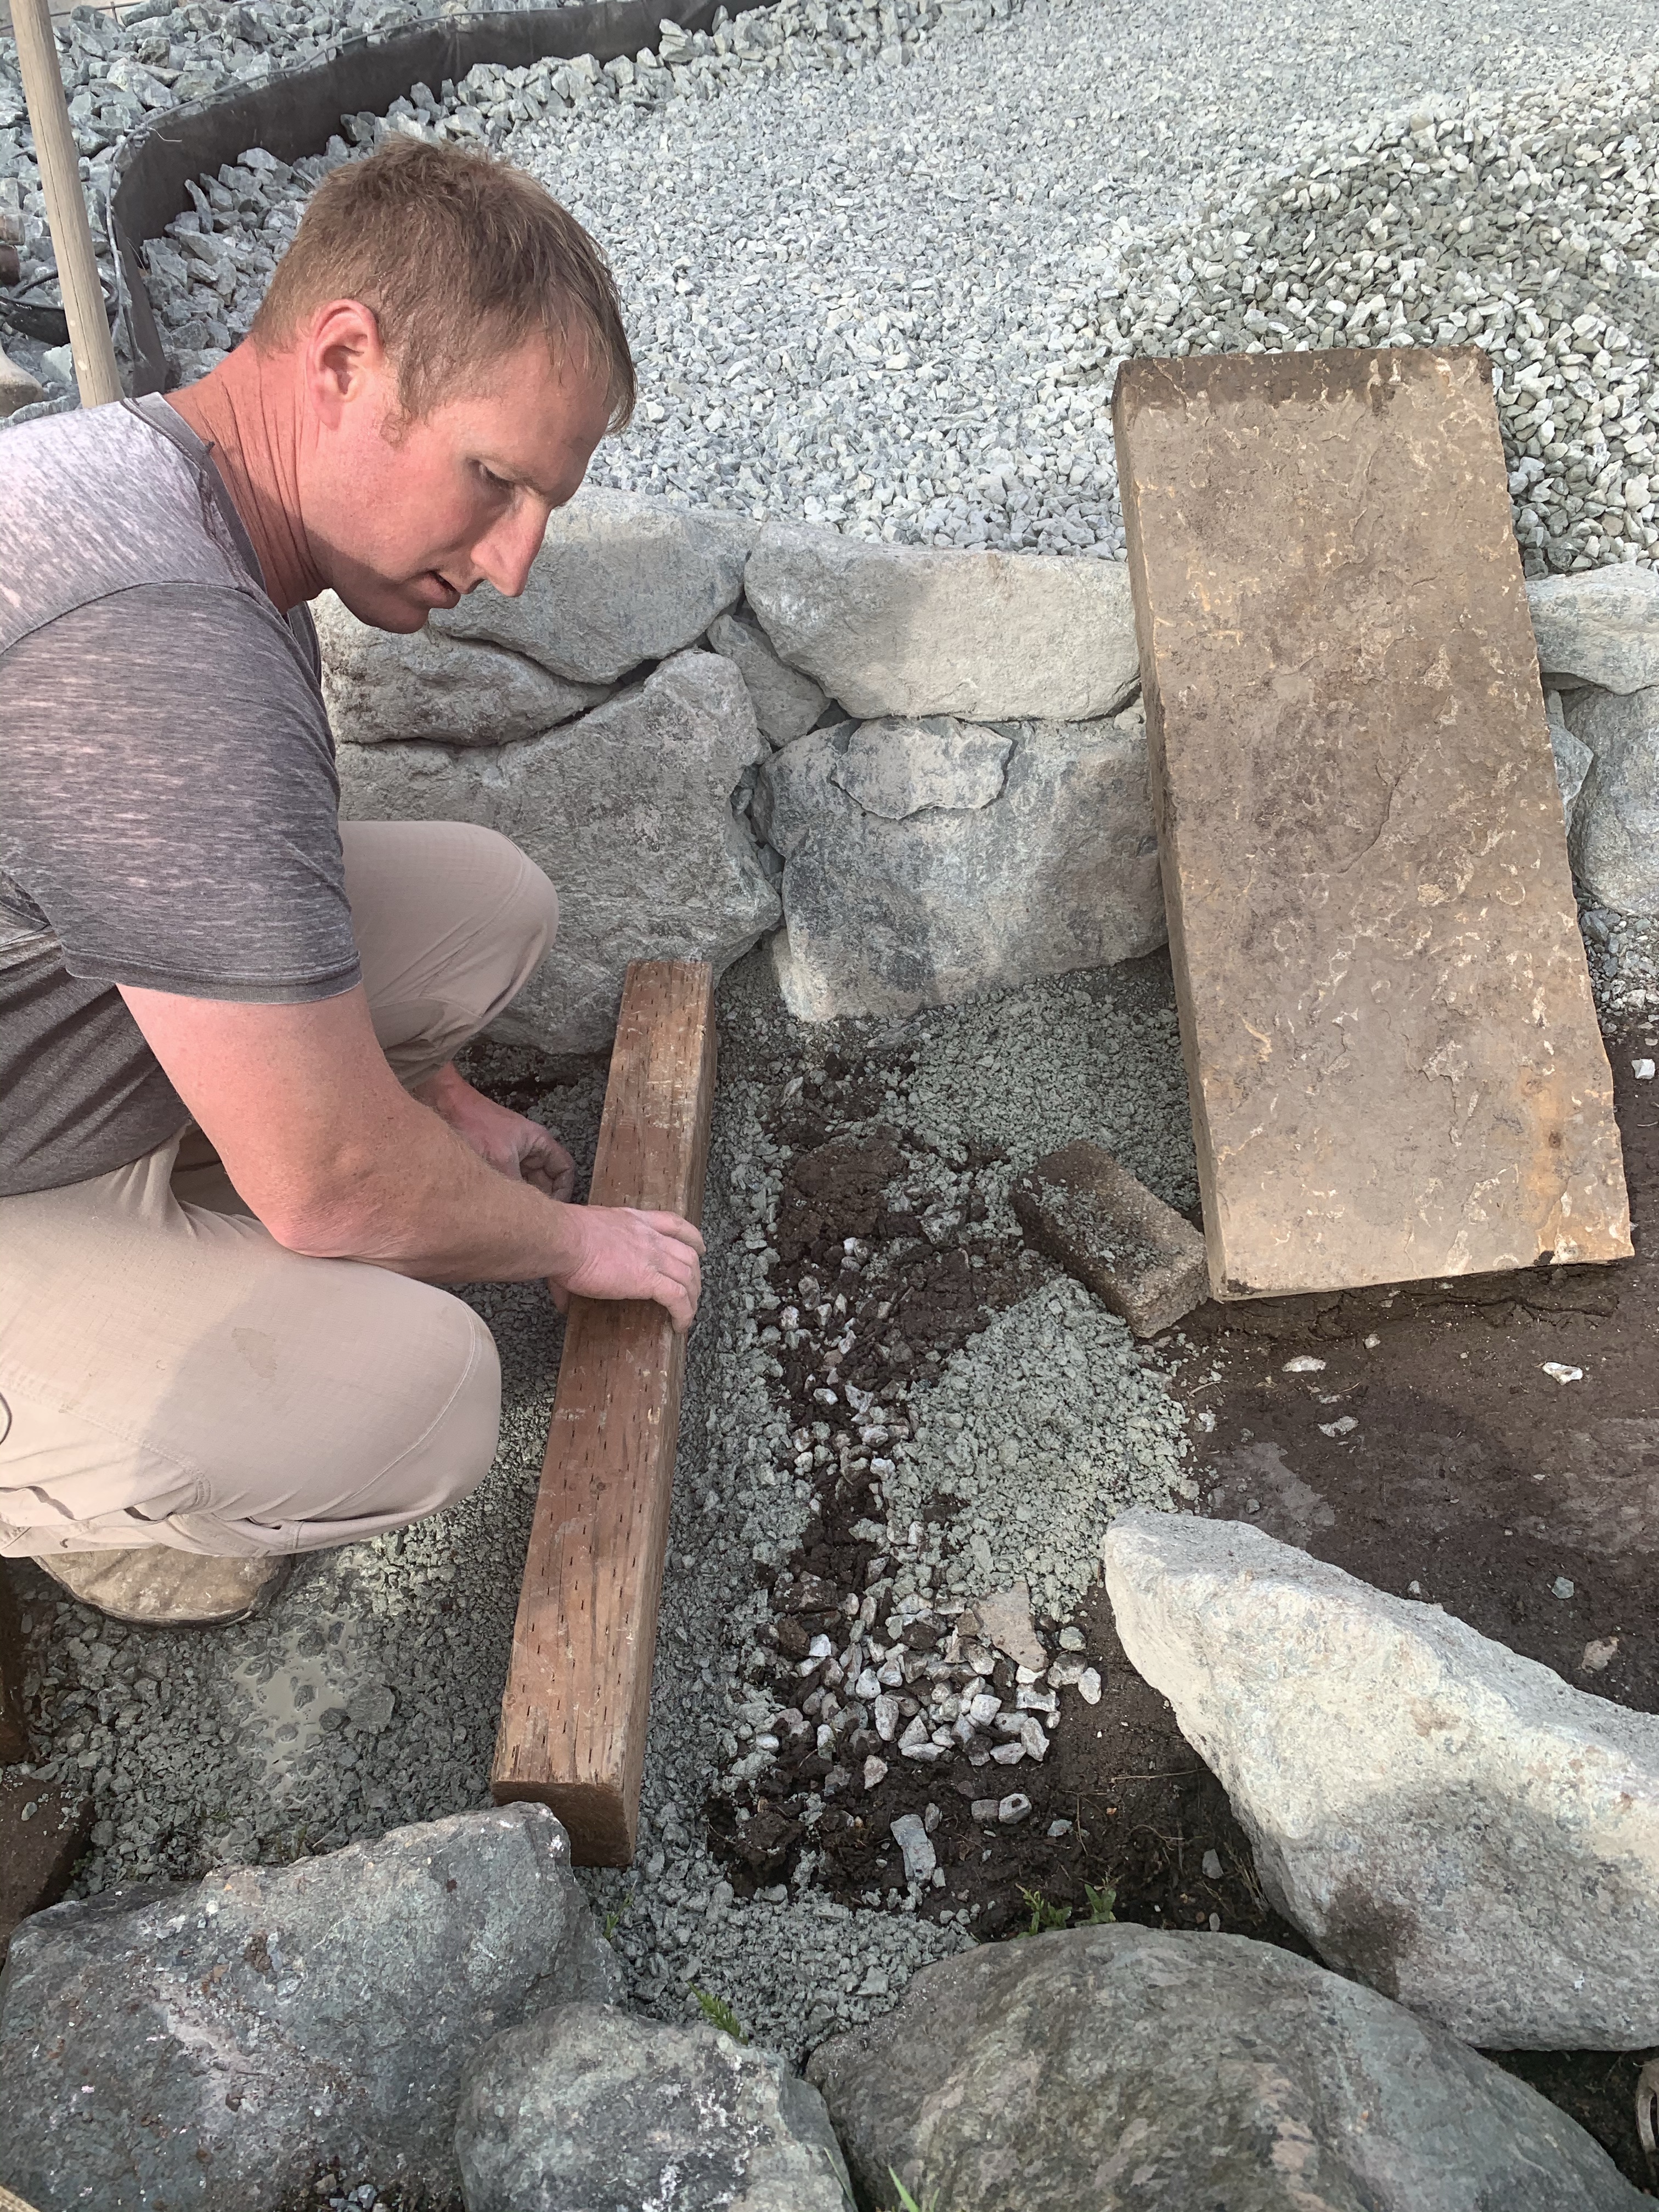
The final part of the project was to build a step. Since the area we were working on was a hill we did not want to just have a ramp. We were afraid the rain would make it slippery and the gravel would create unstable footing. We used some left over pieces of pressure treated boards for the risers. (Have I mentioned we don’t throw anything away?) For the steps we were able to find some stones around the property that had been left over and they matched nicely.
*Tip: Make sure when you are laying bricks for walking paths that you use crushed gravel under them. It is also important to tamp down and pack the gravel so your stones stay level.
Building the steps
Costs of the project:
Cattle panel: $20/panel, we used three in our space. Different wire may be a little more expensive but not by much.
One man rocks: $100 total. By going directly to the quarry we were able to save a bunch compared to going to the landscape store.
2” chip or railroad ballast: $25 again directly from the quarry
We bought our new house back in June of 2019. When we were shopping for homes the existence of a mud room was a must! We did not have one in our previous house and after years of trying to work around it we finally just broke down and built an addition of a mud room. We knew we did not want to go through that again so it was very important to us that we have a mud room space. We have acreage, animals, kids and mud! And we need a space to trap all of the chaos before they enter the rest of the house and create more mess!
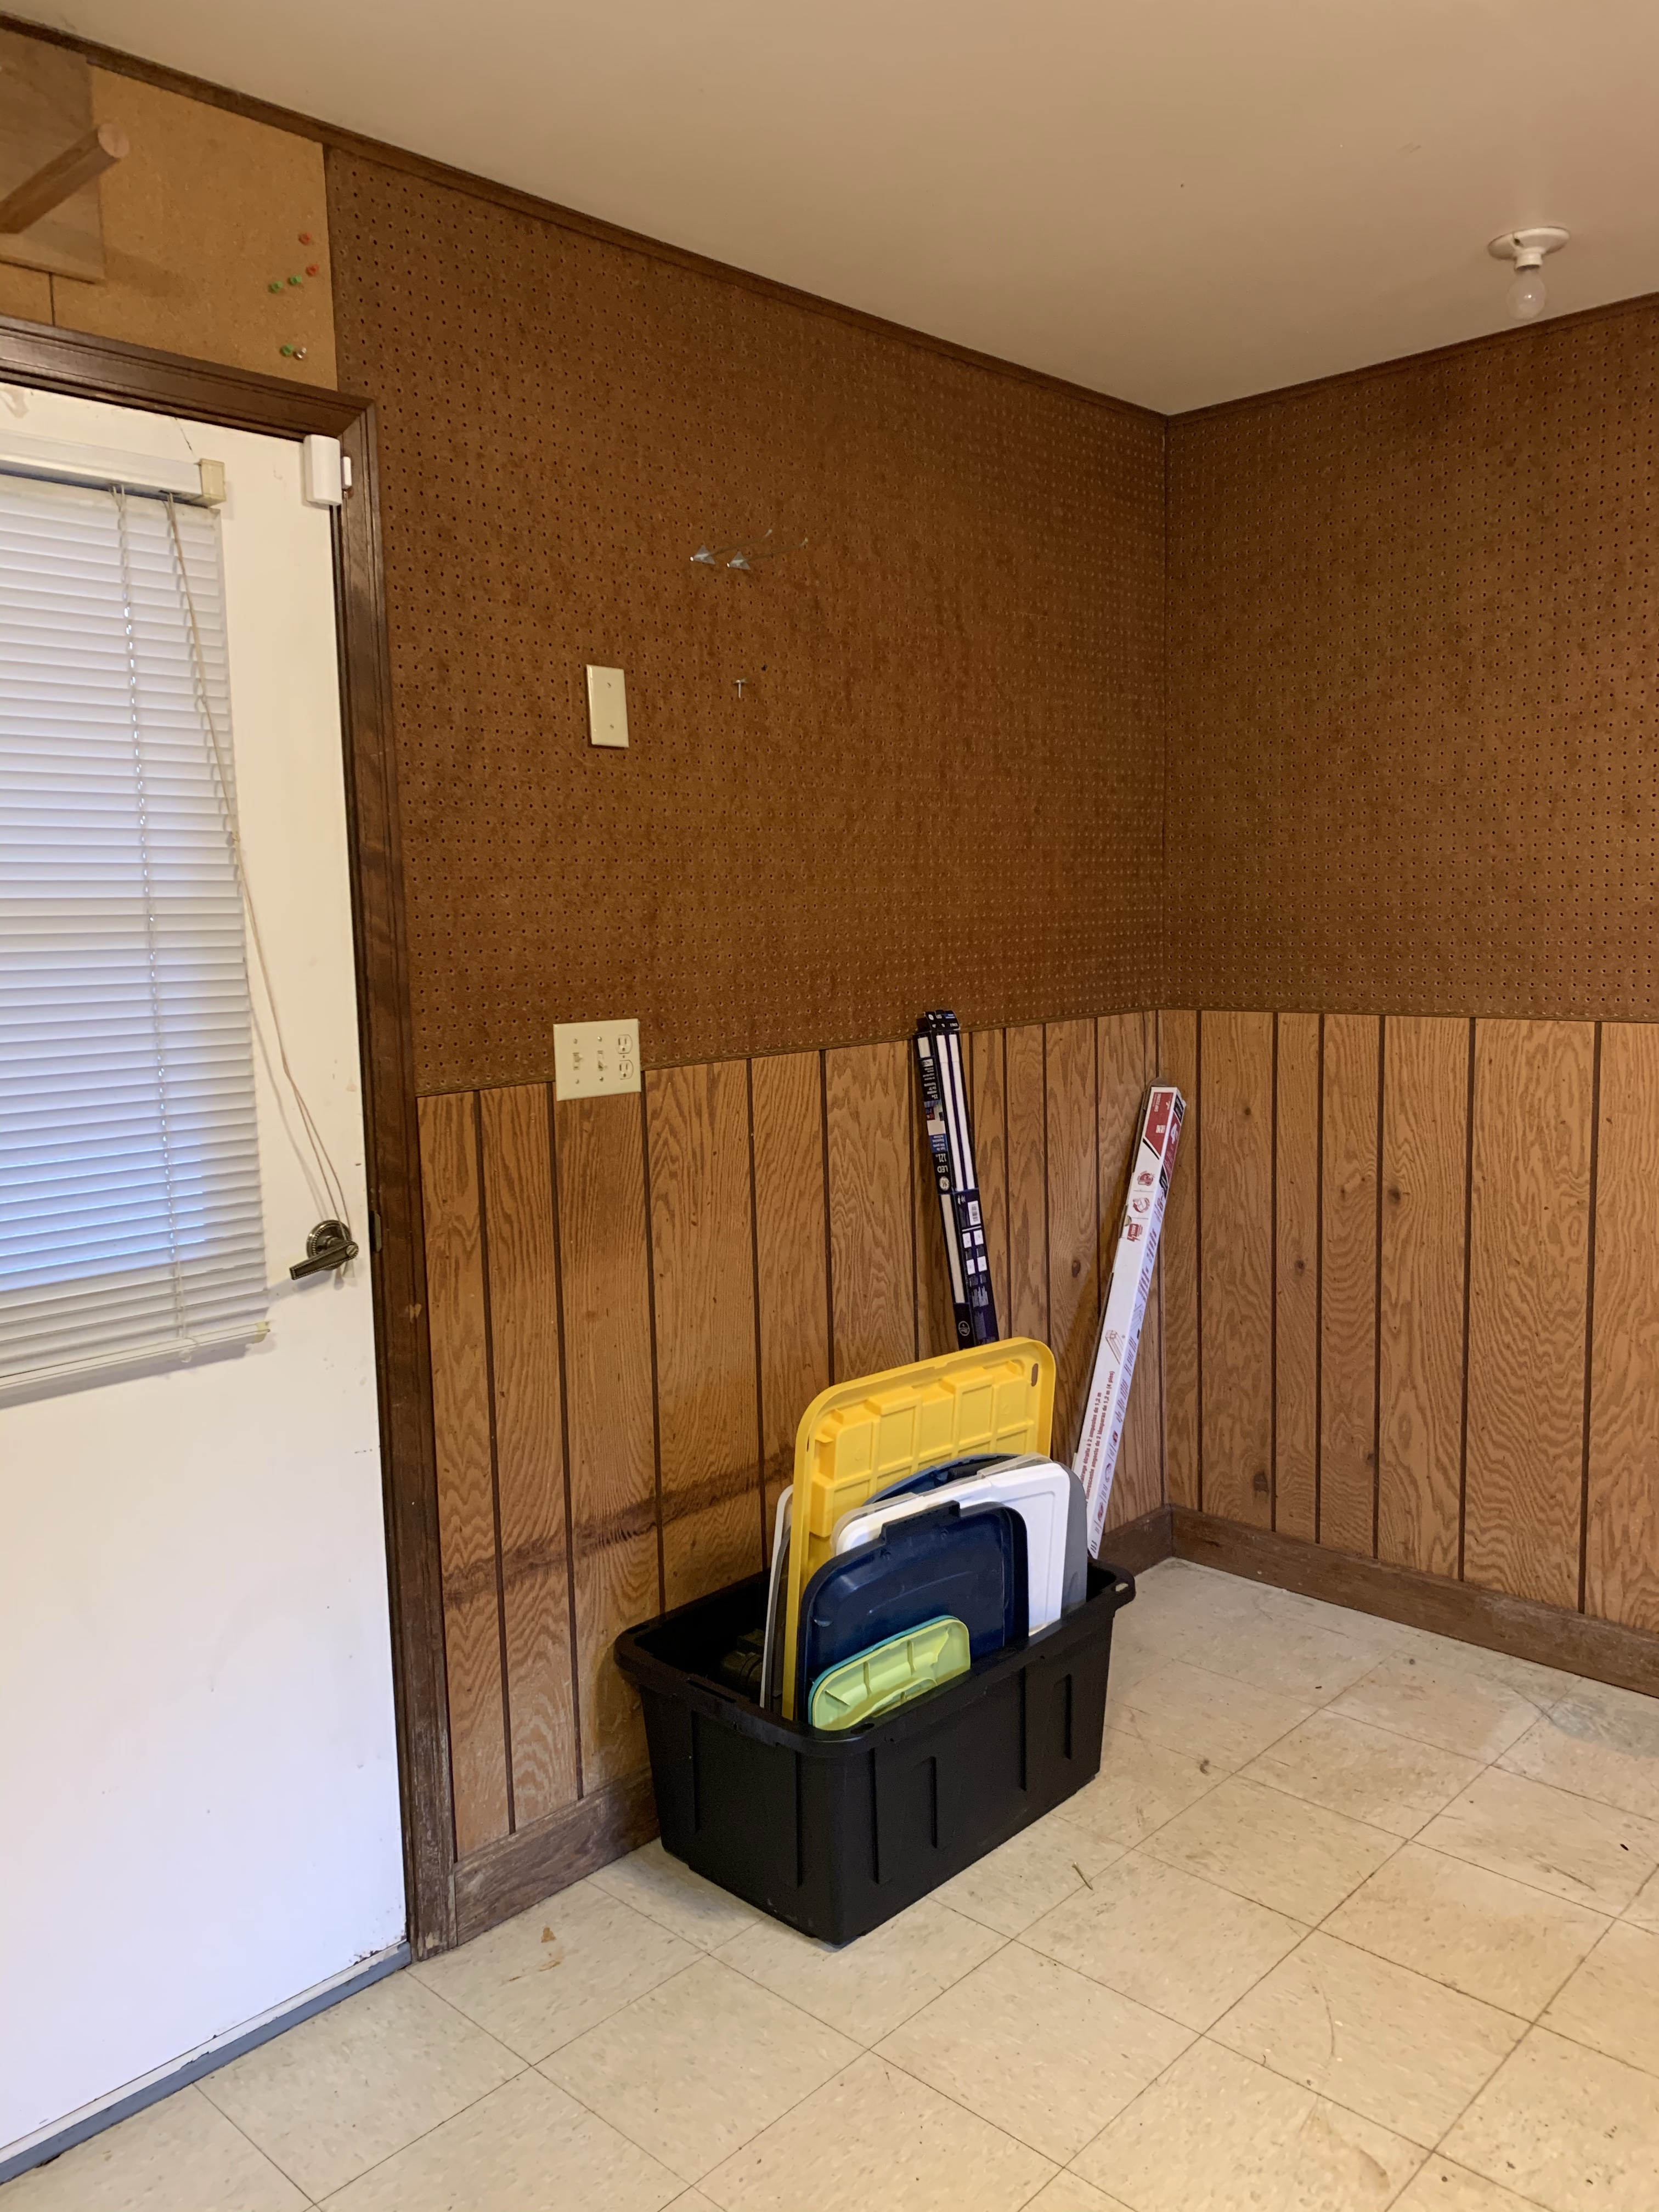
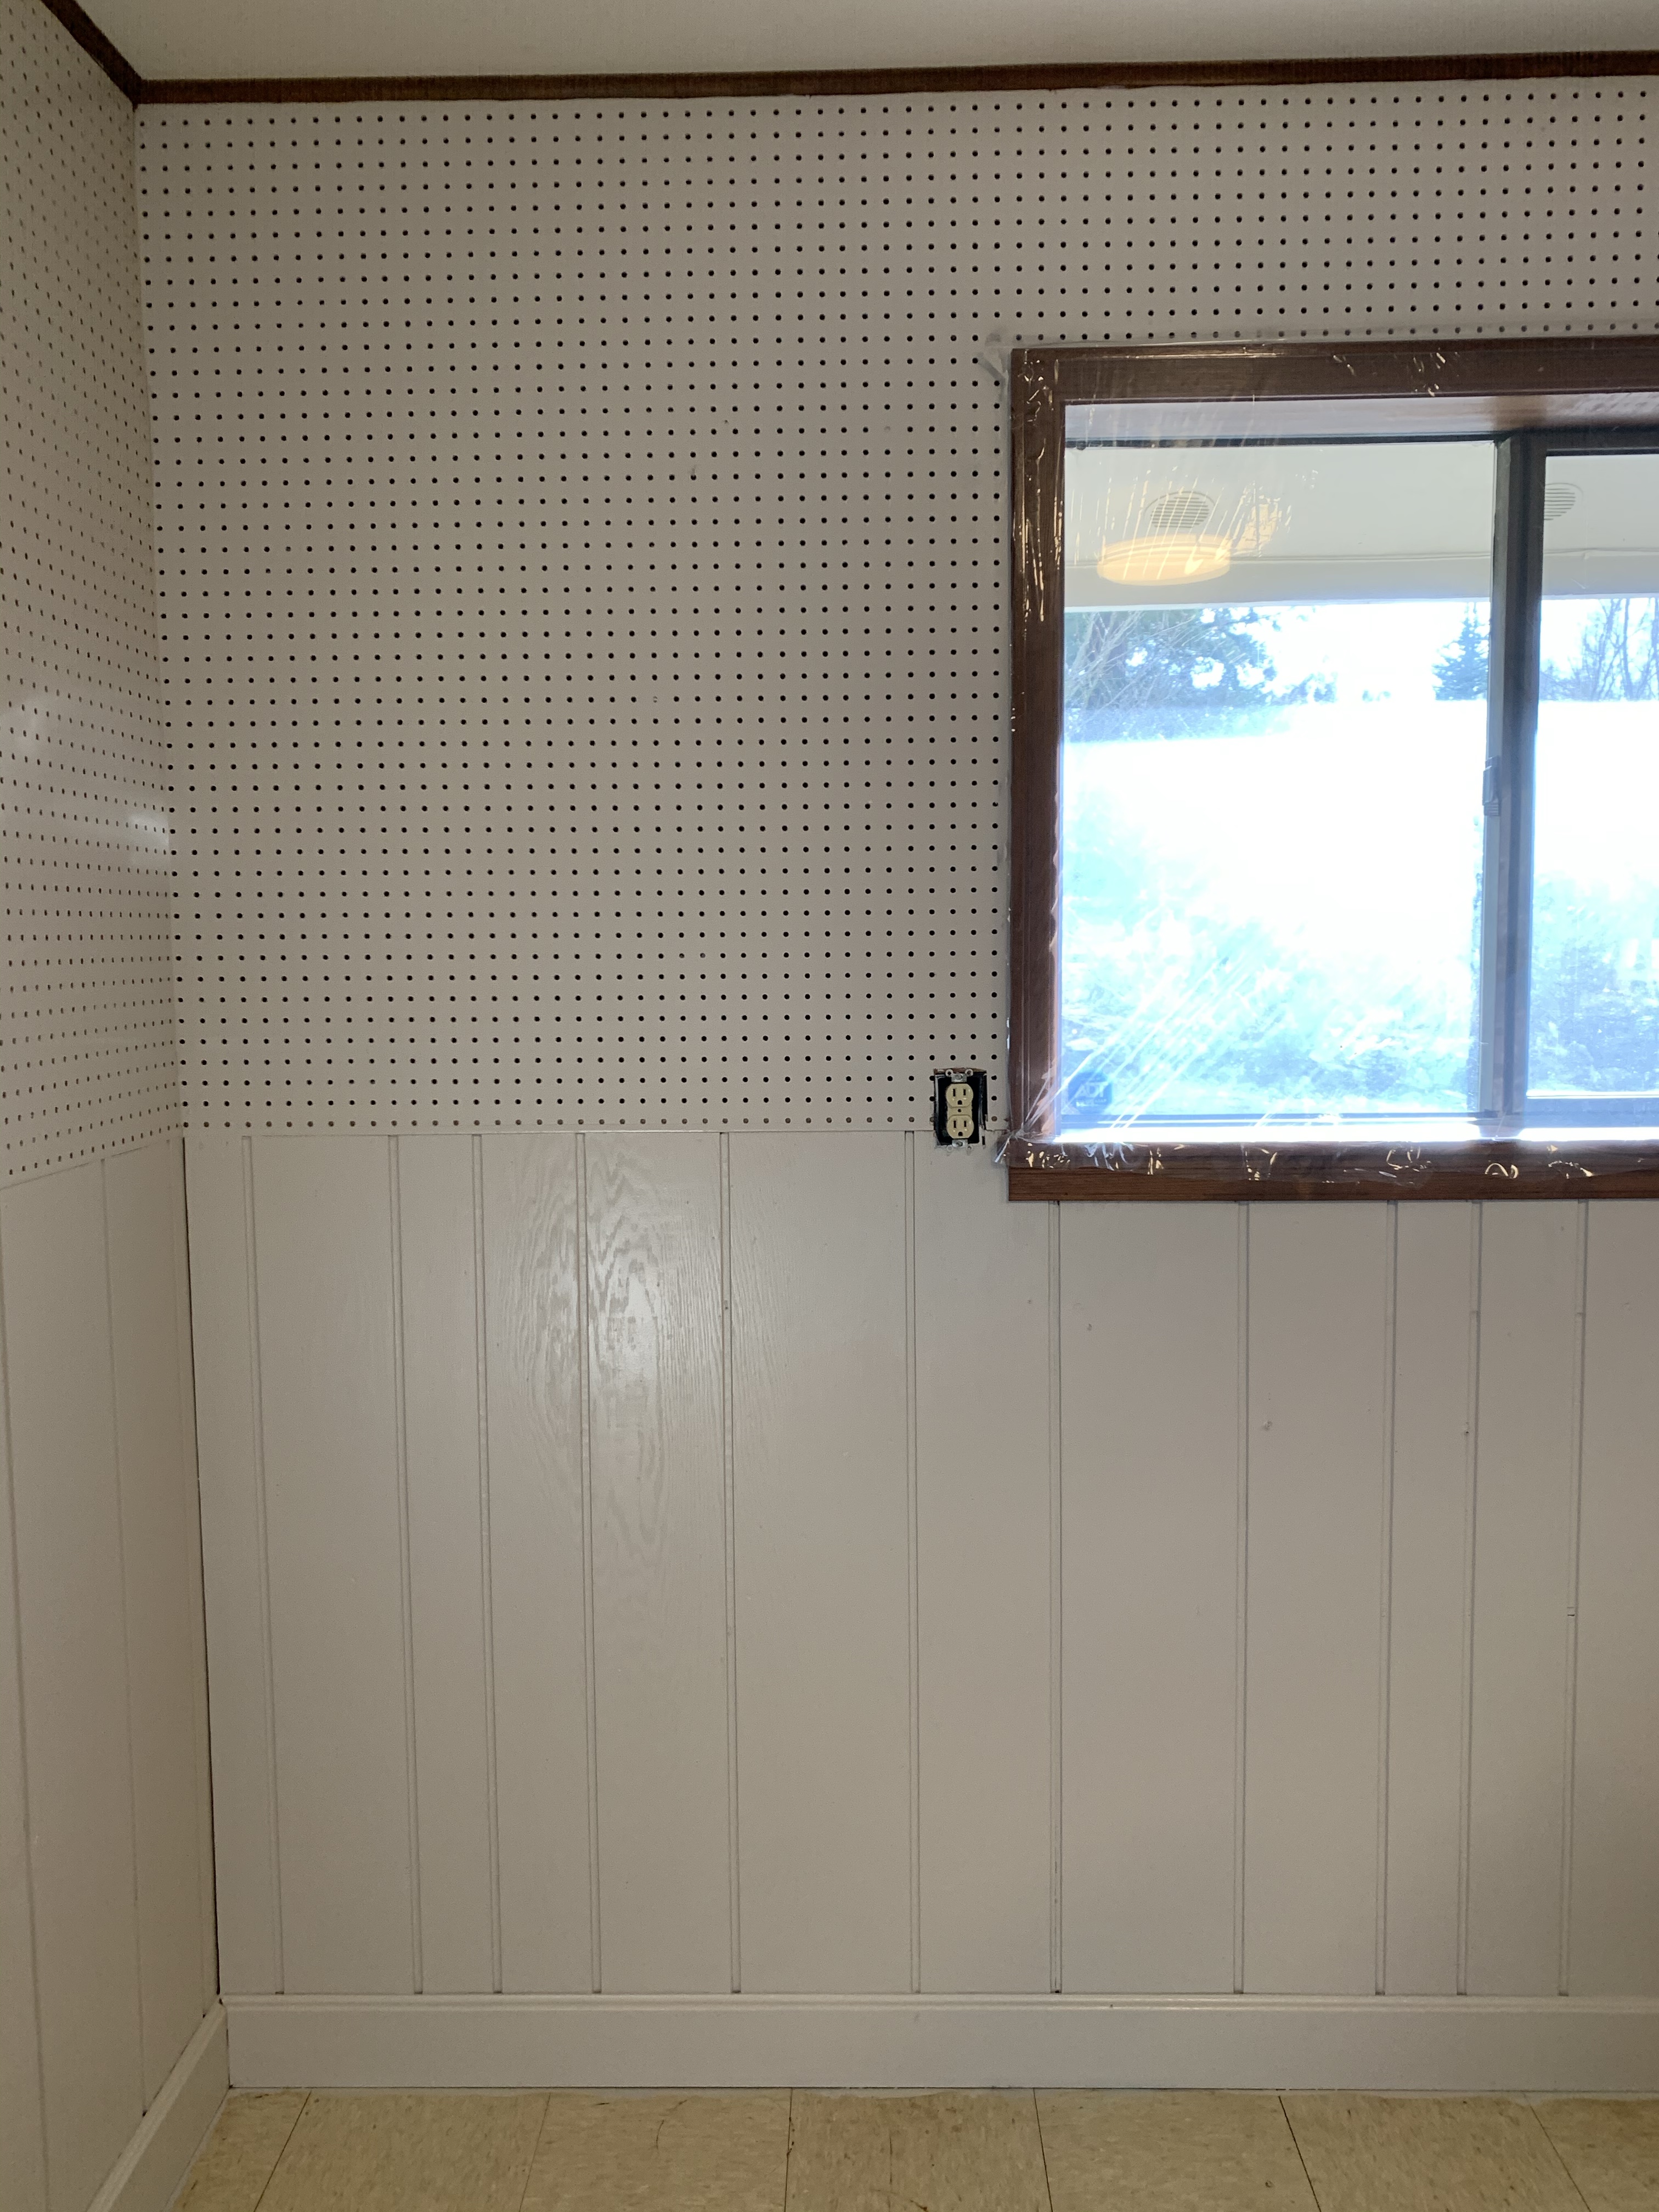
This house had an existing mud room. It was somewhat functional. It had a door to the outside. It had a sink. It had a cabinet. It had electricity. By all accounts it was a reasonable space. It just needed a little help with function, organization and appeal. So, I got to work.
Door to the outside and into the house.
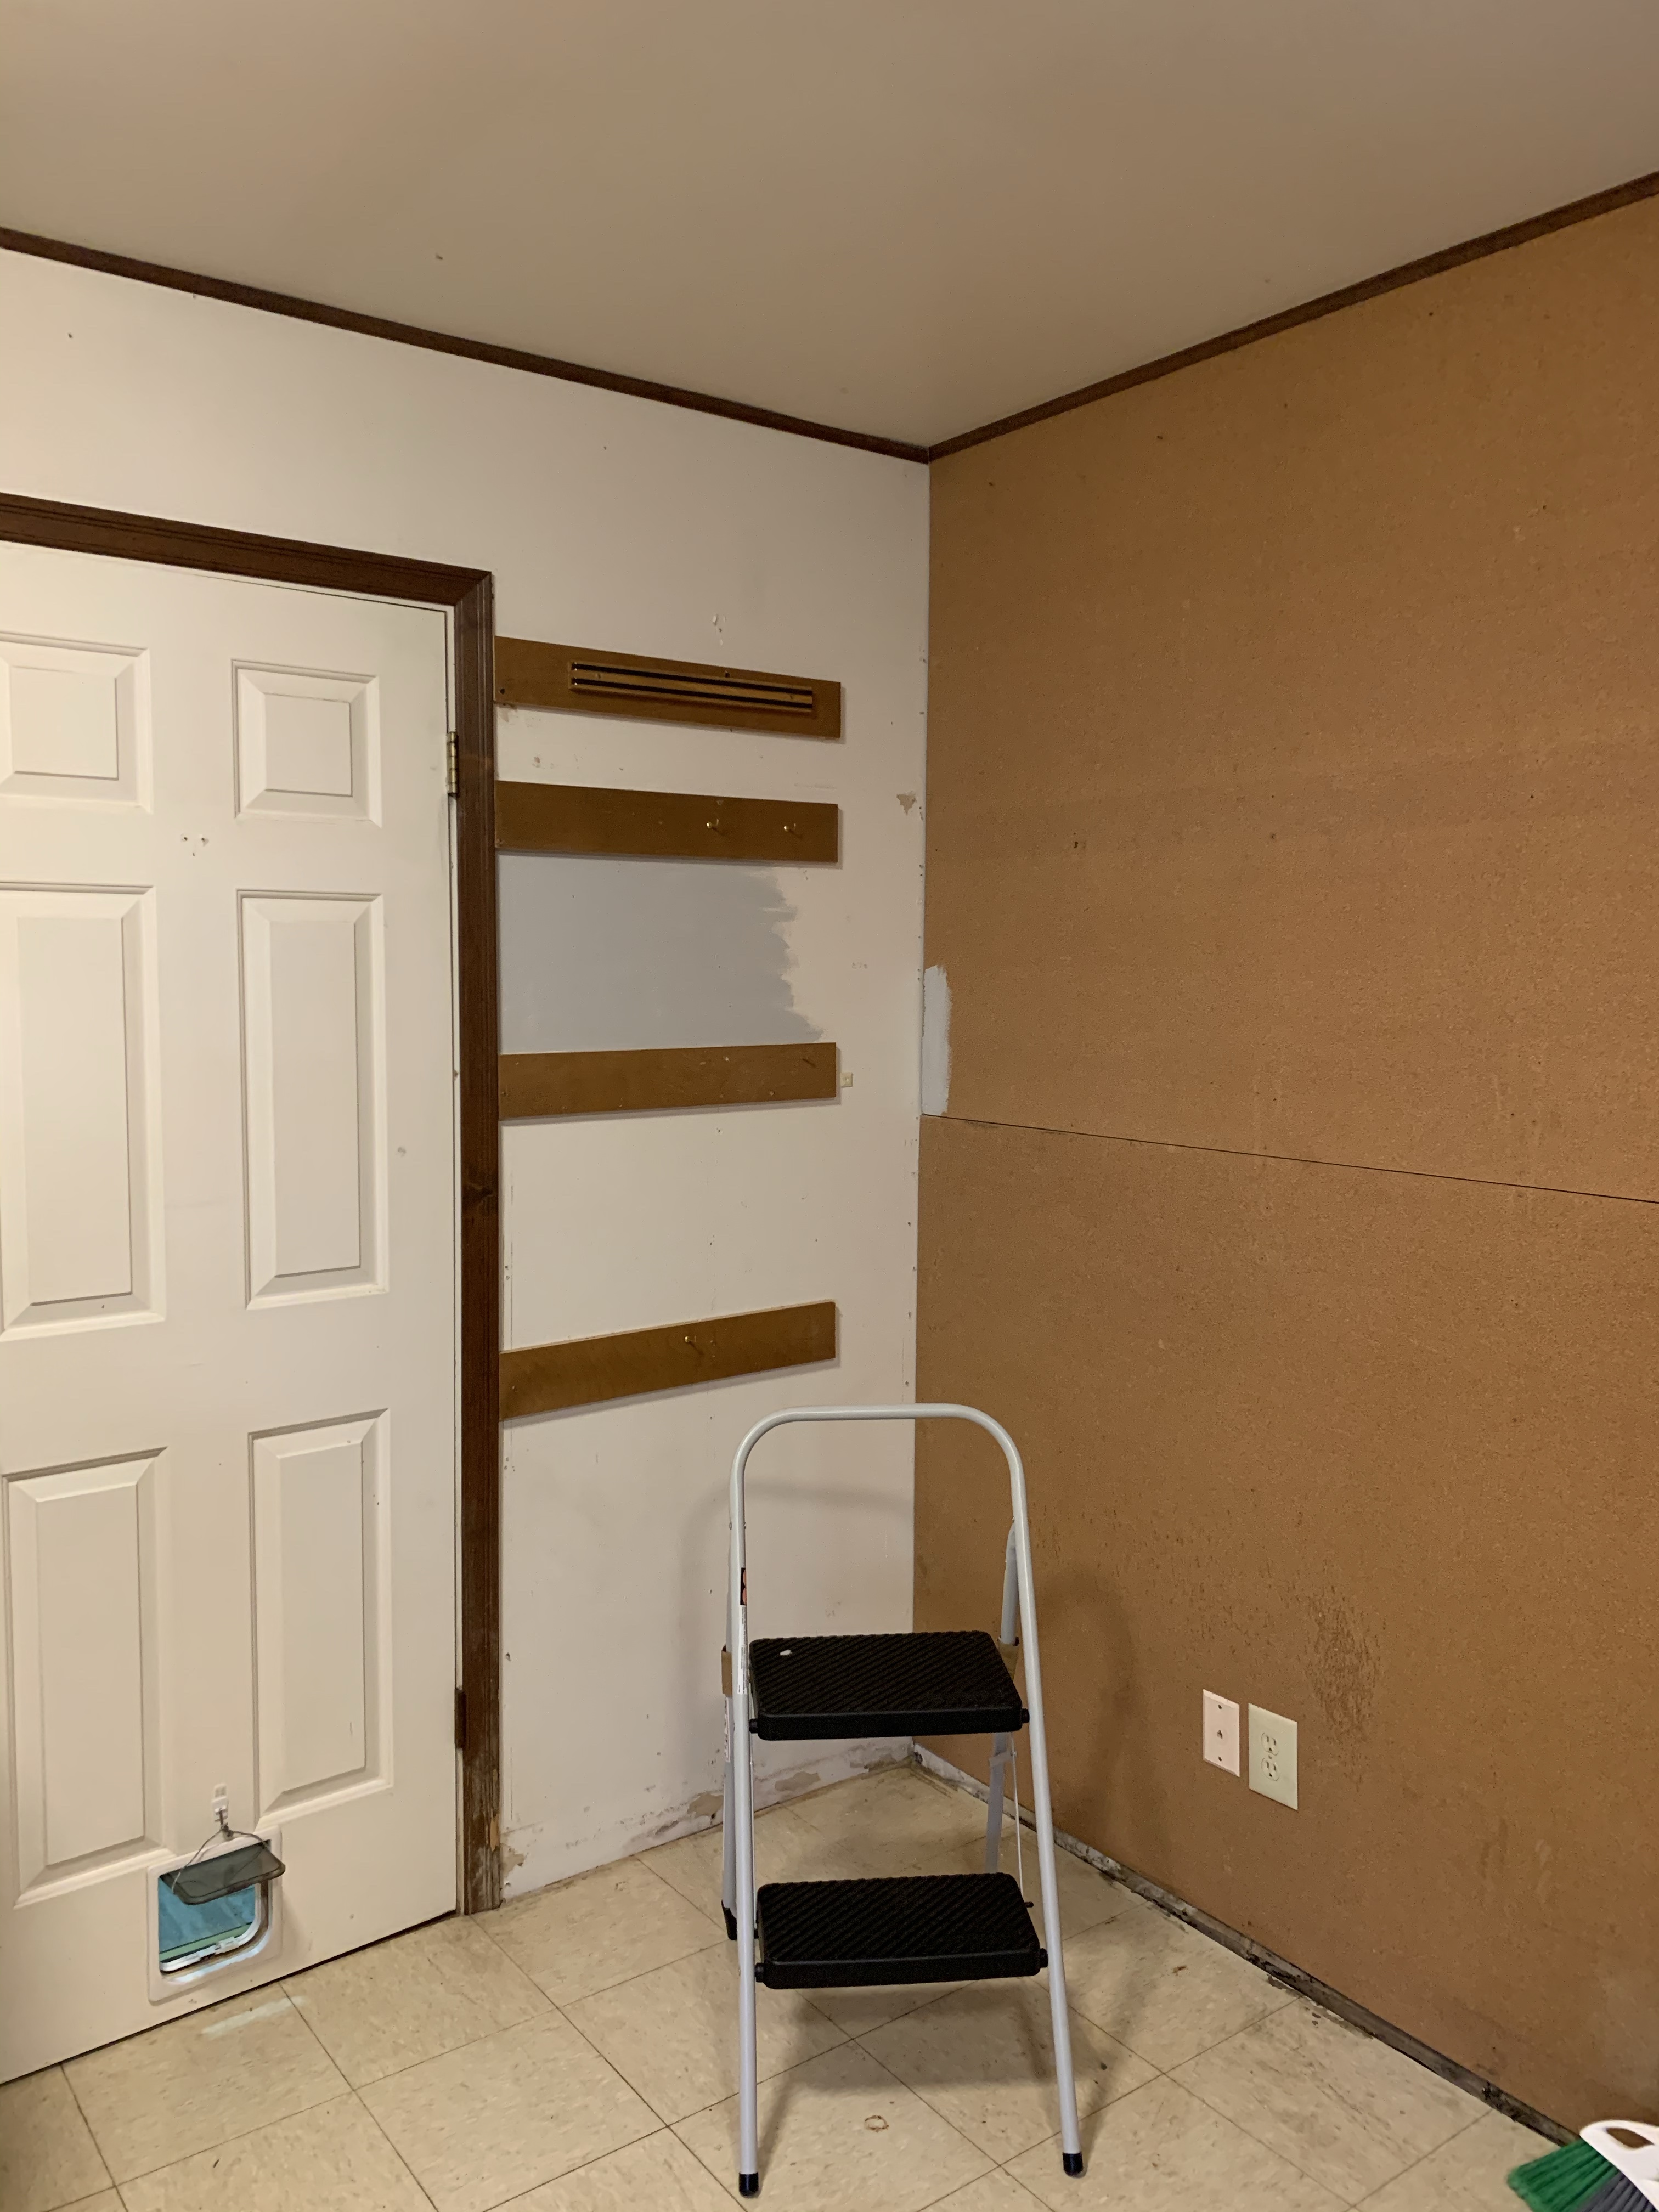
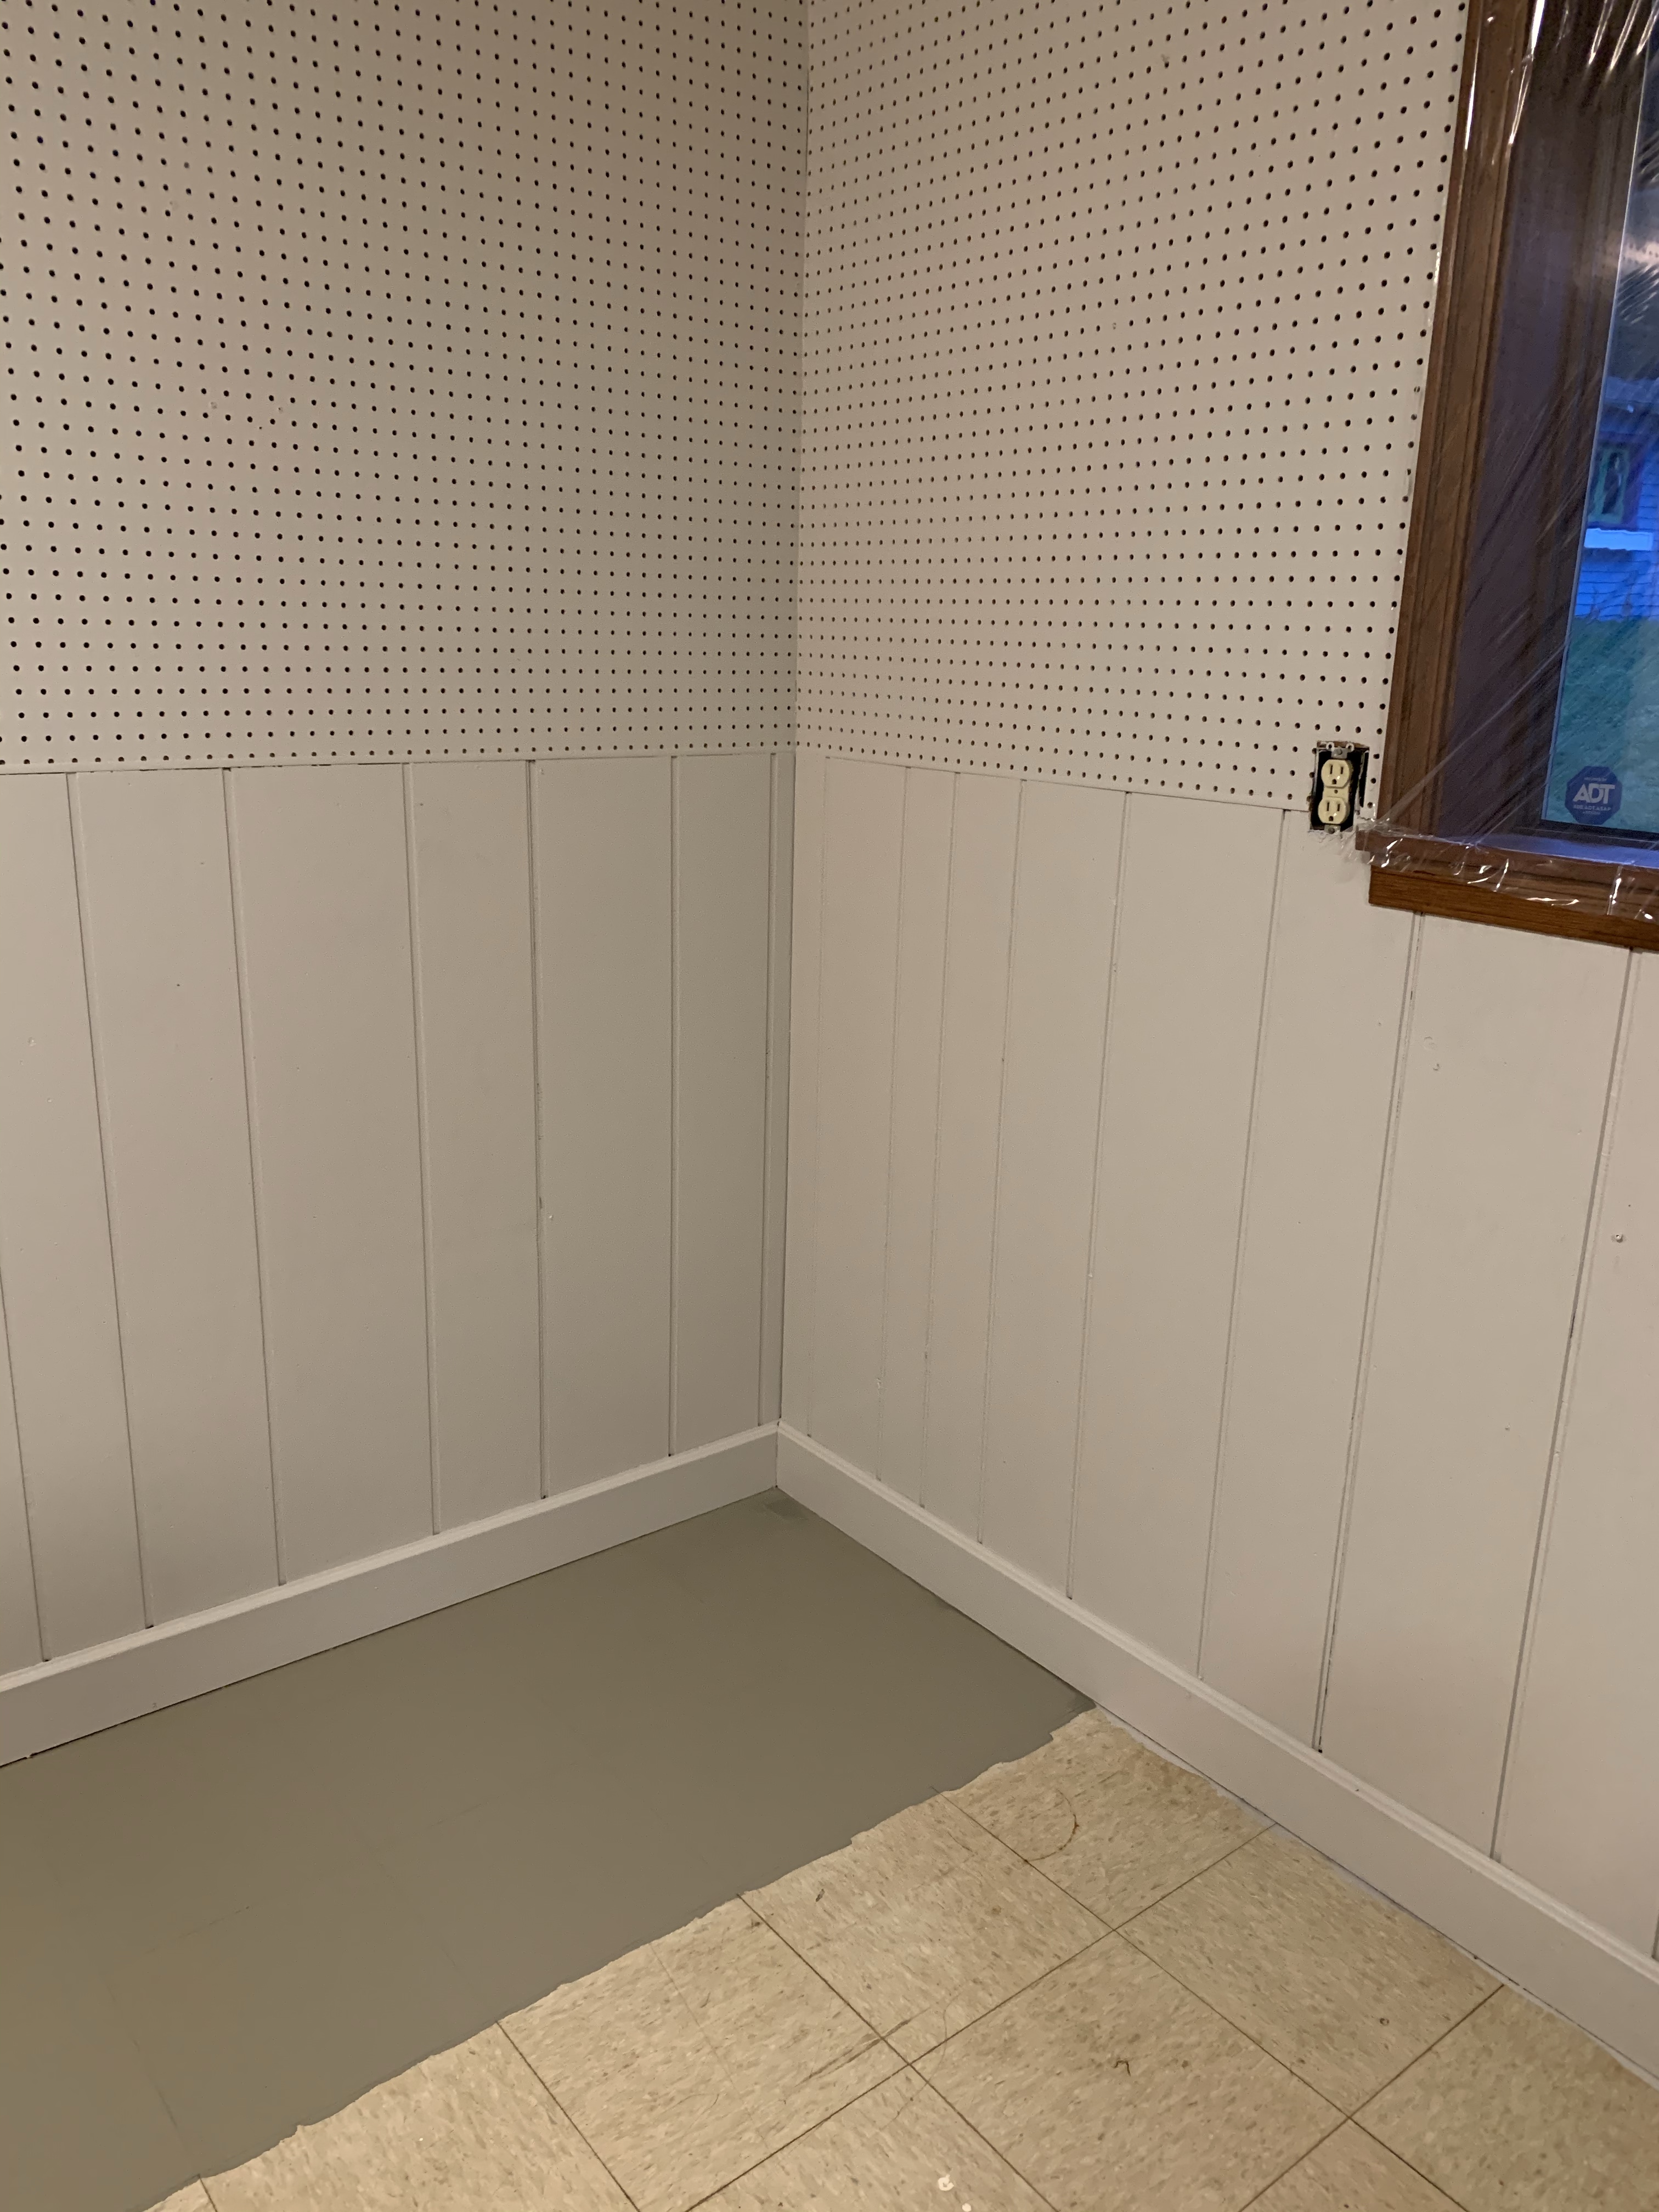
As you can see from the pictures the visual appeal of the room left something to be desired. There were cork board walls, old paneling and peg board. The floors were that old tile that you would expect to find in your middle school art class. Nothing was in bad enough shape to justify tearing it out and replacing, so after extensive research I was able to find a paint for both the walls and the floor that would hold up to the kind of abuse that a mud room takes.
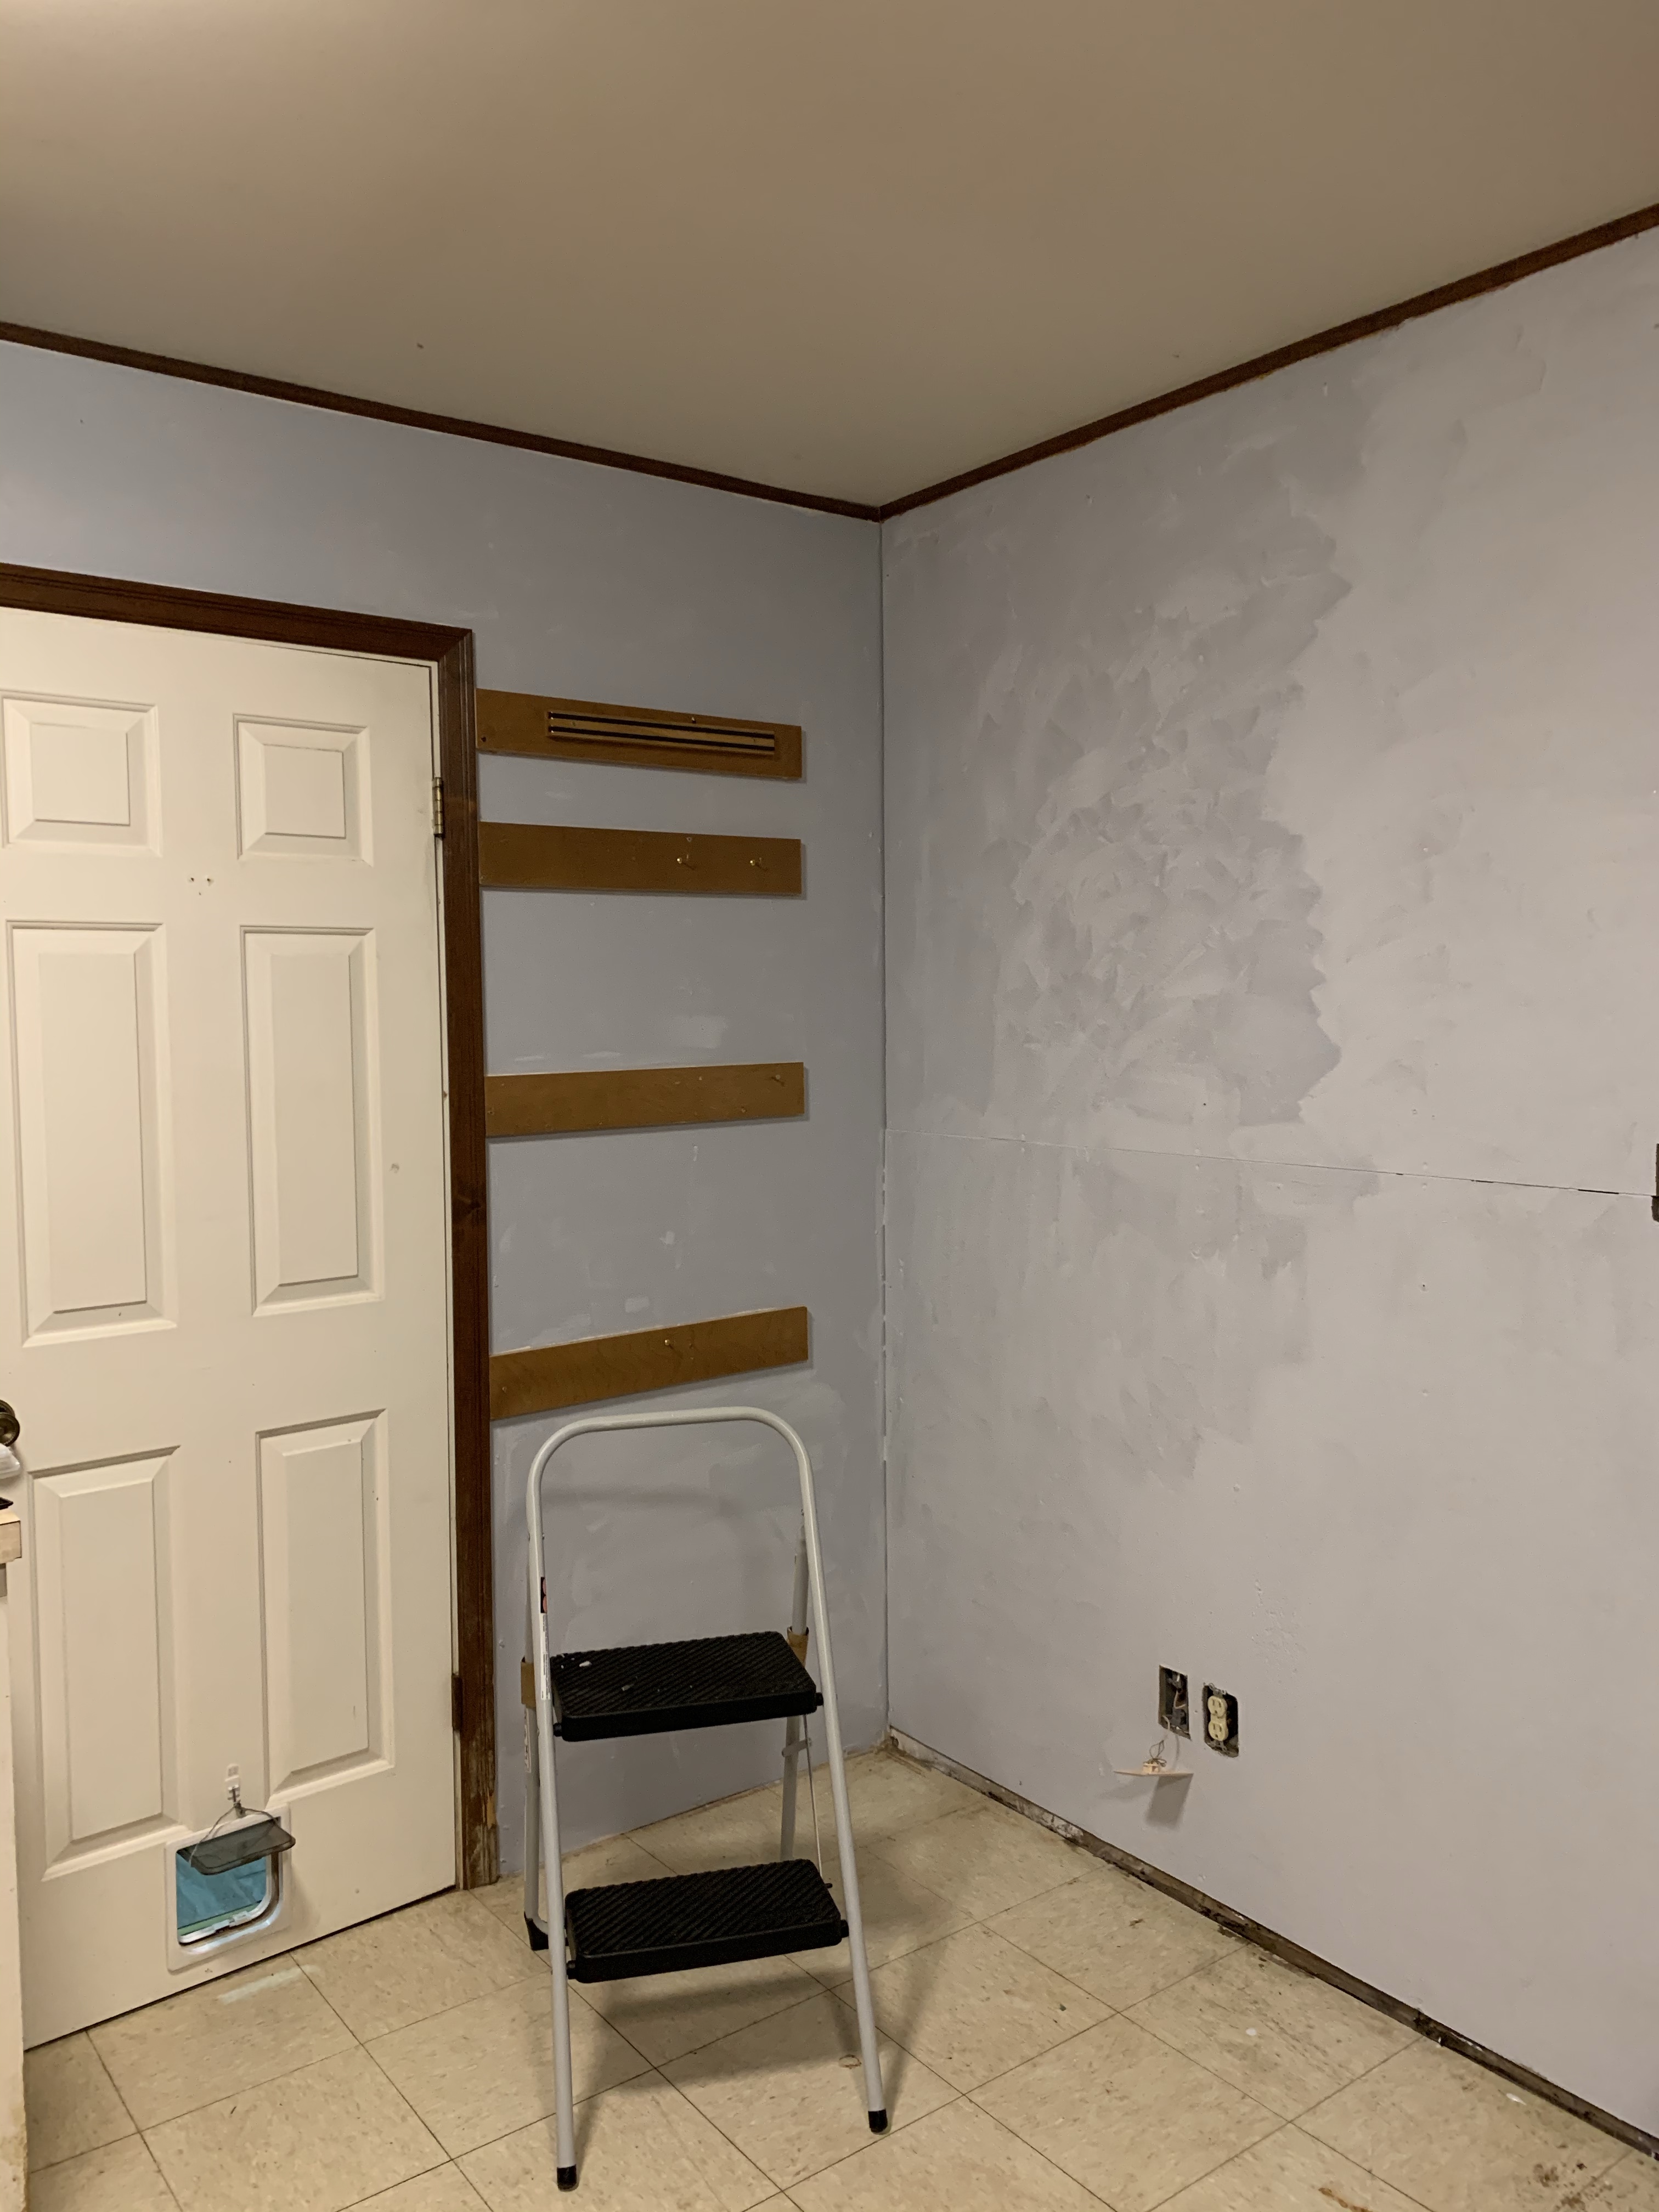
I primed the walls using Valspar Stain Blocking Primer and Sealer. I chose to prime as well as use a paint and primer because the paneling and cork were going to prove to be difficult to cover up.
For the wall color I chose “Alpaca” and used Infinity by Sherwin Williams. I loved this paint. It was more expensive than some of the others but it went on like a dream and I only had to do one coat.
**Tip: I never finish a painting project in one day because there is always an interruption. So if you have to hang it up for the night, take your roller or your brush and put them in a ziplock bag and close them up. They will last for several days without having to wash them and then you can clean them up when your project is finished and they are less expensive than the “roller or brush keepers”.
Kids are good helpers and love getting messy!
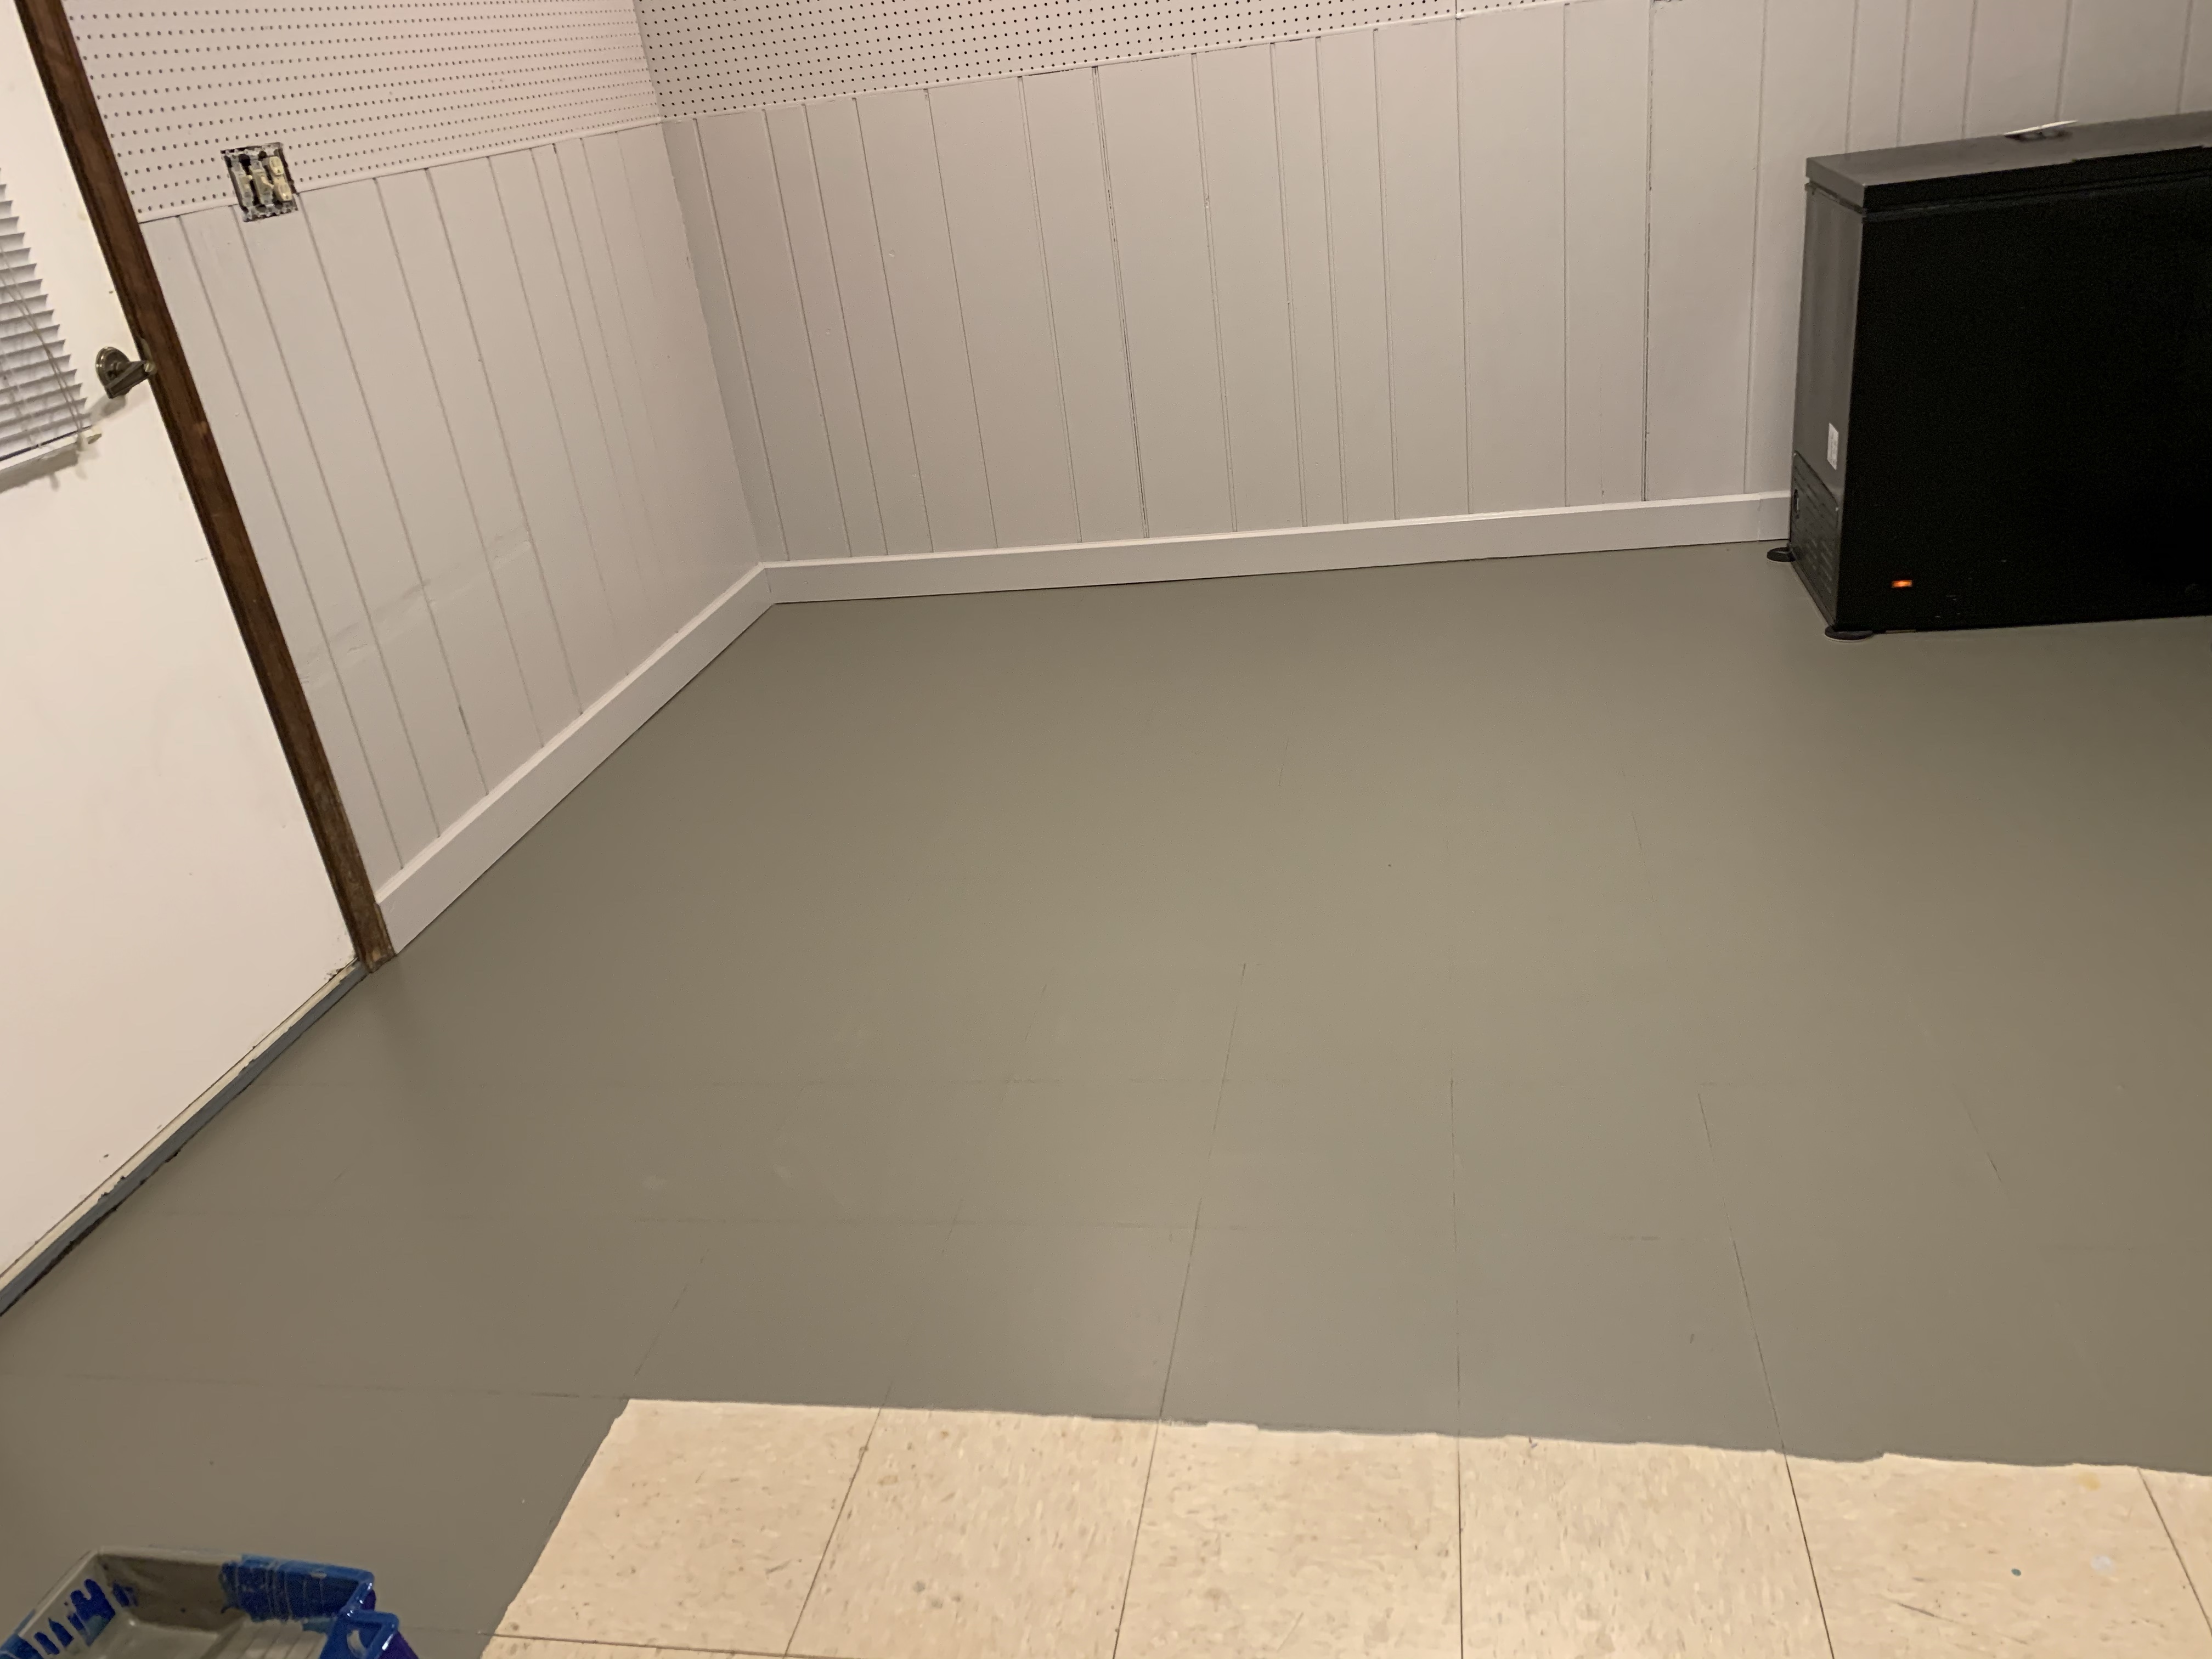
For the floors I decided to paint them rather than rip them out and replace them. They were in good shape but they were just ugly. The prep work was the most difficult for the floors. I chose to paint them using Valspar Porch,Floor and Patio Latex Paint. I had to make sure that the paint was going to stick so I got down on my hands and knees and sanded, by hand, the floor. I had to remove all of the shiny surface of the floor to ensure that the floor paint would stick and cure to the floor. I used a hand held sander with the biggest grit of sand paper that I could find.
*Note: Be sure to not cut out or skimp on the prep. This will make or break the project.
After I sanded, I had to make sure that I had all my mess cleaned up. I vacuumed up the dust with the shop vac and then, again on my hands and knees, scrubbed the floor, cleaning and making sure I did not miss any area where I may have left it shiny. Once that was done, it was time to paint!
I painted the floor in sections. This was mostly due to time and I wanted to make sure that I was going to like what I had going on. I decided that it was looking good and that it was time to wrap up my project. I let the floor dry and cure for about a week. The paint said it would be foot traffic ready in 24 hours but it was cold so it took longer than the 24 hours.
•Product review:
Valspar Stain Blocker Primer– I give this 4 stars. It is a good product. Easy to work with. Easy to clean up. Only thing is that the smell is strong so if you are sensitive that may be something to note.
Infinity by Sherwin Williams – I give this product 5 stars. It was easy to use. Clean up was simple and it did not have a super strong odor. Just keep in mind when using it that it is substantially thicker than regular paint but the fact that it covers in only one coat and looks amazing is worth the extra money to me.
Valspar Porch, Floor and Patio Latex Paint – This product I would give 3 stars. I chose this as my back up because the one I really wanted was on backorder for a while and I needed to get my project wrapped up. It is easy to use. It does require at least 2 coats to really get the coverage. The reason for the lower rating is because it took forever to seem like it cured and stayed tacky for weeks. It was not until after a few cleanings that the tacky feeling went away. It does seem to be holding up to the pets and kids at this point though.
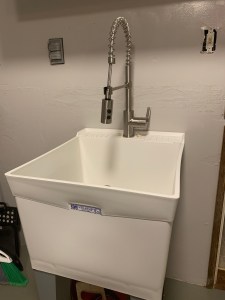
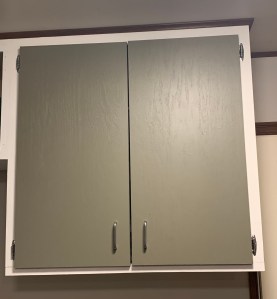
I ripped out the old nasty lower cabinet and replaced it with a nice deep sink that is more functional for us. The deep sink was not expensive. We chose just a heavy duty plastic tub from Lowe’s and it was easy to install and use. I kept the upper cabinets and painted them white with the doors the same color as the floors. I am cheap so I even used the same paint and it worked out great.
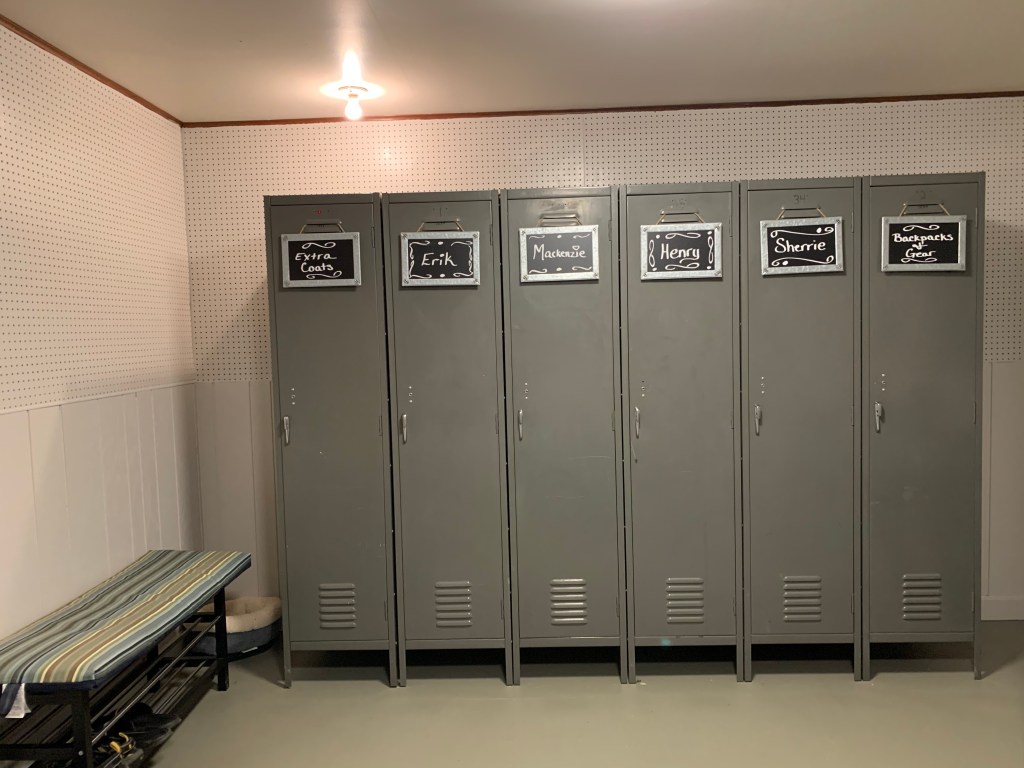
We were able to get our hands on some FREE full sized lockers for storage. Erik was not sure of the vision at first but in the end he has been pleased and we have a great space full of storage and functionality.
So here we are with a half done project of raised garden beds. We heard from several of our readers with some tips and tricks (we love the feedback!) so with super nice weather helping us out we have moved on to finishing our project.
Working after dark
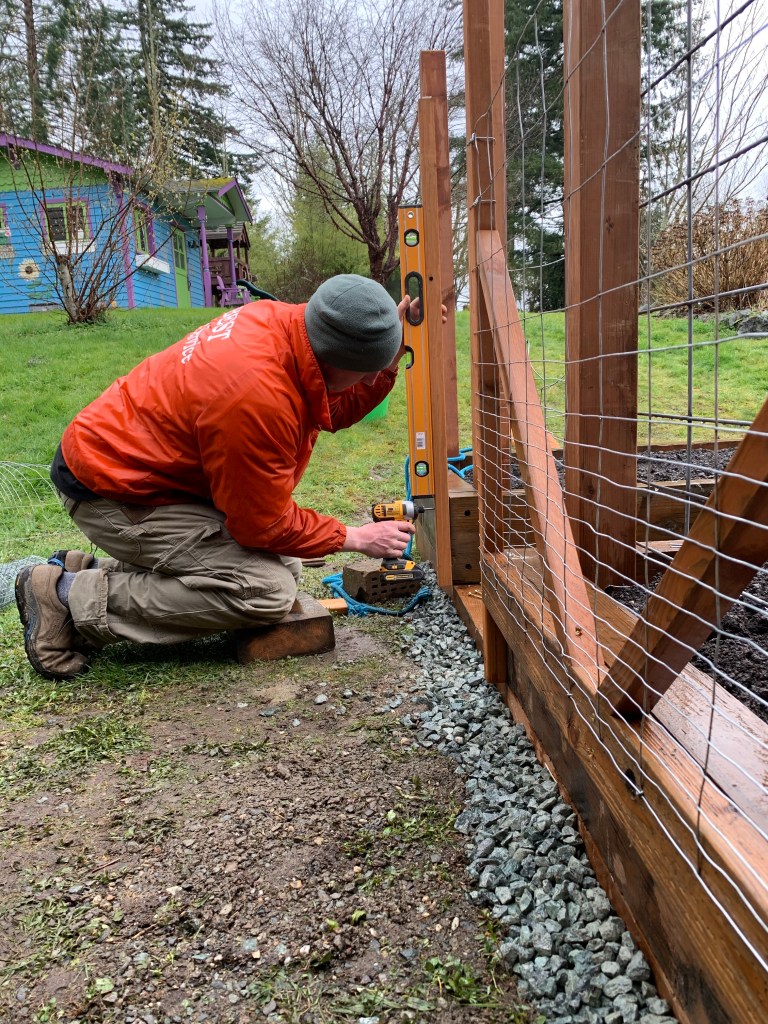
With the beds laid out the way we want them the next thing was to bolt them together. Then, with some of our reader’s suggestions in mind, we grabbed the smallest weave of wire we could get and laid it on the bottom to deter the moles and other burrowing critters from messing up all of our hard work.
Welcome June Bug to the family
As you can see, much of what we do is accomplished at night. Between home schooling the 4 and 6 year old, two full time jobs and taking care of 2 horses, 2 goats, 2 cats, 1 bunny, 1 mini steer and now 3 dogs, we find our projects are mostly achieved after dark!
Next thing to add was the landscape cloth (just to make us feel better about the weeds) and the soil. We found a local nursery that we like supporting and have been purchasing our stuff from them. They have been helpful and we enjoy supporting small businesses.
Dirt work is hard work
Now that the dirt is all in and everyone is nice and dirty, we had to accomplish a few more things to make it functional. 1. We needed to make sure we could keep kids, pets and pests out of the garden and 2. We wanted to have a space for things that climb.
We found some nice wire at the local feed store. It is called rabbit wire for good reason. It has a tighter weave on the bottom and a larger weave on the top. Our garden is close to our house so there is not a lot of risk for deer eating our goods but the rabbits and the pets for sure will prove to be a problem. Because of this we chose to only use the 36” wire. We also used some section of hog panel that we had to make an area for peas that enjoy climbing.
Rabbit wire fencing
Now that it is secure from the crazy critters we can make a nice pathway and start getting things in the ground. Here’s to hoping our quarantine time garden is a huge success! Thanks for reading. Stay safe and well!
Back in January when we decided that we would start a blog there is no way we could have imagined that today we would be on a mandatory Stay at Home order due to the COVID-19 virus. Yet here we are, like the majority of the rest of the country, learning to be home school teachers to our children, social distancing from our friends and families, some of us losing jobs and on top of it all, having to fight people in the store for toilet paper. With all of this going on, there is not a lack of stuff to keep us busy, but how do we stay sane?
Home school morning with a 4 and 6 year old
We took a look around our home and realized there is not a shortage of things that need to be done. But we are currently in the twilight zone so we asked ourselves, how could make a long term impact on our home and make our family more self sufficient? With that, we decided to take a stab at gardening. Yep you heard me right, gardening.
It seems logical really. We watched the news and the president says we have at least 30 more days of this with some suggesting through the summer. With that in mind we tried to prioritize our home projects and choose the ones that would have the greatest impact on our current situation. So, this week’s home school class has consisted of lots of hard work moving lumber, digging in the dirt, measuring, cutting (with supervision of course), nailing and even some planting.
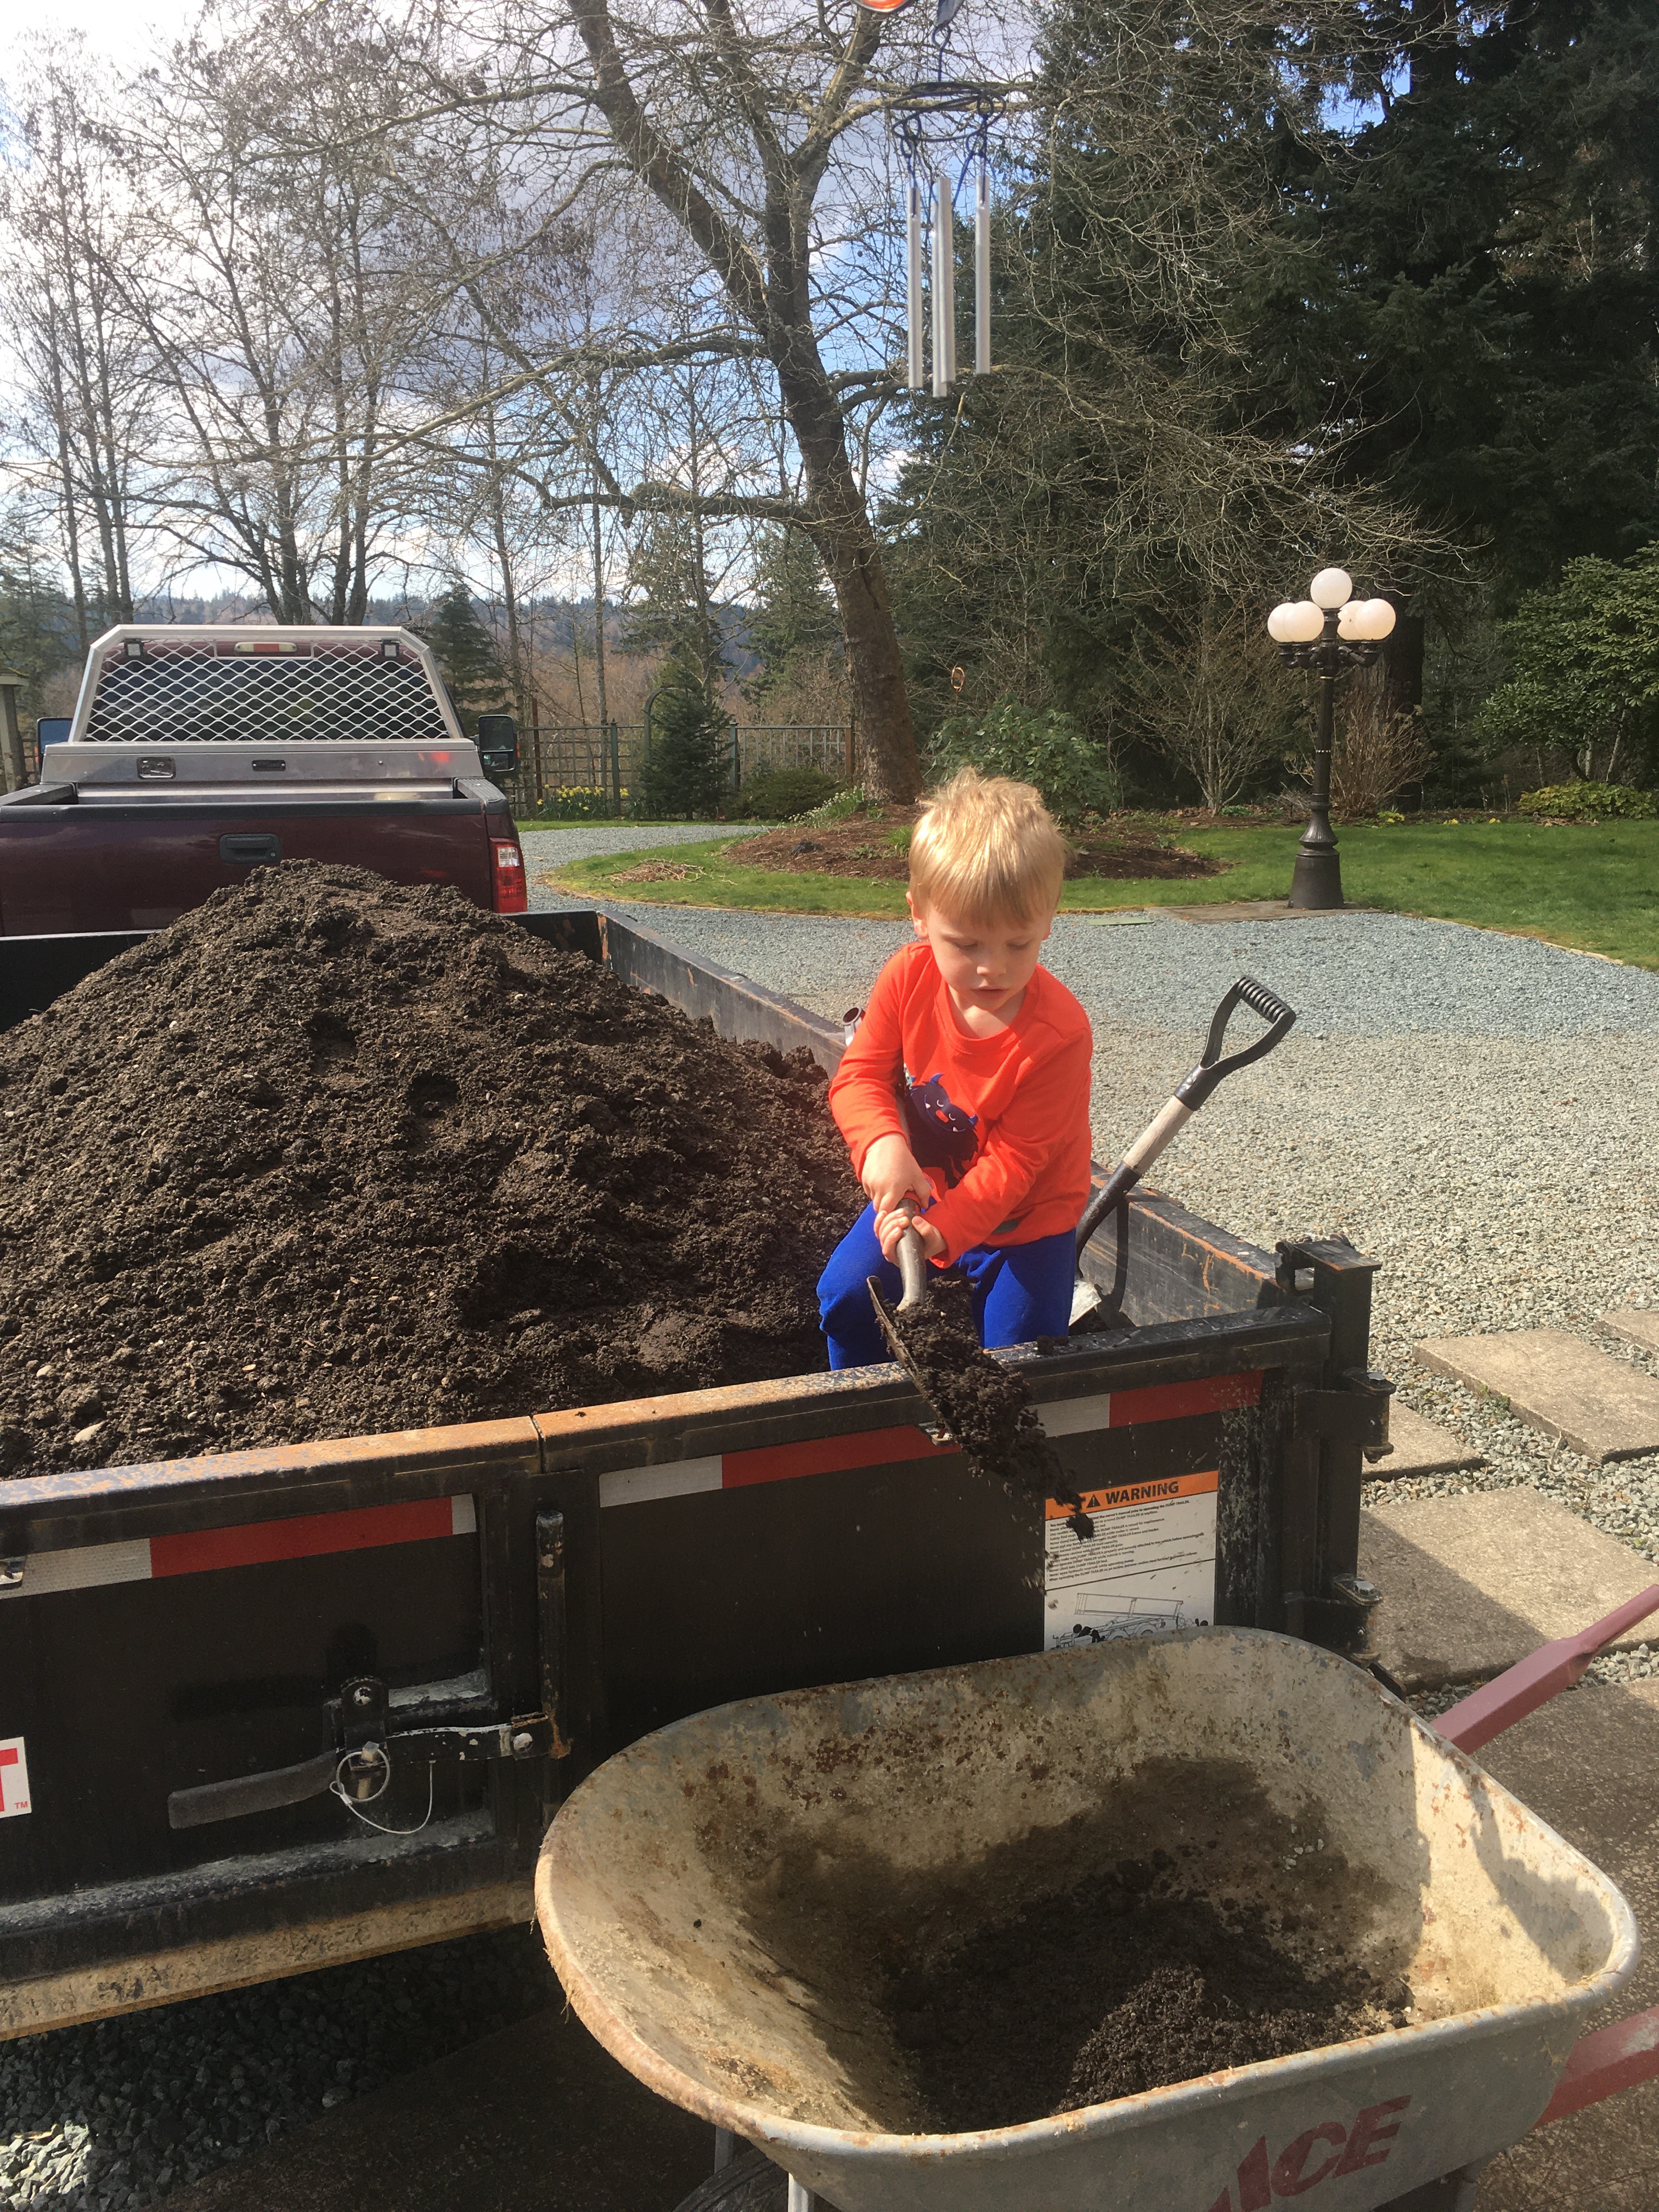
Helper Henry washing the dump truck after a hard day of work.
Knowing just enough about gardening to be dangerous, we thought it best to do a little research. After looking at ideas online and reading about the best ways to go about our garden we jumped right in. Let me say, we by no means think that our little garden will supplement a large portion of our food supply. However, we do think we will enjoy eating from the garden and teaching the kids all aspects that come along with a small garden.
Laying out the template
We first decided on a space in our yard that we would not mind giving up to garden space. We chose an area that was out of the way, gets good sun, is easy to water and could possibly be expanded if we chose to at a later date. We also decided that raised garden beds were the best idea for us. They look nice, they are easier to contain away from critters and the weeds are easier to keep up with (or so we are told).
Next we dug through our lumber pile to see what we had available to use. We like to stock pile random lumber. Just like everything’s we do, this is probably overkill but we found some nice 4x10x18 foot boards for the boarder. Next we laid out the vision and now we will get to work! Stay tuned to see how this whole thing will turn out!
**Tip** If you have a smaller lumber yard in your area that you can connect with, often times they have a “bone yard” in the back. This is lumber that people have either returned, paid for and did not pick up or ordered the wrong thing. Rather than throwing it away you can purchase it from them at a deep discount. Our lumber yard bundles random stuff so you have to take the whole bundle but it can be fun to find projects to do with the lumber and it is substantially less expensive than buying it one project at a time.